rdBPtools Tutorial 10 – More Nested Blueprints
Last Updated: 31st March 2024
Tutorial created using rdBPtools version 1.10
In this tutorial we are going to have a number of layers of nesting. It covers nesting both types of rdBPtools containers in other containers. It also nests these container BPs in a Distribution System (rdBuildBuddy) to take it to the next level.
It’s based on the same Chips shelf system used in Tutorial 3 with some extra Candy shelves added.
Step 1. Create a RandomActor Blueprint for CandyBar Boxes.
The first step is to create the first Blueprint for the assets lowest in the nested hierarchy.
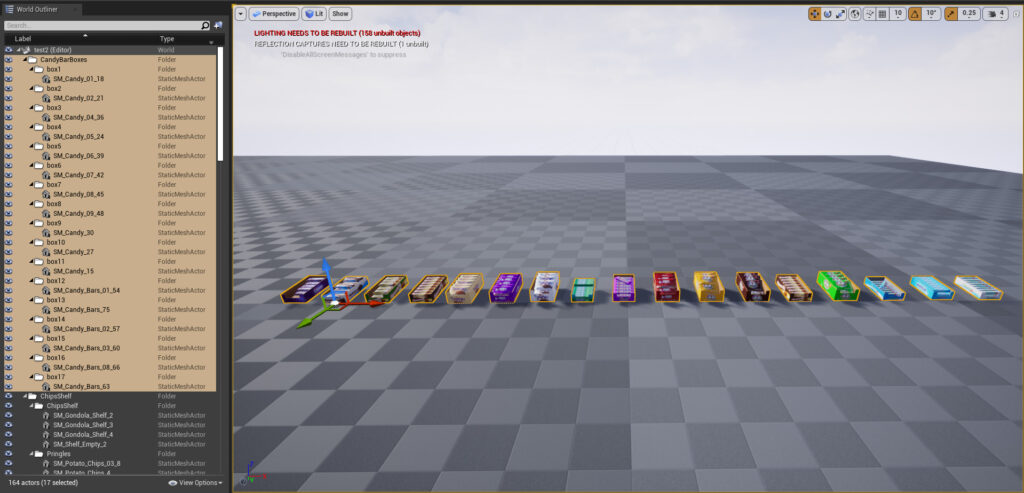
This is a box of Candy Bars. We want one of 17 random boxes to show – create a Folder in World Outliner and then create 17 sub-folders, copy each of the CandyBar boxes into a folder.
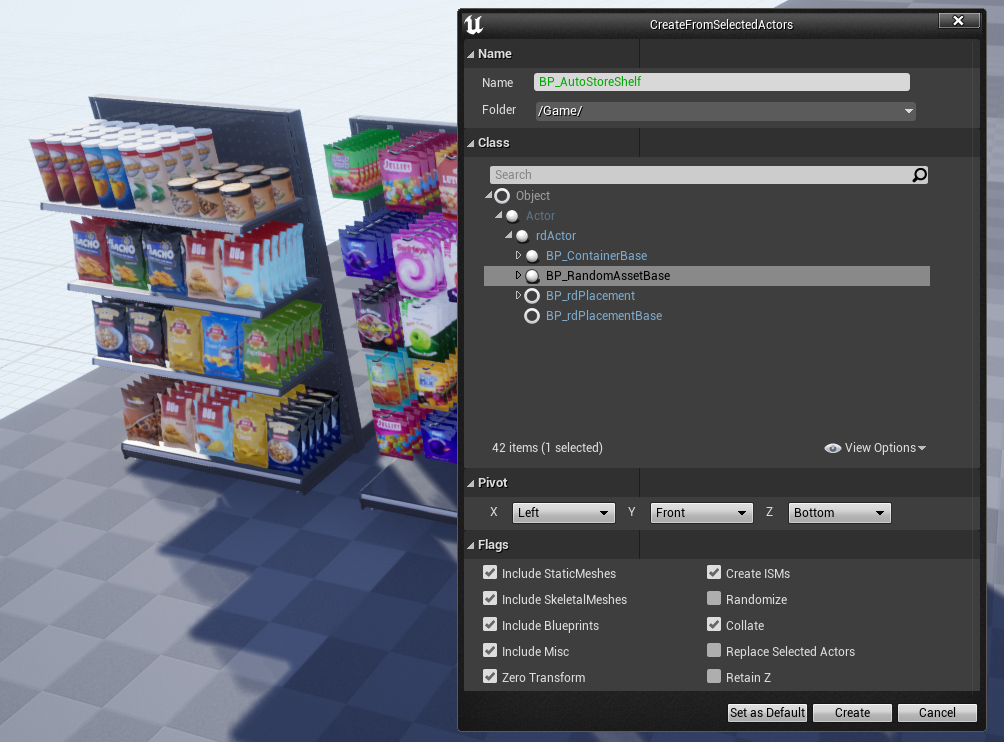
Then Right-Click on the base folder in the World Outliner and choose the “Create from Folder” in the rdBPtools submenu.
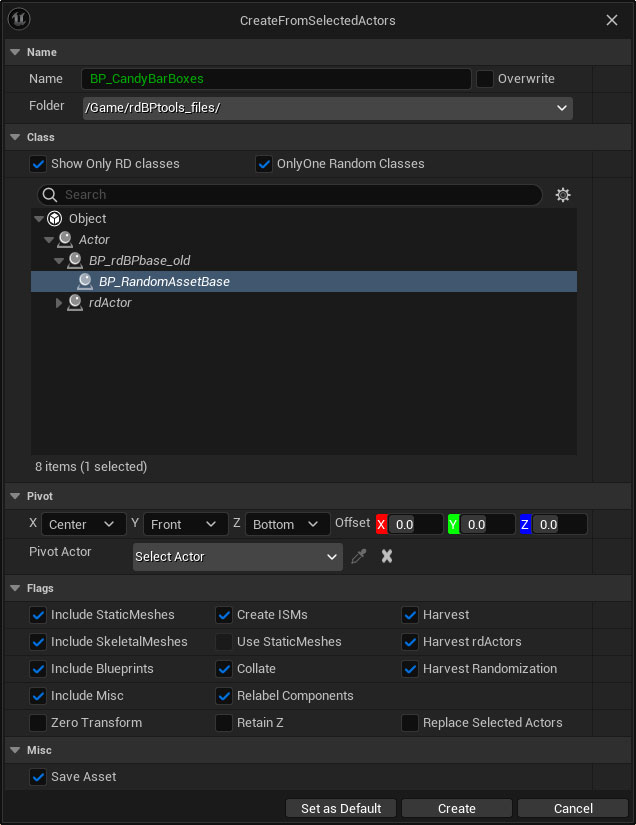
In the Window that opens, choose the “BP_RandomAssetBase” Blueprint class, and make sure “Create ISMs” is ticked, along with “Collate” and as we want them all in the same place, make sure “Zero Transform” is ticked, but “Retain Z” is unticked.
The Randomization option should not be ticked – if it is ticked it hides the “BP_RandomAssetBase” type Blueprint so if you don’t see it, it’s probably that the option is ticked.
That’s all that you need for this Blueprint, go ahead and click “Create”.
Step 2. Create a CandyBar Shelf from the CandyBar Box Blueprint.
Now we need to populate a set of shelves containing the CandyBarBox Blueprint you created in Step 1.
Add the Gondola and set of shelves meshes, then distribute the CandyBarBox Blueprints on those shelves. Make sure they are all in a folder (makes the selection side of things much easier).
Once you’re happy with their default positions, select them all, Right-Click and choose the “Randomization Settings” in the rdBPtools submenu of the Context Menu (or use your hotkey).
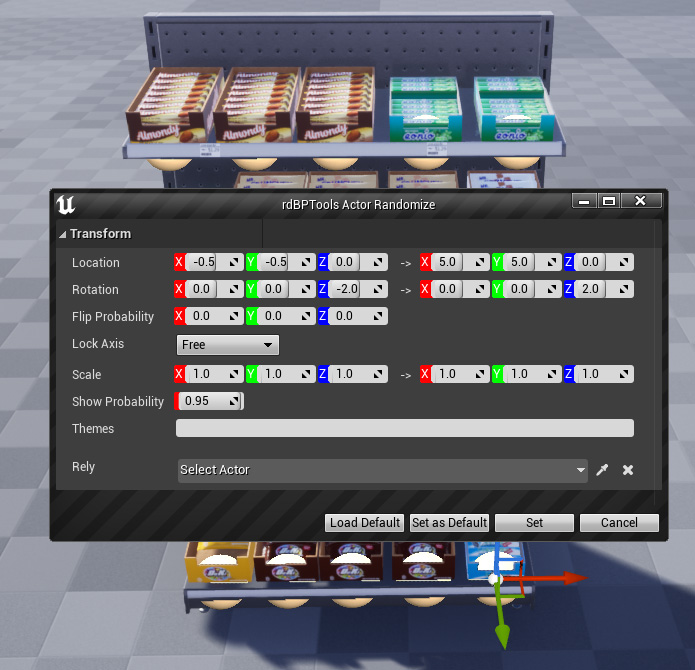
We just want them to move around slightly and a small rotation, just to give the impression on uniqueness.
A Show Probability of 0.95 – most of the time they will all be displayed.
Once you’ve set those, click “Set”. Then you just need to select the base folder of your gondola full of CandyBars, Right-Click and select “Create from Folder…” in the rdBPtools submenu.
Step 3. Create a CandyBag Shelf Blueprint.
The next shelf to build is the CandyBag shelf – it has shelving poles instead of shelves, and the candy is hung from those. Because we want some random rotation of the candy bags, their pivot needs to be center-top, where the hole is for hanging them on the poles. It’s easy enough to change with a tool such as rdMeshtools.
Once that is done, lay out the gondola, shelving poles and CandyBags in their default positions.
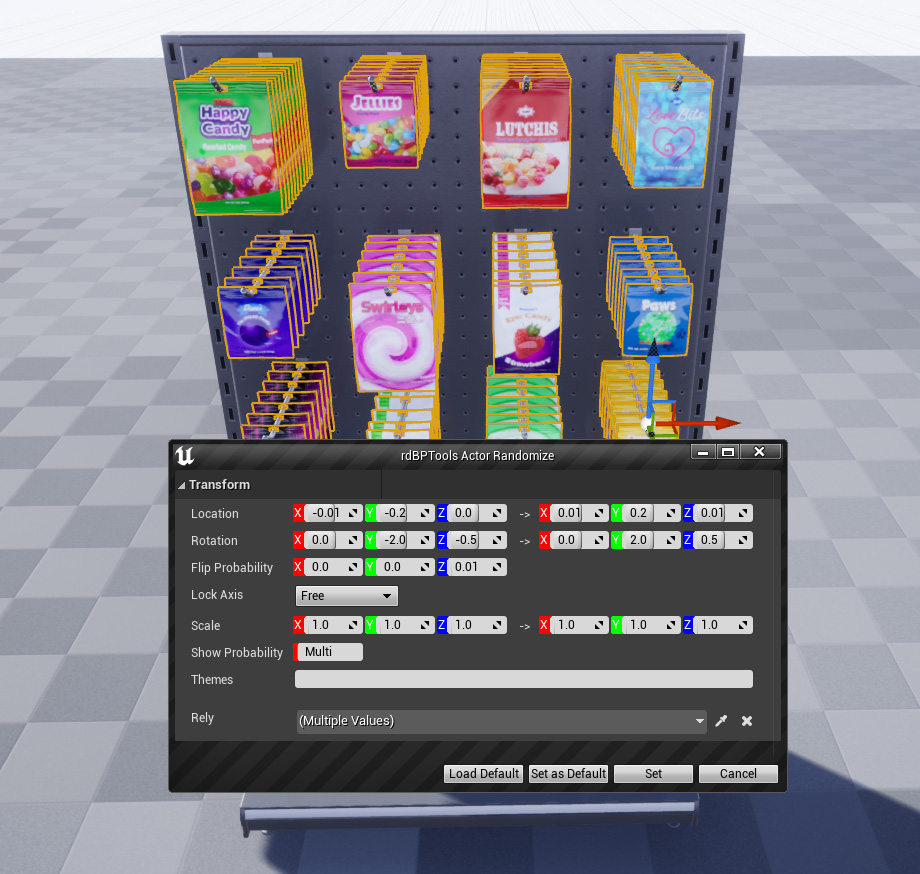
Now we want to set their randomization, select all the Candy Bags, Right-Click and select “Randomization Settings” from the rdBPtools submenu.
Notice there’s a slight movement and rotation but not a lot. Most of the rotation is on the X axis to give the appearance of leaning.
We also need to set up each rows Dependencies. One row at a time, select each bag, starting at the back and moving forward. Once you’ve done that, Right-Click and select “Set Rely On Actors”. This will automatically make each selected actor rely on the previously selected one (except the furthest one).
With those set, now just create the Blueprint – select the root folder of the shelves, Right-Click and select “Create from Folder…” from the rdBPtools submenu.
Step 4. Create a Chips Shelf Blueprint (same as Tutorial 3).
This shelf is already covered in Tutorial 3 – just bring it into your level and have it ready.
Step 5. Create a Random Shelf Blueprint.
This step is really just for completeness – as we will be using rdBuildBuddy’s distribution system – we don’t need to make another blueprint – we’ll just use the random system in that.
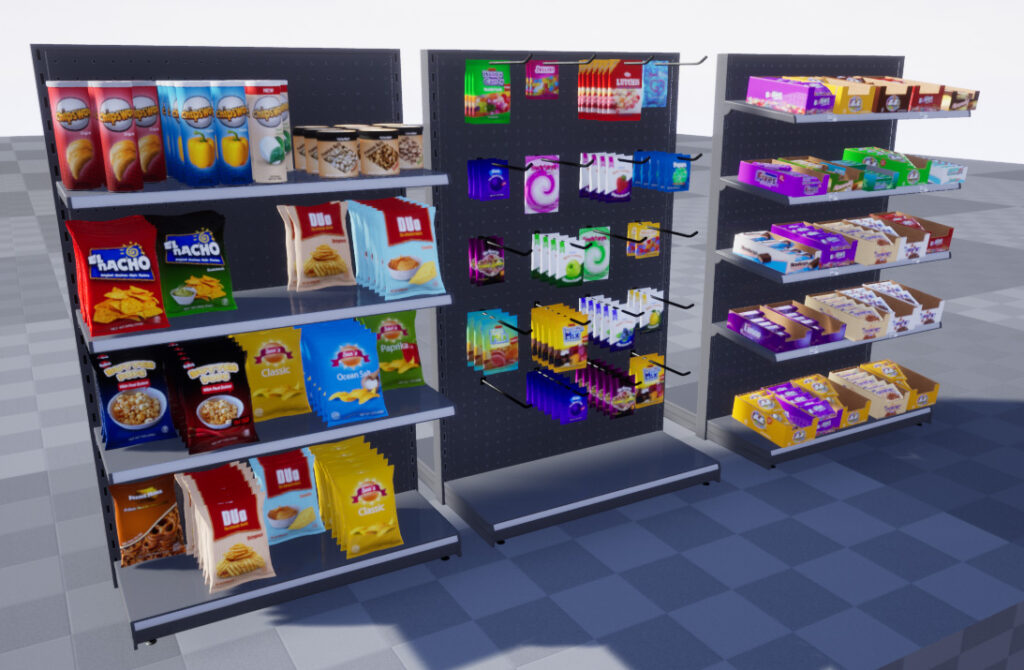
To create it though, just put each of the 3 Shelves into your level, select all 3 and Right-Click, then select “Create from Selection” from the rdBPtools submenu. Make sure Collate and Create ISMs is ticked, but not Randomize, then select the BP_RandomActorBase class.
Done – we have a random shelf… time to take a shelfie…
Step 6. Create a Distribution using rdBuildBuddy.
This last step is just to show how these nested Blueprints can then be nested into other Blueprints such as Distribution Systems and Splines.
rdBuildBuddy has an excellent selection of tool for distributing objects in many different ways – in this example we’re wanting to create shopping isles filled with shelves, so a simple 2D distribution tool is what we’ll use (BoxDistribute with no height).
I wanted to make a very large scene full of shelves. The shelves in the distance don’t need to have the same level of randomization as closer ones, so it’s most efficient to create static meshes of some randomized shelves and distribute them through the scene (in fact there are 12 of them – you can make them larger, but if they’re smaller they are quicker to move around):
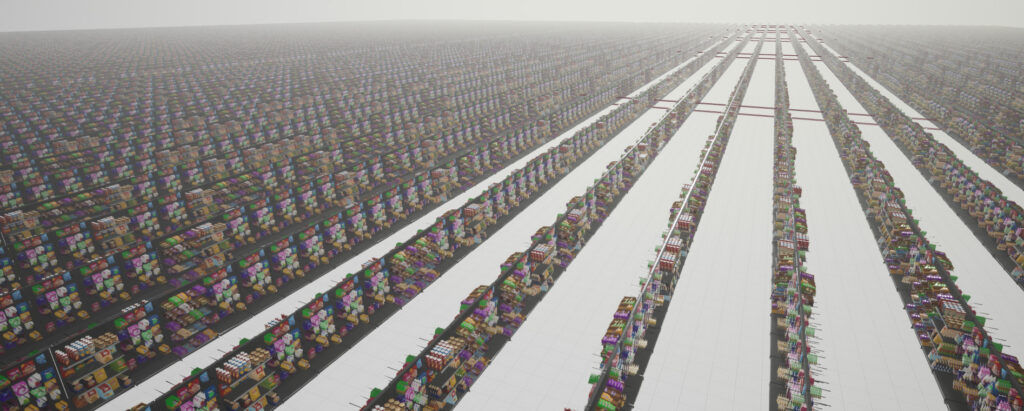
Then it’s just a matter of making a column through the middle (leave a gap) with another BoxDistribution using the Blueprints we created earlier instead of the Pre-Built Static Meshes.