rdBPtools Tutorial 12 – Using rdBPtools with Epics MergeActor Tool
Last Updated: 1st April 2024
Tutorial created using rdBPtools version 1.10
If you’re wanting to use rdBPtools to help you build assets for a project and you don’t want to use the rdInst ISM manager but still do want to get the speed increases the Instanced StaticMeshes give you – you can, using Epics Merge Actors tool.
Note that as of version 1.10, rdBPtools has it’s own ISM/HISM system built in without the need for rdInst or using the MergeActors tool. You can still use this method, but the Blueprints created using the default settings now gives you the same speed benefits as using the MergeActor tool, and no runtime plugin is needed.
These are not quite as fast as rdInst ISMs, and the Randomization is done in Blueprint, so is not as fast as the C++ version, but often with careful consideration and planning you can achieve good results.
Using the MergeActors tool or the default (non-rdInst) prefabs - if you have made a house prefab for example, with 10 unique meshes, each used 10 times in the prefab (100 instances total per house) - each house will have it's own set of draw calls (the ISM components handle the rendering) - so if you have 10 houses in your level, (lets say the meshes only have one material for simplicity) - that will be a total of 100 draw calls.

If you use rdInst to handle the instancing, rather than store ISM components in each actor - it has a singleton manager that only ever has one ISM component per mesh for the whole level. Creating the same house using rdInst will total 10 draw calls for the 10 houses.

In real life, a house can be something like 60 unique meshes or more, each with 2-5 materials - you can see how many draw calls using rdInst can save. That speeds up both runtime and editing.
Step 1. Create your asset
Create your Blueprint asset in the way you would normally, it doesn’t matter if you have Randomization and/or rdInst style instance static meshes as they will be converted in the next step.
Step 2. Copy to Level

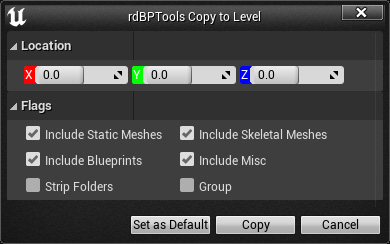
Once you’re happy with your Blueprint assets, simply run the “Copy To Level” tool from the BlueprintEditor toolbar (or from the Context Menus). If you’re wanting randomized versions (you loose the ability to do it at run-time once using the Merge Actors tool unless you do some Blueprint coding) – tick the “Enable Randomization”.
Step 3. Open the “Merge Actors” tool

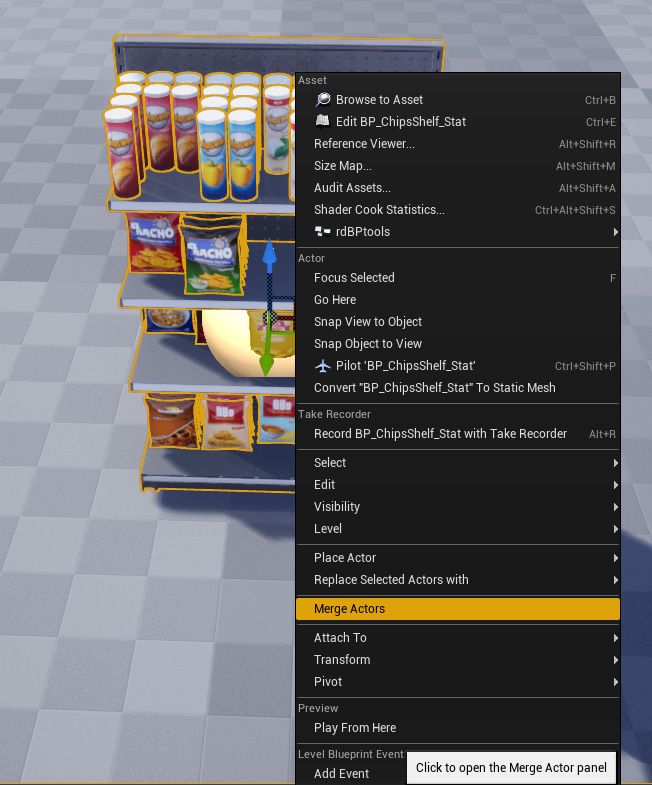
Now you can select all those output actors, Right-Click and select the “Merge Actors” option from the Context Menu.
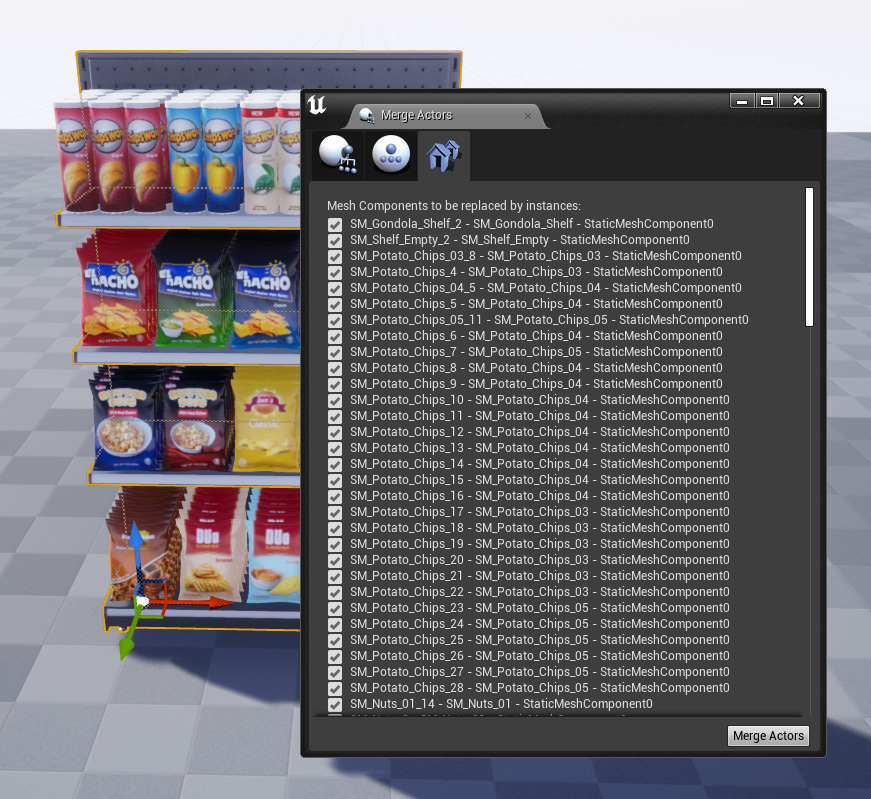
From the Window that opens, select the 3 tab for the Instance Static Meshes, you can use the defaults for the tool. Then click “Merge”.

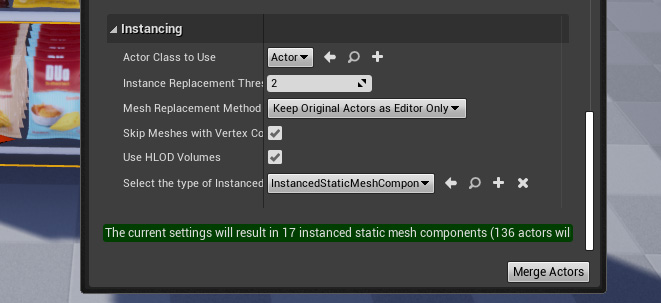
There are Options at the bottom of that window (as seen in the Image) – you can select your own base class if you wish and change some other options such as whether it has Editor-Only components too.

Step 4. Done.
Finished, now you’ll have a new Actor Blueprint containing the Instance Static meshes.