rdBPtools Tutorial 3 – Adding Random Transforms and Reliance
Last Updated: 30th March 2024
Tutorial created using rdBPtools version 1.20
This tutorial uses the second Blueprint type included with the plugin.
Using this Blueprint allows you to randomize every asset included in it – from it’s location, rotation and scale, a random probability of flipping any axis, a random probability of showing it, and assign another actor that controls it’s visibility.
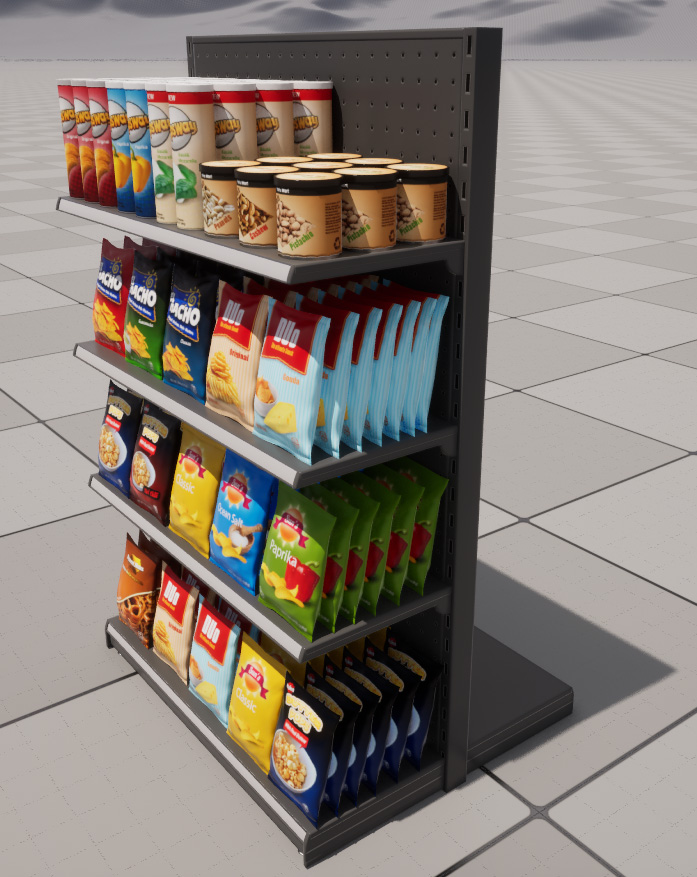
In this tutorial we are going to set up a Shelf with randomized Chips, Pretzels and Nuts etc. This tutorial uses the assets from the Convenience Store Pack on the Unreal Marketplace:
https://www.unrealengine.com/marketplace/en-US/product/convenience-store-modular-pack
Step 1. Set up the Randomization Values.
Each and every actor can have it’s own set of randomization values.
The First Step is to create the layout you want, with all assets set to their default positions/scale/rotation etc.
You will also need to think of their Pivot Point, and how you want the asset to move/scale/rotate randomly. Mostly, you’ll want the pivot point at the bottom/center so you can get a good random transform with it looking realistic.
If you need to change Pivot Points on the mesh, I recommend another tool I have on the marketplace, rdMeshTools – that allows you to easily set the pivot to the correct place.
Note: You can make your randomization settings with confidence. The values are stored in Tags, so even if you don’t have the rdBPtools plugin installed, the values are still there.
Select all the Tubes of Chips in your scene and right-click, then select “Randomize Settings” from the rdBPtools Submenu in the Context Menu that opens.
Tip: When creating your layout, it can save a lot of time later if you collate everything into folders – for instance, all Tubes of Chips can be in a folder, so it’s easy to select them all.
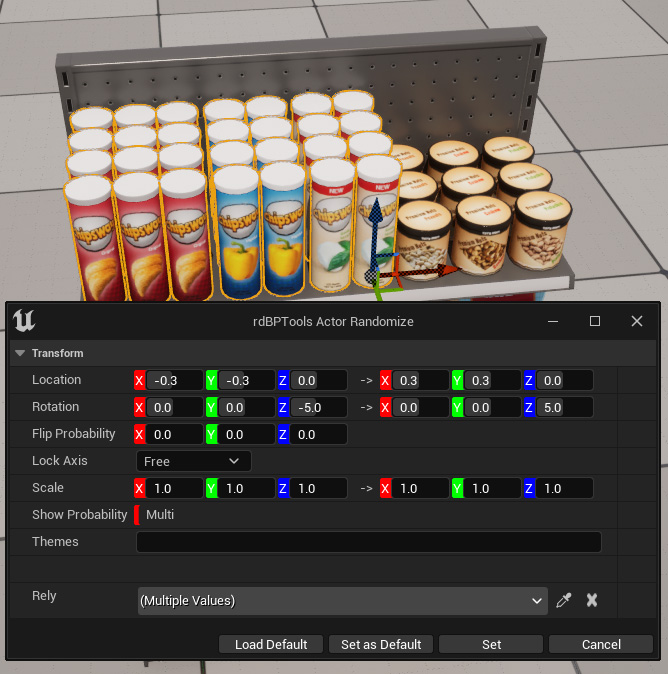
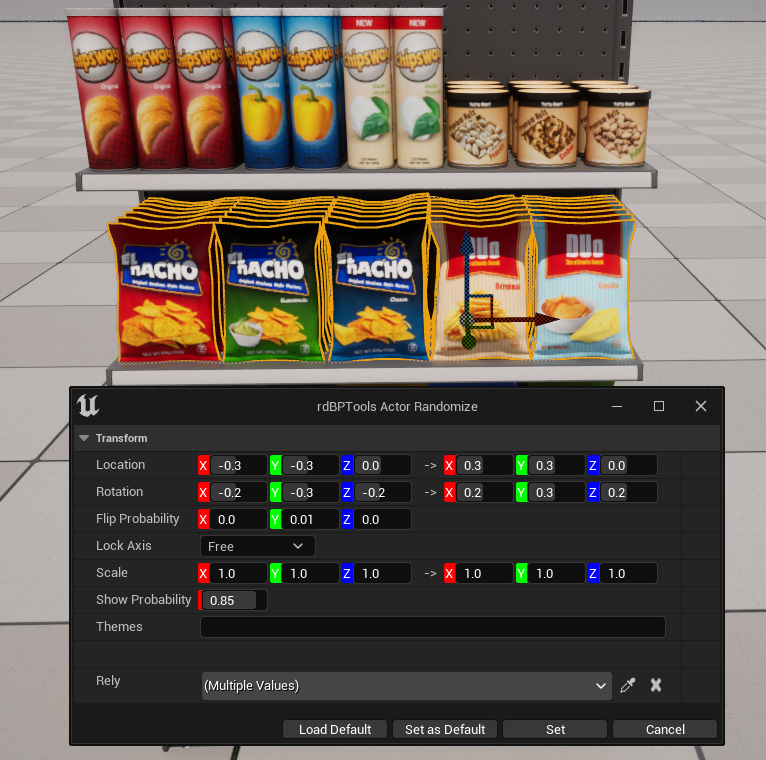
The rdBPtools Randomize Settings window will open.
We want the tubes to move slightly and rotate a bit, but still look like they’re pointing forward.
Setting the X and Y range to -0.3 -> 0.3 is a good amount for the move
A Z (Yaw) rotation range of -5.0 to 5.0 is good for the rotation.
A Show Probabiliy of around 0.8 is good – I’ve made the back ones 0.95 and they range down as they get closer – the front ones are 0.7.
You can also make the more popular flavors more likely to be hidden to add to the realism.
Carry on and do all the products on the shelves – for the leaning piles, they can rotate slightly differently, just a little in all axis can give a realistic look.
Again, change the values so the more popular, or easy to reach piles are hidden more often than the others.
Note: Along with these randomization values, each Blueprint has a “multiply” value for each setting, so you are able to control the amount of variation from the Blueprint itself.
Step 2. Set up the Reliance Values.
Now we need to instruct the assets to rely on the visibility of the asset behind it in a row.
We could select each asset, one at a time, open the randomization window, choose an asset and save, but that gets old real quick – trust me.
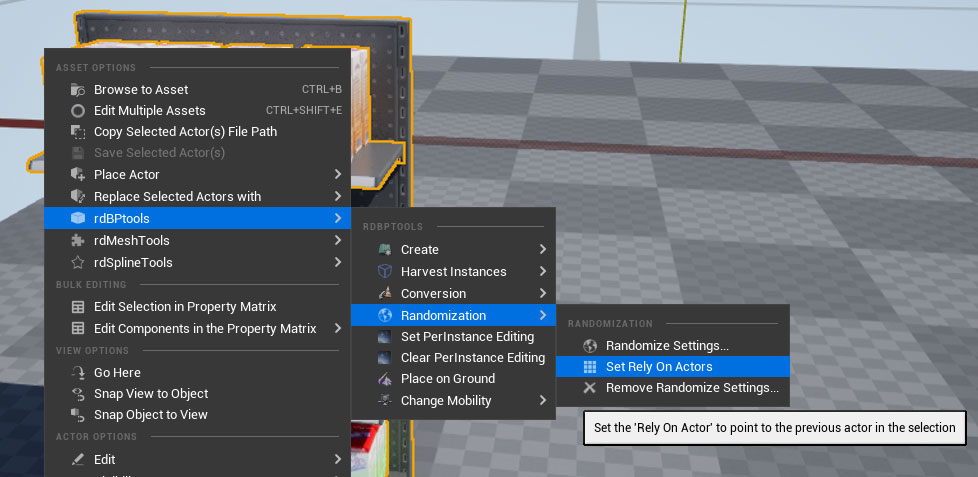
Don’t worry the “Set Rely on Actors” is here to save us from that. It uses the order in which the actors were selected and makes them rely on the previous one (excluding the first selected of course).
Just select a row of Chip Tubes, starting at the back and selecting forward – then Right-Click and select the “Set Rely On Actors” option in the rdBPtools submenu.
Or even better – set up a hot key to do it – It all becomes quite painless…
Step 3. Create Blueprint.
Right, all the hard stuff is done now. Your randomization settings are here to stay (assuming you have saved your project) – you can copy/migrate those assets to other projects and the settings will be retained – even if you don’t have rdBPtools installed.
The next step is to just create a Blueprint for them. This is done in the same way as the previous Tutorial – select all the actors you want in your Blueprint, Right Click and select “Create From Selection”. If you’ve collated them into folders – you can just Right-Click on the root folder of your actors and “Create From Folder”
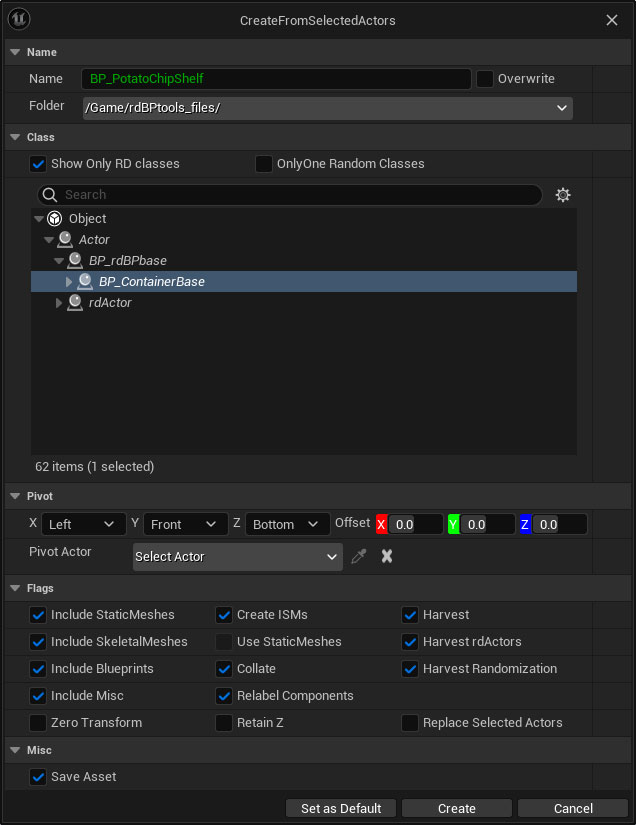
In the window that opens, the first thing to decide is if it will be using Instanced Static Meshes (ISMs) or not. If you do want to use these (and they provide HUGE speed increases) tick the “Create ISMs” box.
You can always create a SubClass off “BP_ContainerBaseBP” that has your own ISM manager code in as well.
Depending on the ISM option, either choose the “BP_ContainerBaseBP” (non-ISM) or “BP_ContainerBase” Blueprint, which is a child of rdActor. You may need to expand the “rdActor” branch, or just search for “BP_ContainerBase” in the search bar.
Make sure that “Randomization” is ticked, and we want to retain the actors relative positions so make sure Zero Transform is not ticked. Tick the Collate option to store the data in the Blueprint in the same heirachy as the world outliner folders.
That’s it, now just can go ahead and create it with the “Create” button.
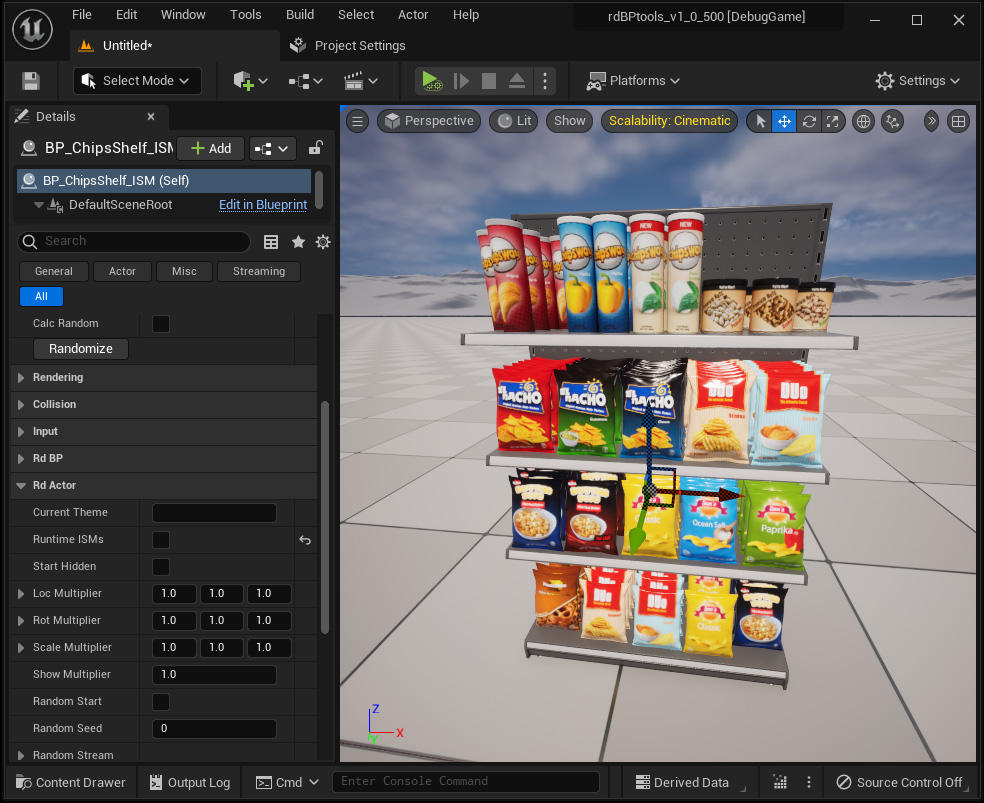
Step 4. Done! Copy to level.
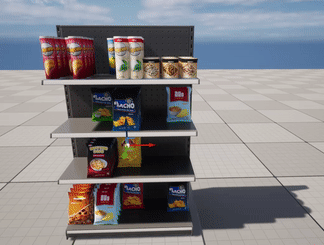
Now you can copy your Blueprint to the level to see it in it’s glory.
You can Change various settings with the Blueprint, there is a Button to regenerate the randomization – or you can make it always use a specific “Seed” for the random, which produces the same results every time.