rdBPtools Tutorial 5 – Using 1 Instance of a BP in many places in Level.
Last Updated: 6th December 2022
Tutorial created using rdBPtools version 1.10
The ability to re-use one single instance of a Blueprint many times in your level is literally game changing. It allows you to take the detail of your scene to the next level – imagine cities where every room is populated. This is what rdBPtools Blueprints can do!
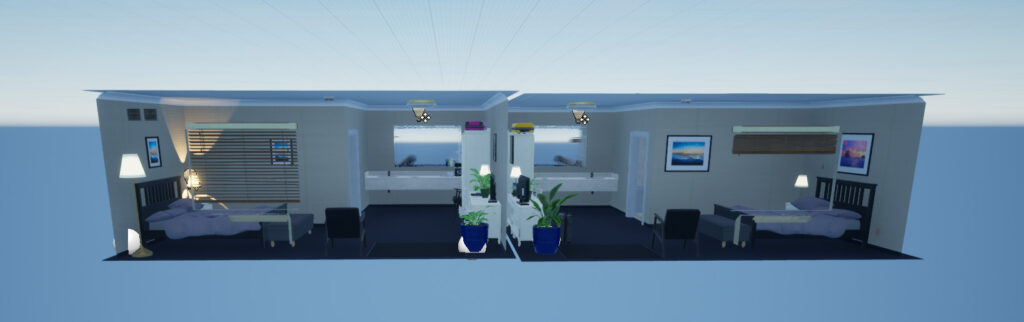
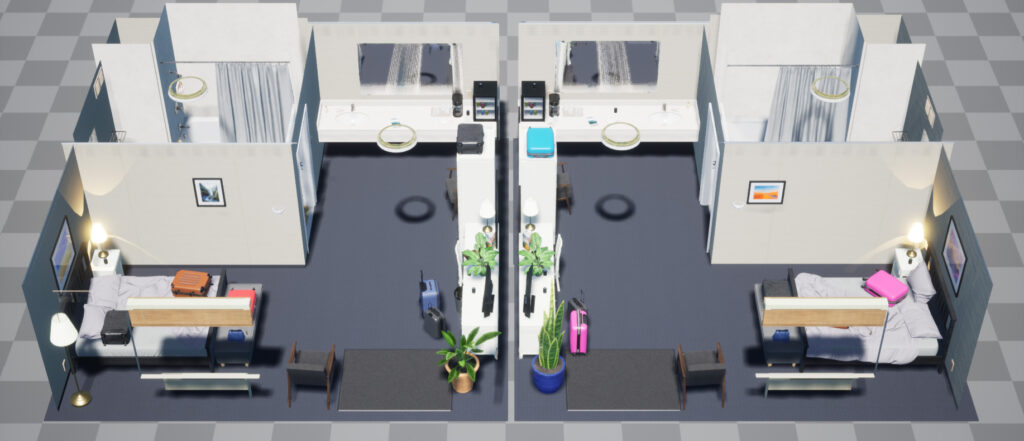
This tutorial is another approach to a room in a building, similar to Tutorial 4. This way is much faster and efficient though. It uses the same Motel Kit as described in the previous tutorial.
Step 1. Create Blueprints of your internal rooms.
It’s really very simple to do to – all you have to do is create Blueprints of your actors as normal (see Tutorials 1-3) – it works with any type of configuration, as long as the Blueprint is based on a BP_ContainerBase blueprint (you can use derived classes with your own code too). If you’re using rdBuildBuddy and want to assign various objects depending on level, and use the room number blueprint – make the base BP_ContainerBase_Levels blueprint.
Build your internal rooms in a similar fashion as the previous Tutorial, just omit the External parts – make one for each of the two rooms.
Step 2. Build a Trigger Volume Blueprint
Then it’s just a matter of setting up a trigger of some type. Tutorial 4 has already shown how to trigger with a door opening, so this time we’ll do it with a trigger volume. This way is good if you want transparent windows that the player can see into when walking outside the room. If you’ve got rdBuildBuddy – it has a trigger blueprint setup that you can use out of the box.
Seeing as we want each room random, but the same random every time it’s visited – we need to store a random seed for each room. The logical place is in the trigger volume itself – your blueprints (or rdBuildBuddy does it) set the Random Seed of the room to the one it has stored before moving it into place.
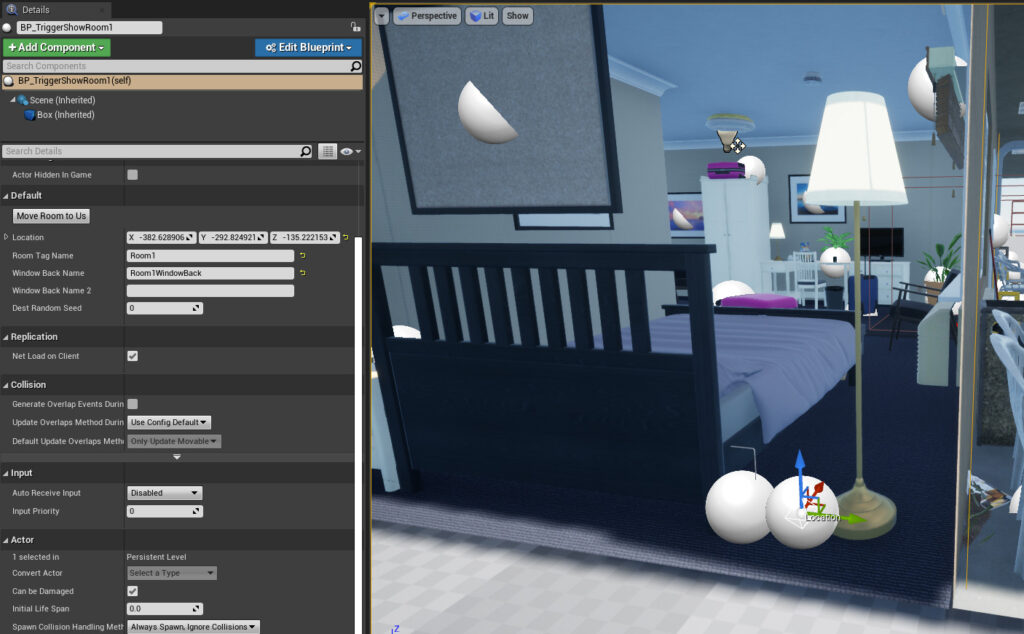
For this tutorial, we’re going with rdBuildBuddy – it also handles things like supplying the correct room number to each room, setting the external Theme depending on if it’s the bottom, middle or top level and moving the rooms into place on an overlap. Just Add one for each room, size them so they start before you can see through the window or door.
the rdBuildBuddy RoomTrigger has a location value which the Room is moved to when triggered. There is a button you can press during editing to move the paired room to this position – this can be very handy to get the exact room location correct. rdBuildBuddy also comes with a window type that fades into the view when close to hide the hide/show of the transparency.
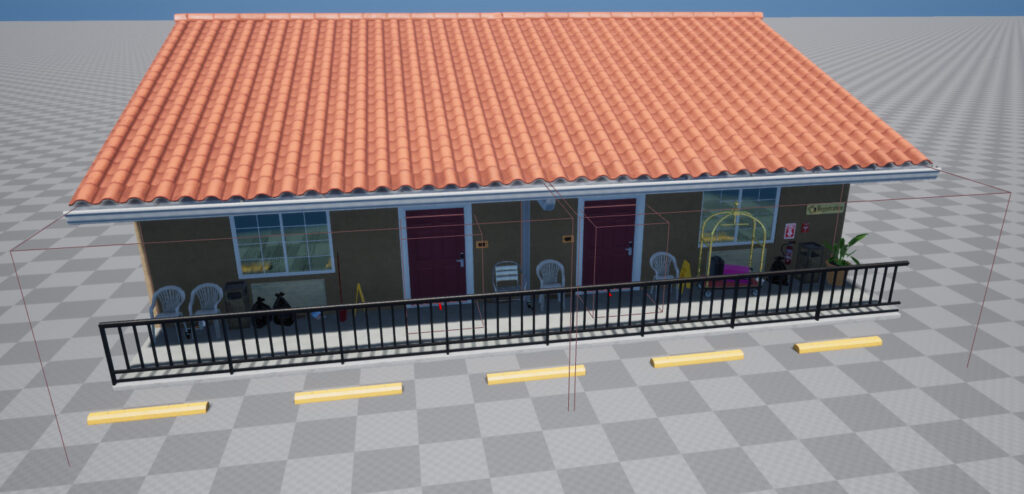
Step 3. Create a Blueprint with your external building (including trigger volumes)
Now create a Blueprint from your external view of the motel. You can use themes to re-use the same Blueprint for ground, middle and top floor. rdBuildBuddy supplies the correct theme, we just need to make sure that the roof only shows for the TopLevel, the rails the MiddleLevel,TopLevel and some individual items such as the parking barriers only for BottomLevel.
This example uses the RoomNumber Blueprint from rdBuildBuddy to set the correct room number mesh instances.
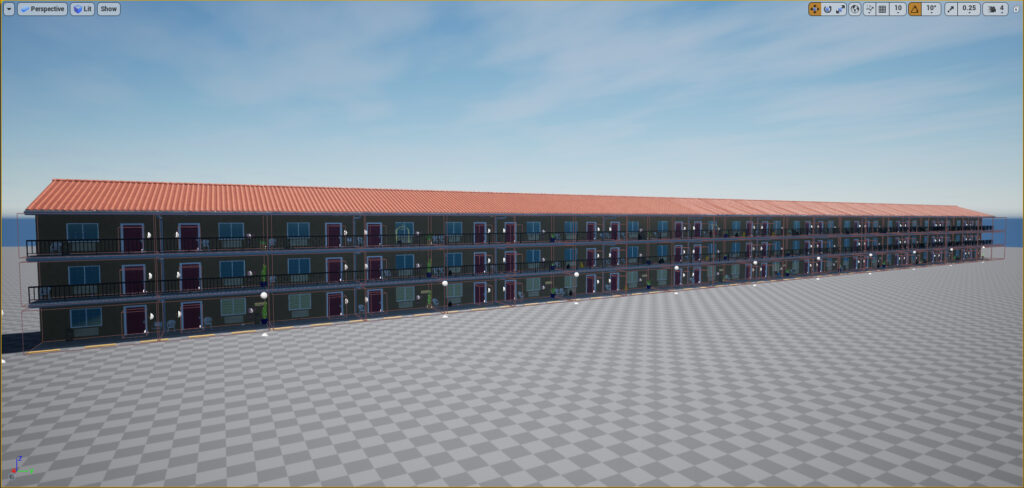
Step 4. Build a line of the buildings
Now create a line of these external building Blueprints, you can do this in any way, rdBuildBuddy provides some powerful build systems that also pass in things like level and room numbers to each section. You should end up with something like this:
Step 5. Add the Room Blueprints to the Level
Add your two Room blueprints to the level, put them somewhere they won’t be interfering with your scene, below the landscape is a good place.
Now Add a Tag to each one, the first put “Room1” and the second “Room2” – the trigger searches for those tags when showing the rooms. (You can optimize out things like searching for Tags, this was kept simple for the tutorial).