rdBPtools Tutorial 7 – Copying your Blueprints back to the Level
Last Updated: 31st March 2024
Tutorial created using rdBPtools version 1.20
Being able to create Blueprints from your actors in Level is extremely useful, but there are times when it can be very handy to copy them back to the level. Having the ability to do this gives confidence with working with Blueprints as you have options to convert to other types at any stage.
This is a simple tutorial as it’s a simple tool.
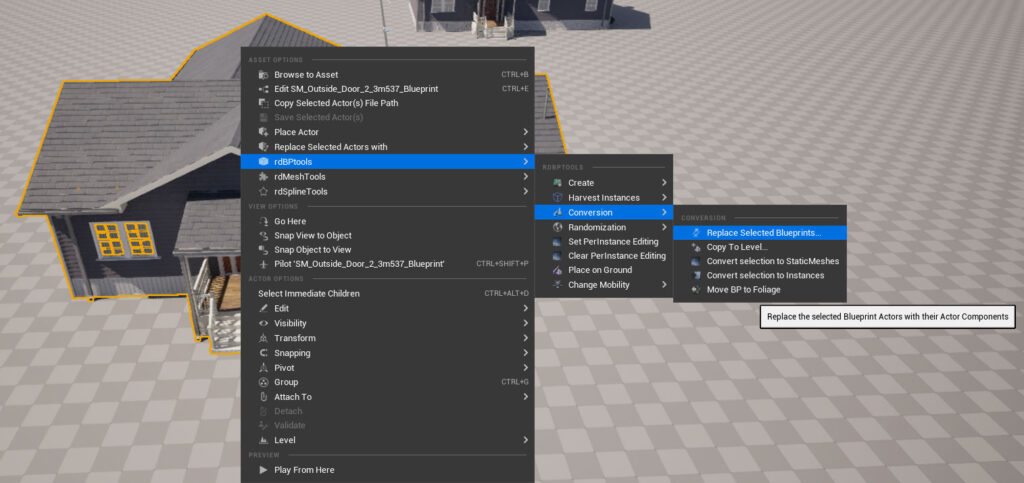
Step 1. Select your Blueprint in the Level, the Blueprint Editor or the Content Browser.
rdBPtools has options to do this from multiple places to keep it as quick as possible. Just choose the option from one of the Menus you select with the Right Mouse button.
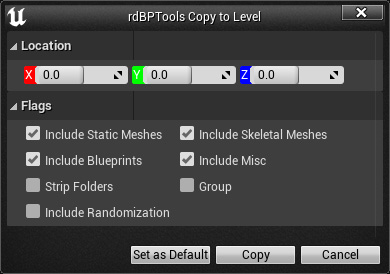
Step 2. Choose your Options in the CopyToLevel Window.

You can specify the location you want the actors in the Level with the top options, having them created at 0,0,0 is just handy and you’ll almost always know where that is.
If you have them in Folders and/or Grouped, it’s easy to select them all and move to anywhere on the level you want after that.
If you’re wanting to include your Randomization, make sure that it’s ticked.
You can also filter out unwanted actor types by un-ticking the specific types you don’t want.
Once you’re happy with that, just click “Copy” – that’s it, done.
Step 3. Replace Existing Blueprints in the Level with their Actors.
The other way you can do it, is to replace all existing Blueprints in the Level with their Actors, just choose the “Replace in Level” option rather than the “Copy To Level” option.
