rdBPtools Tutorial 16 – Creating Unique Materials
Last Updated: 10th January 2023
Tutorial created using rdBPtools version 1.10
Another thing you’ll probably be wanting to randomize with your levels is the Objects Materials. Seeing as we push as many things into Instanced Static Meshes we can – it is a little more tricky than if they were each their own Mesh (StaticMeshComponents have their own set of Materials) – but still possible.
This is where “Per Instance Custom Primitive Data” can come in handy. You are able to pass in variables to each Instance of your Static Meshes which their materials can use to select different textures, age, dampness, dust etc to create a very unique look for each Instance.
Here’s a simple example, we have a blueprint that creates 10 instances of a mesh, setting unique values for each instance to describe a color:
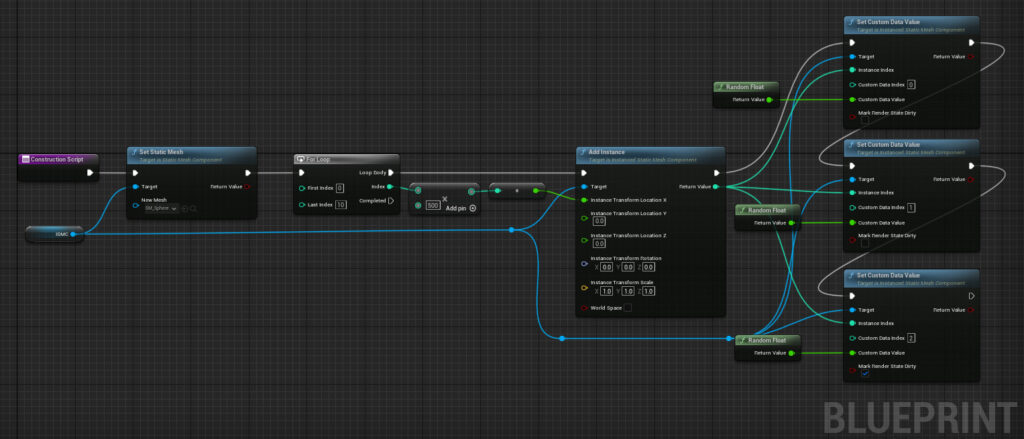
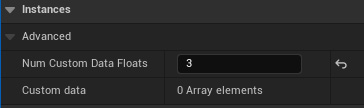
Note that “ISMC” is an InstancedStaticMeshComponent that’s attached to the Blueprint, and it has the Number of Custom Data Floats set to 3 in it’s Details Panel.
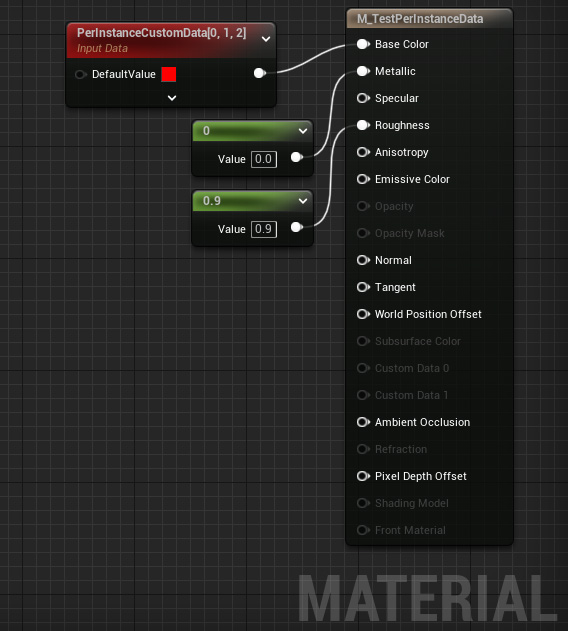
For the Material, it simply uses the “CustomFloat” nodes to give the passed in values:

So now back to the tutorial. In this tutorial we are going create a Picture Blueprint that chooses a random Frame, then using per-instance custom data, displays a random picture within that frame.
the rdBuildBuddy PositionInfo data (and also the rdInst C++ one) has an array of floats that you can use for any number of per-instance (or just custom-data if you’re not using instances) information.
Step 1. Create a Picture Blueprint from some Picture Actors.
Create a RandomPicture Blueprint (if you have rdBPtools, you can create a blueprint from any number of frames and pictures).
Have (at least one) Picture Frame – and either have the internal section with UV’s set from 0,0 to 1,1 pointing to their own texture, or put a plane in front of the picture and use that (easier, that’s what I’ve done in this example).

Step 2. Set the Meshes to have 2 Per Instance Floats
Now for each of our Frame Meshes, we want to tell the Instance Manager that they should allocate 2 floats for Custom Data (a row and column into the Pictures Texture which is 4×4 pictures in a 2048×2048 texture).
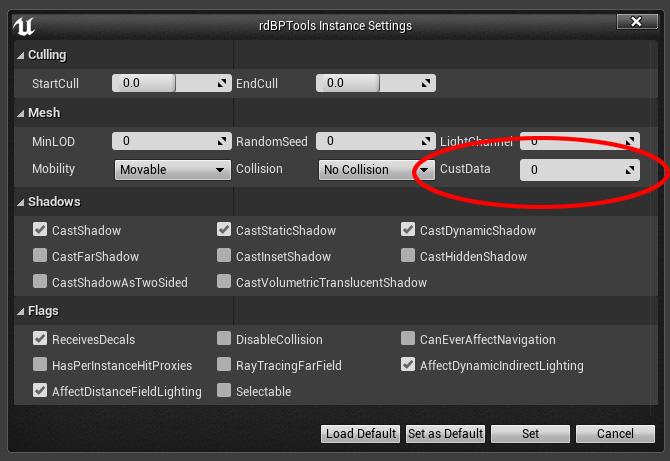
This requires rdBPtools to be installed – right click with all your Frame Meshes selected (or planes if that’s what you’re using) and choose the “Instance Settings…” option from the menu that opens.
In the Window that then opens – set the “CustData” value to “2”:
Now we just need a way to set those 2 floats.
Step 3. Add the Custom Data to the Instances
We do this by editing the BP_RandomPicture Blueprint. First we create a function to put two random numbers between 0 and 3 into the PositionInfo structure. It uses the Hierarchical Random Stream so all numbers generated are controlled by the parent actor. The Blueprint is:
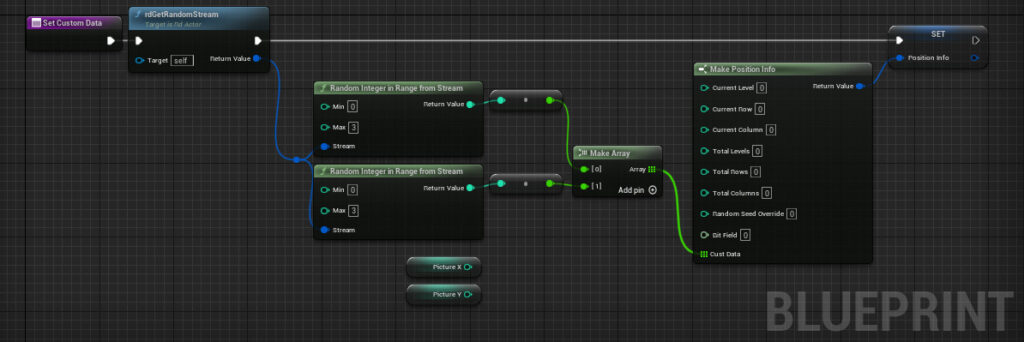
If you’d rather control which picture is shown per actor, you can just make two integer variables and pass them into the “MakeArray” instead.
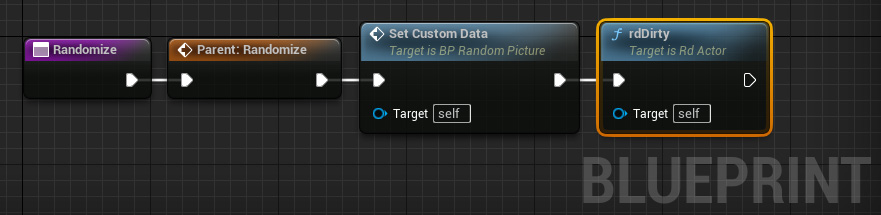
Now get the Construction Script and the Randomize button to call this.

Override the “Randomize” function with:
Step 4. Done
Now your Picture will show a random Frame and Picture – you can test it by dragging to your level and then clicking the “Randomize” button a few times…
