rdBPtools Tutorial 4 – Working with Hierarchies
Last Updated: 30th March 2024
Tutorial created using rdBPtools version 1.20
rdBPtools gives the ability to store the actors in hierarchical folders, which can then be hidden or shown, either at construction with random probabilities, or at runtime with triggers.
In this tutorial we are going to create a room, both inside and outside. The inside will only be shown when the door is opened.
This tutorial uses assets from the Paradise Motel Pack on the Unreal Marketplace:
https://www.unrealengine.com/marketplace/en-US/product/paradise-motel-modular-pack
Step 1. Create the Folder Hierarchy with the Actors you want.
The first thing to do is to arrange your actors into folders – you want to have the outside of the room in one folder (it can contain other folders below it) and the inside in another. I usually put walls into a subfolder of the internal room, furniture in another etc.
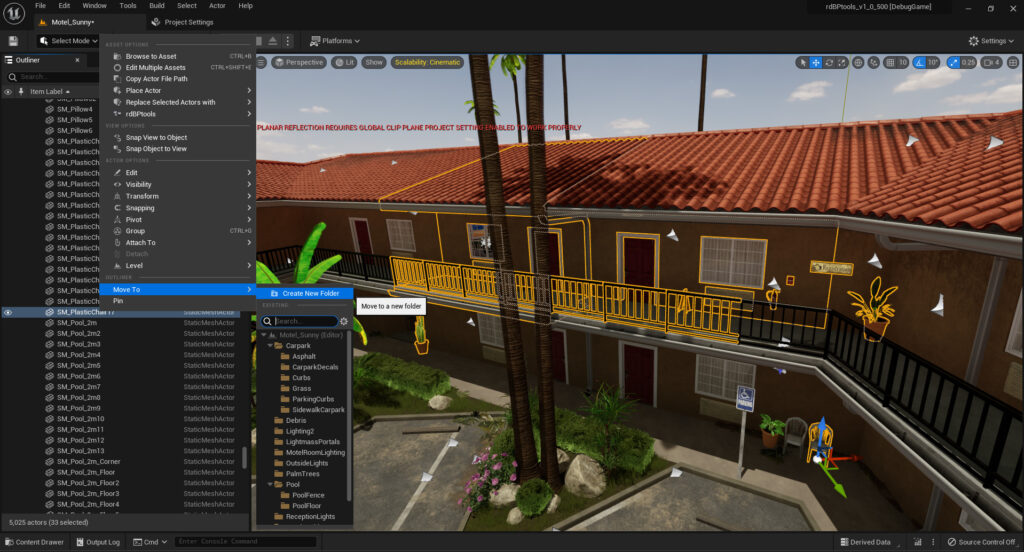
So load the Motel map and start selecting! There’s a populated top floor room which is what we’ll use. We start with the outside.
Seeing as the rooms alternate in layout we choose 2 rooms. There’s some other interesting bits and pieces around so now’s a good time to select those too.
Once you’re happy you’ve got all the external items, Right-Click and select “Move To” and create a new folder, called something like “Room_External”. Move this to a root folder called “MotelRoom” too.
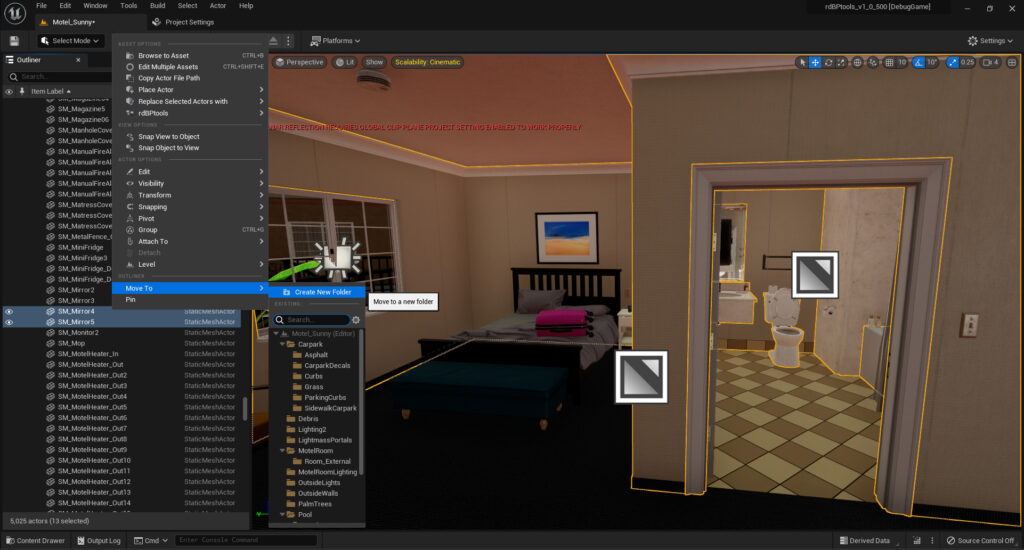
Next select all the internal walls – you can also select things like the bath, toilet etc as they will always be in the same location each time. Move these into another subfolder of MotelRoom called “Room_Internal_Walls”.
Do the same next for furniture, then for the scatter items such as suit cases etc.
Step 2. Clean up positions, names and duplicate scatter
The next step is to clean it up – we need to make a reflected room as well – that’s fairly simple – just selecting the internal actors for the first room, duplicating into a new folder and re-arranging them. I wouldn’t advise using the “Transform->Mirror ” tool with those actors as that just gives a negative scale and can mess up instanced meshes.
This motel project also has a few duplicate names (just in different folders). They need to be renamed. It would be possible to have rdBPtools handle this, but it’s an extra layer and would slow it down slightly – when working with many instances speed is of the utmost importance. You can find them by clicking on the meshes folder and searching for “SM_4m” and “SM_8m”.
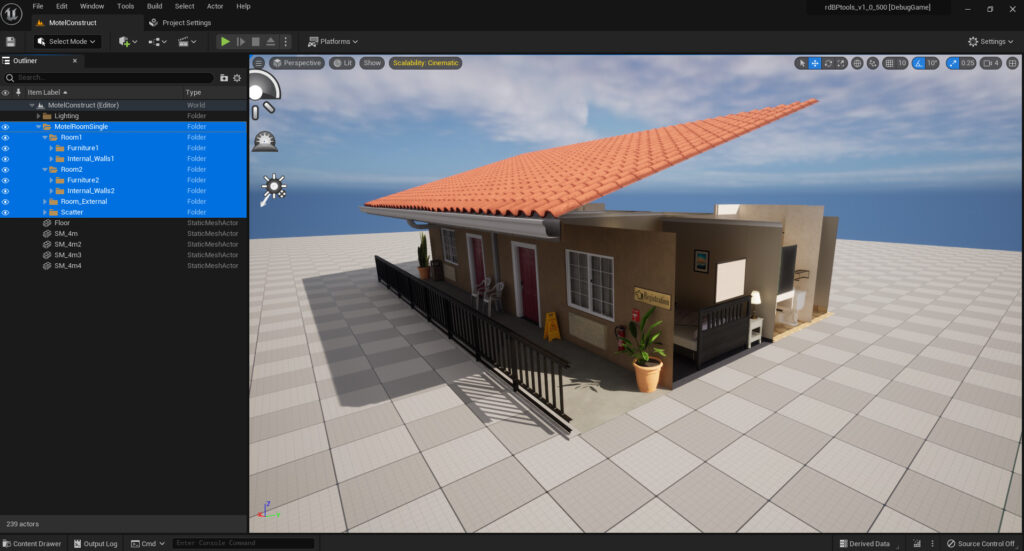
We want the rooms in their own folders – that way we can show and hide them independent.
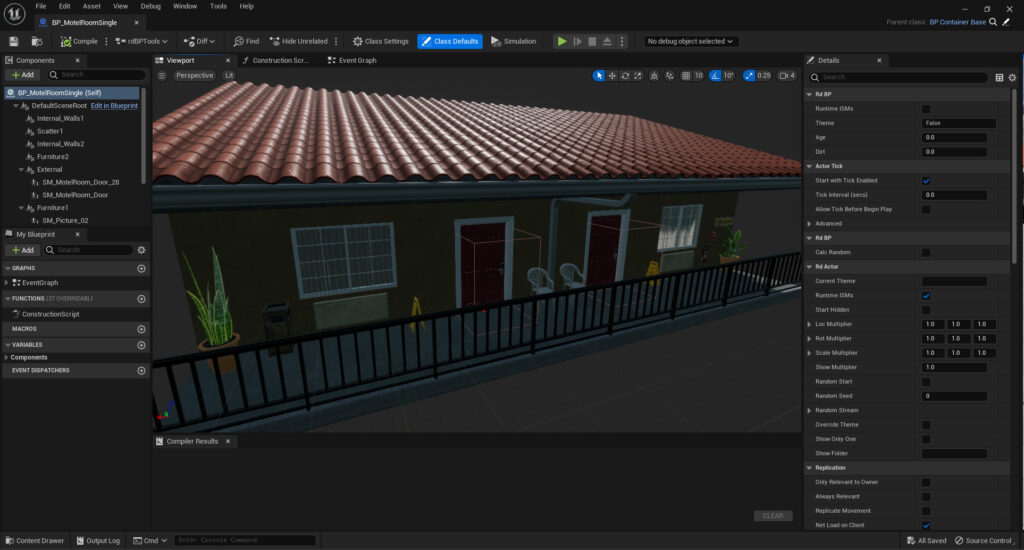
Once that’s done you should have something like this: (Note, I quickly made a BP from the selection, then “Copy To Level”ed it on a blank scene).
Step 3. Set up Randomization
Next we set up the items in the rooms (and on the balcony) to have some randomization.
Duplicate items, and have them with a “Show Dependency”. Things like suitcases etc can have quite a bit of freedom with their random location/rotation. Things like the drinks in the mini fridge can have Show Dependencies, and rely on the drink behind it to be visible to give the appearance of usage. Pictures can be made from the BP_RandomAsset blueprint so they show a random picture (like tutorial 2). Drawers in the furniture can have a random travel set to appear randomly open. The same with closet doors, but with their rotation.
It’s pretty easy to create a motel room that will look very different each time but retain it’s style.
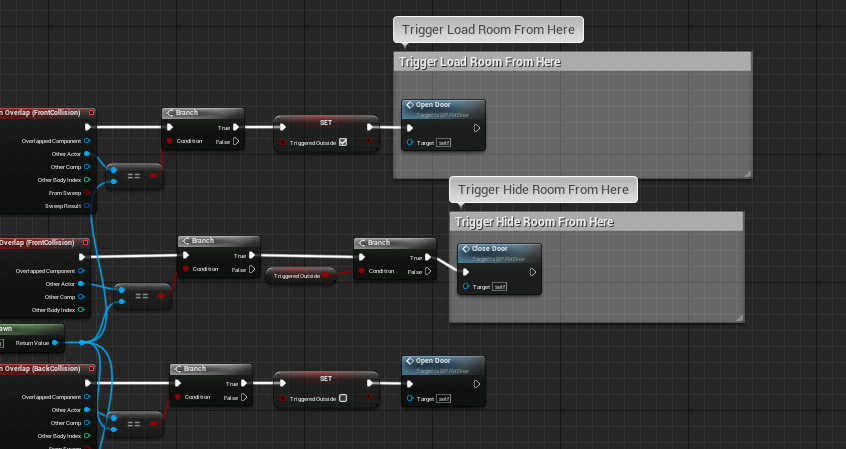
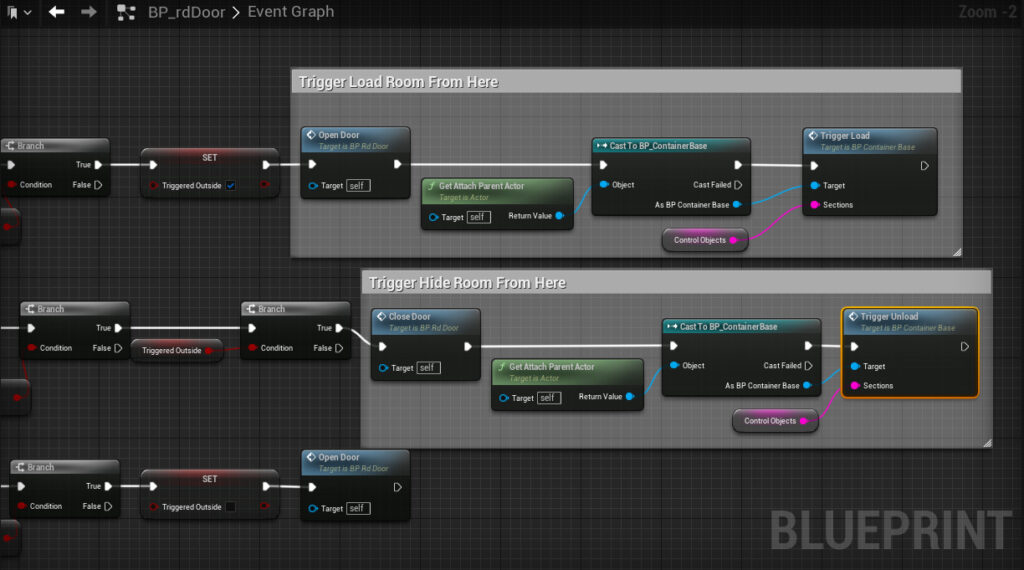
I’ve built a simple Door Blueprint (download here, 4.25up) that can be used to trigger the internal room visibility – replace the door meshes with this blueprint and set that door mesh in the Blueprints door mesh. (It’s easy enough to just add the events you need to any existing door blueprints you may have if you’d prefer.)
With this door BP, it has a String which is a comma delimited list of folders in the Blueprint to Load/Unload – just set that to the internal folder names and add this little bit of code below:
Step 4. Create Blueprint from Actors
Now you can create a Blueprint from your actors – either Right-Click on the root folder of the Motel, or select all the actors and Right-click – and select “Create BP from Selection” – make sure to have “Create ISMs” ticked as there are a lot of meshes and also “Randomized” and “Collated” are both ticked. That’s it, then just click “Create”.
Step 5. Setup Blueprint to Hide internal at start, and expose trigger to show on door open
The next bit is fairly straight forward – in the newly created Blueprint, we just need to set some of the Defaults to make sure only the external walls and scatter are shown by default:
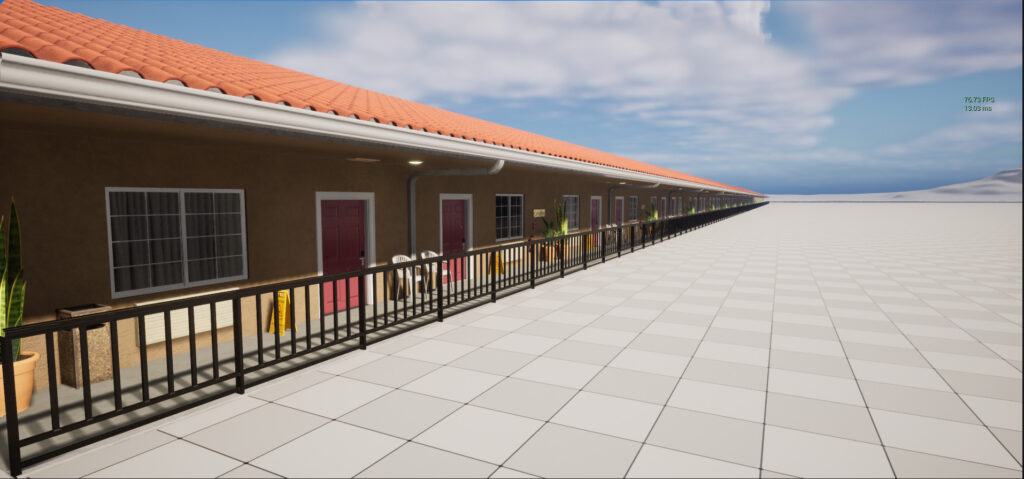
Step 6. Create Line of Motel Rooms.
Now we can test how it works with a line of rooms – It’s easy enough just to duplicate the BP (alt+drag), or for more sophisticated layouts, you can use something like rdBuildBuddy. You should find the performance in both the Editor and during Play is very good even with lots of rdBPtools Blueprints with Instanced Static meshes. Here’s an example of 36 Motel rooms with Nanite and Lumen – during editing it hardly even notices on my 12th gen i7 and rtx3070ti. With UE4.27 and no raytracing, it’s even faster.