rdInst Tutorial 1 – Adding Static Mesh Instances
Last Updated: 19th February 2024
Tutorial created using rdInst version 1.3
rdInst makes it extremely easy to add Instanced Static Meshes to your level. You don’t need to worry about where they’re stored, or how to remove them.
Step 1. Create a Blueprint with Parent of rdActor
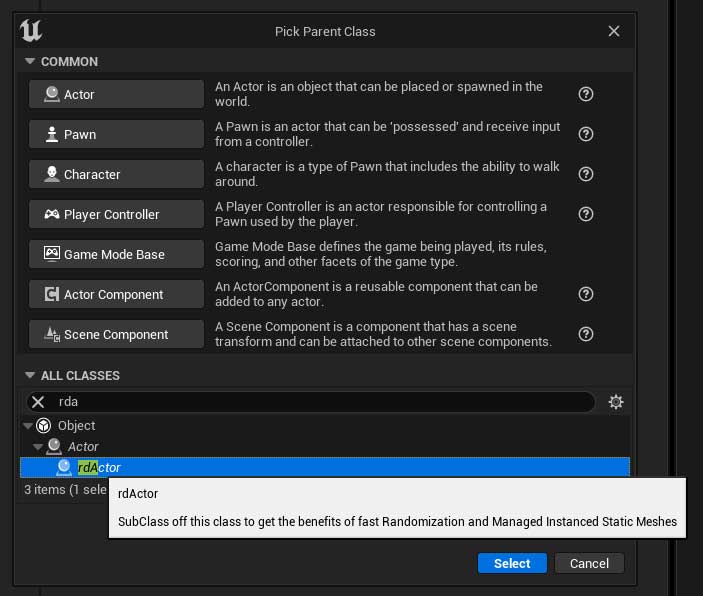
Right Click in your content browser and create a new Blueprint.
Select “rdActor” from the list of parents (I type it in the search box) then click “Select”
Give the new Blueprint a name.
Step 2. Set the Actor Mode type for your needs.
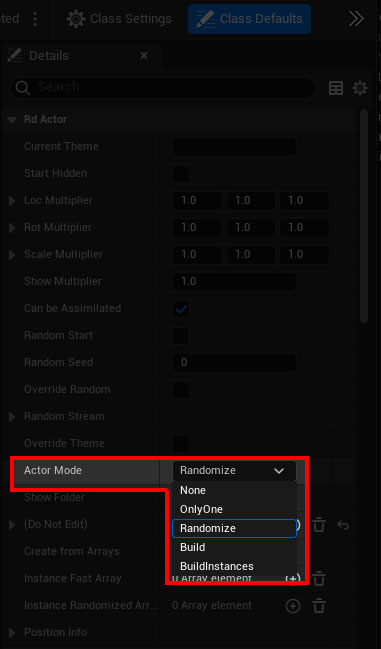
Now open your new Blueprint in the Blueprint Editor, and find the property “Actor Mode” in the Details Panel on the right (you may need to select the “Class Defaults” button along the top first).
Change that to “Randomize” if you’re wanting randomized instances (you can also have non-randomized instances in this mode) – “Only One” if you’re only wanting one of the meshes to show (or a folder of objects if you specify folders) – or “BuildInstances” if you’re just using non-random instances.
For this tutorial, we’ll be using a combination of random and non-random instances so we set the ActorMode to Randomize.
Step 3. Add some StaticMeshs to the InstanceFastArray
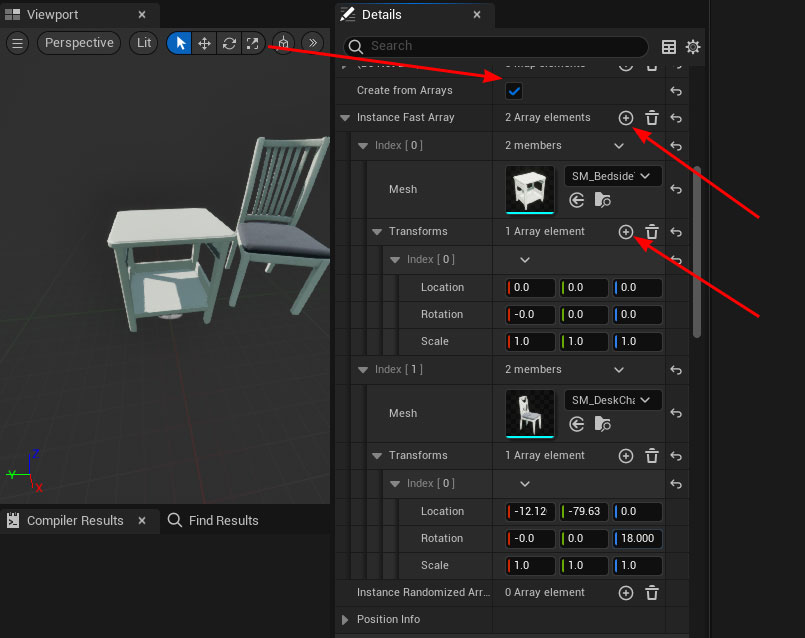
The first thing to do is tick the “Create from Arrays” tickbox. When this is ticked, the rdInst system instance map is erased and set to a collated version of these Instance Arrays. You don’t edit this main map directly – it’s only just visible to Blueprints so the data is serialized – but editing the contents directly isn’t supported. Exposing it directly to Blueprints makes editing very slow as it has to maintain that list in the editor.
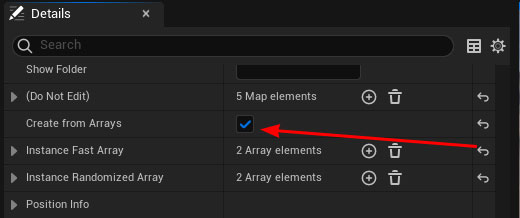
Note: Don’t tick this option if you have already built instance data in the BP using rdBPtools, if you tick this you will loose all your instance data.
Now we can add some non-random StaticMeshes to the InstanceFastArray in that same section of the Defaults. Just click the “+” button and expand that and choose a mesh in the StaticMesh section.
Then Click the “+” besides the “Transforms” section – this is the first instance of the StaticMesh. You can leave that as it’s defaults if you want it at 0,0,0 – otherwise choose a Transform in that section.
Then Add another Static Mesh and Transform and move that to the side of the first one.
Step 4. Add some Randomized Instances
Now we will add two more meshes – but this time to the InstanceRandomizedArray.
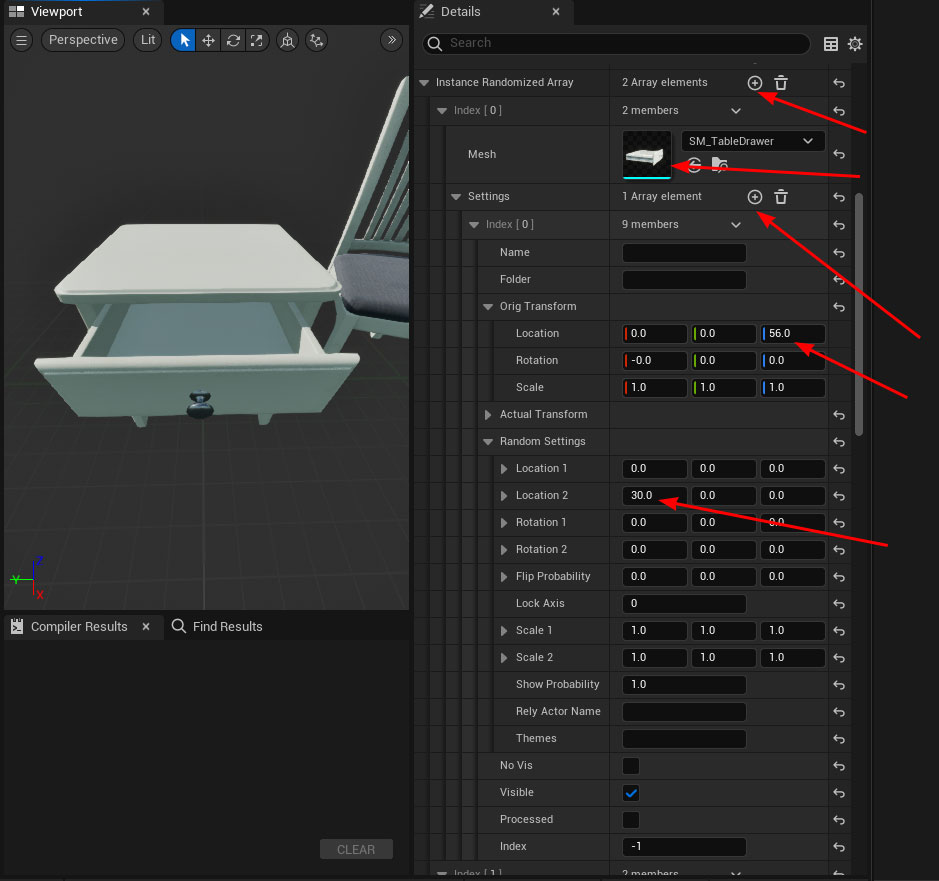
The first one is a drawer for the table – we want it to be randomly open each time.
Add an entry with the (+) symbol, select your mesh – then add a Randomization entry with the (+) below the mesh.
The only settings we need to set for the drawer are it’s Original Z location (the table is at 0,0,0) and a random position in the X axis. Set the Z value in the “Orig Transform” Location section to “56.0”.
Then set the Random Settings “Location 2” X value to 30. Done. The “Location 1” location can be thought of like the Minimum values to set the random location and “Location 2” as the maximum.
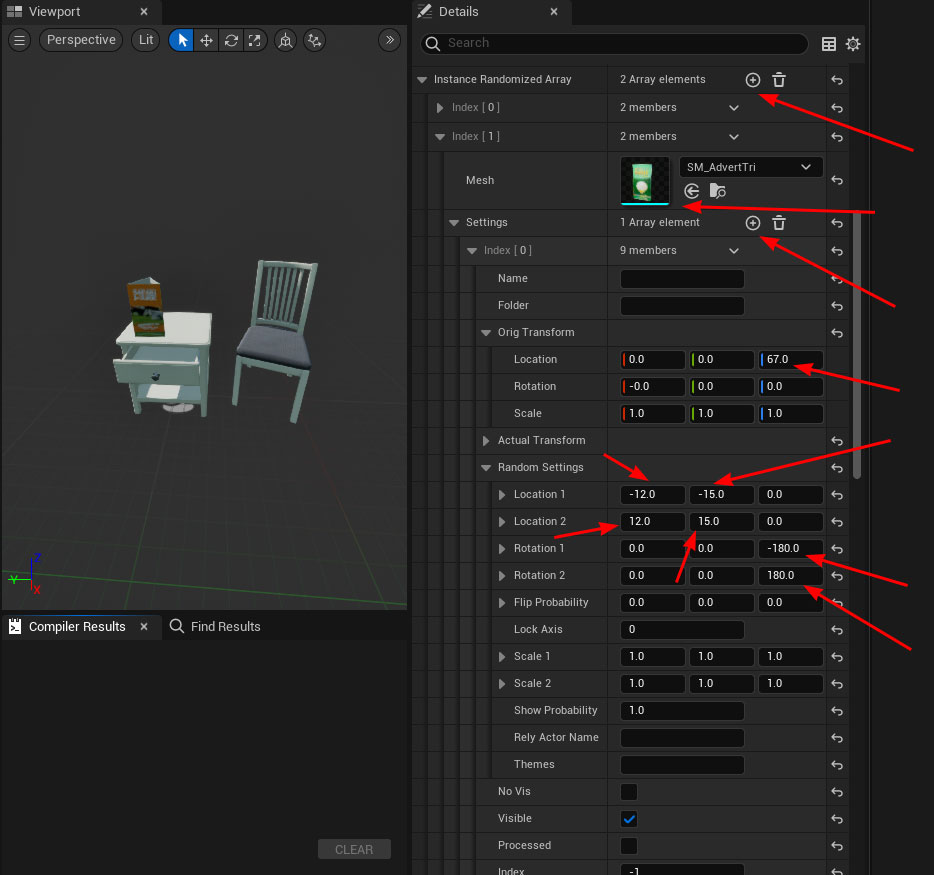
Now we’re going to add a hotel brochure on the table at random location and rotation. Follow the previous steps to add a new mesh to the InstanceRandomizationArray and a new Settings item.
This time set the Original Transform Z to “67.0” and set Location 1, 2 and Rotation 1,2 to the values in the snapshot below:
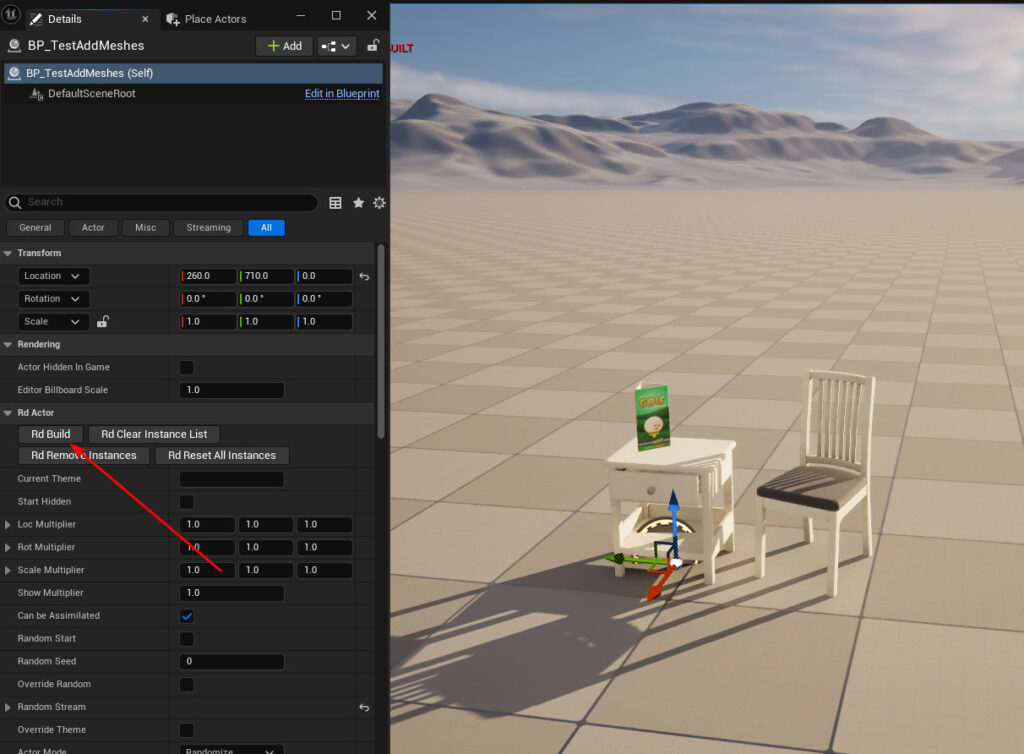
Step 5. Add to the scene
That’s all there is to it. Now just add your new actor to the level. To see the randomization at work – click the “RdBuild” button in the details panel with the actor selected.