Tool 3: Create Billboard LOD
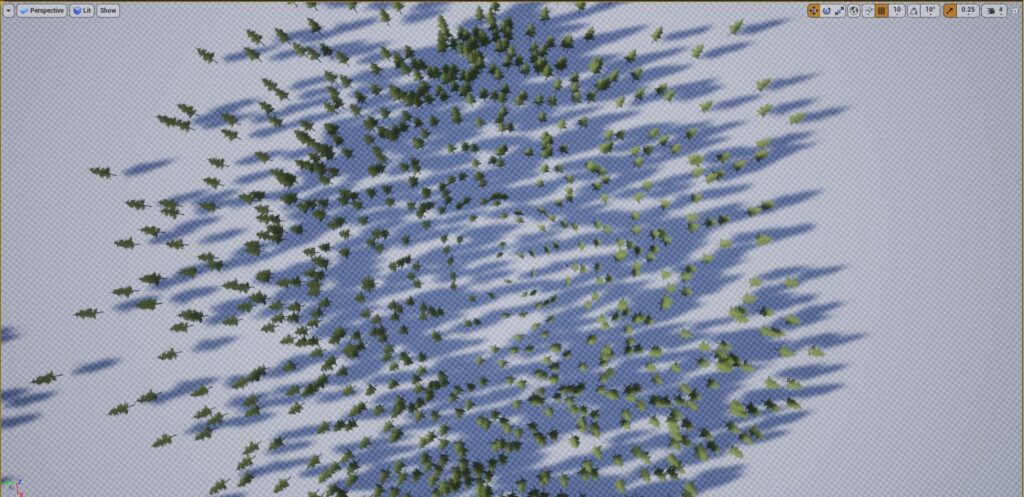
Billboard LODs are mesh LODs that have 2 triangles arranged in a plane which through the material, always faces the camera.
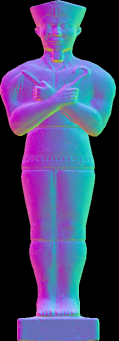
The material is a series of captured frames of the mesh, circling the mesh around the z axis. (Dual axis also circles the x axis).
Pros:
- Very Fast (2 triangles opposed to 5,000 -> 200,000 or more)
- Low texture look-ups (only uses 1 material and 2 (or sometimes 3) textures)
- minimal over-draw (it’s 2D, less surface area)
Cons:
- Lighting doesn’t display in exactly the same way
- single-axis billboards do not look good when viewed from above
- when the mesh is displayed close to the camera and an instance/copy is much further away, both sets of textures will be in GPU memory.
- Billboards do not work correctly with non-zero Pitch or Roll.

The Billboard Creation window is broken into 4 sections. Each of these sections is explained in detail in the following pages.
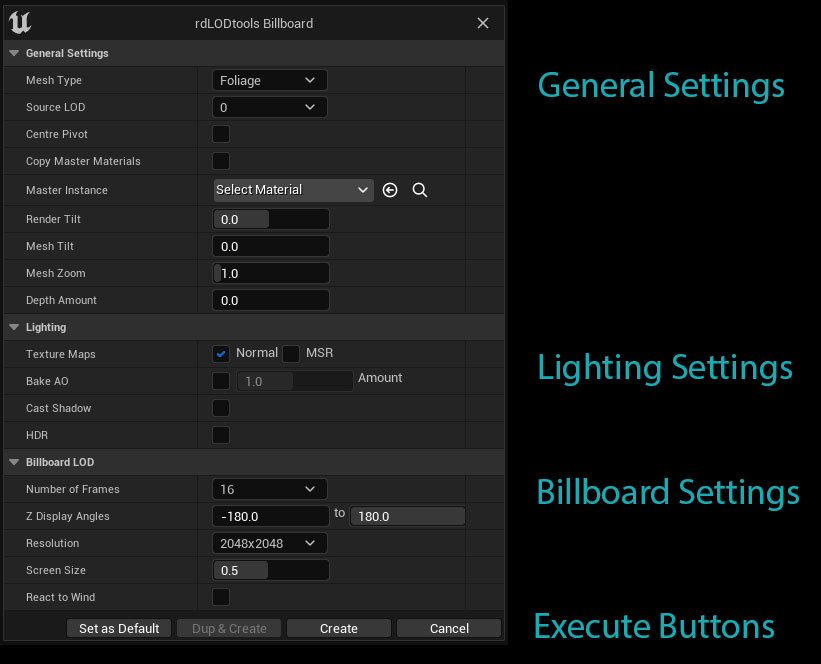
The Settings window is displayed as modal, meaning you will have to close it to access the Content Browser etc.
Area 1: General Settings
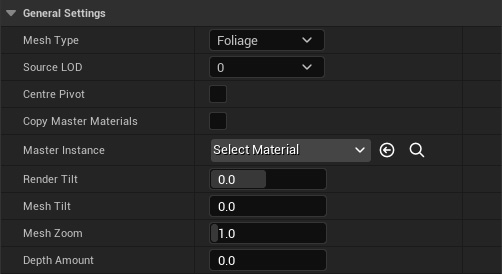
Mesh Type Currently there are two options, General and Foliage. The Foliage mesh type is optimized more for trees and foliage and adds the option to apply a wind effect.
When a shadow is included, the foliage type will also create an extra plane that runs perpendicular to the main plane to give shadows a more realistic depth.
Source LOD This drop down box allows you to select which LOD is used as the source for the billboard and planar LODs.
Using LOD 0 gives the best results, but for the smoothest transition to the Billboard using the lowest LOD is best (lowest as in the LOD with the greatest index, 0 being highest).
Centre Pivot As the new LODs pivot around the centre of the mesh, the source mesh must be as close to centre as possible.
Some trees use a pivot slightly off from centre, but in most cases this is fine.
A lot of buildings have their pivot point along one side of the building – these need have this option ticked so they get centred before the LOD creation.
Note that if you have already placed these meshes in your scene, they will move if you execute this, so it’s best to use the “Duplicate and Create” option to make the changes in a new copy of the mesh.
Copy Master Materials Normally the Billboard Material Instance references a Master Material that is by default copied to your project in /Game/rdLODtools/.
If you tick this option, a Master Material is copied to the meshes Material Folder and the Material Instance references that instead of the one in the rdLODtools Folder.
This can be useful if you intend to make your own modifications and/or optimizations to the material.
If you don’t tick this option, all files will still be copied when you publish.
Note: this only applies when no Master Instance is selected.
Master Instance You can specify a Material Instance that is derived from the same type of LOD Master material as is being created here. The benefit of doing this is that you can adjust just the master instance and all billboard LODs that reference it will use those settings.
Render Tilt The Render Tilt option provides the ability to tilt the camera by the specified amount (between -45° and 45°).
This can give an illusion of depth by giving areas such and the trunk of a tree a more rounded finish. Using too much of an angle will spoil the rotation matching so small amounts is better.
Mesh Tilt The Mesh Tilt options tilts the Billboard mesh by the specified amount (between -45° and 45°).Tilting Billboards slightly off from complete vertical can help remove artifacts such as shadow cross-talk when the sun is parallel to the Billboard or a bland looking Billboard when the sun is directly overhead.Another use for the Mesh Tilt is helping with the display of smaller objects on the ground – with a Mesh Tilt of 45° the transition from main LOD to Billboard is eased.
Mesh Zoom Mesh Zoom scales the Mesh by the specified amount.
When you create billboards of meshes such as buildings, the Billboard can appear slightly smaller due to it being a plane located at the center of the building whereas the mesh has a building side out in front of that.
Zooming the mesh allows the visual “pop” to be minimized by matching up the size.
Depth Amount This is the amount of depth the Orthographic render of the mesh has.
Area 2: Lighting Settings
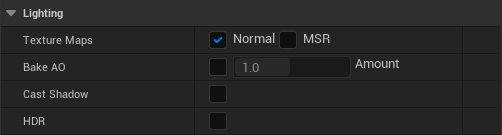
Make Normal Map Adding a Normal Map to the Billboard LOD helps to give it better lighting and aids to make the transition smoother from other LODs. Including a Normal Map does come with an expense – they do take more memory as they have an extra texture, and they take slightly longer to render, although negligible.
When ticked, rdLODtools also creates a single channel Ambient Occlusion map and stores it in the Normal’s Alpha channel.
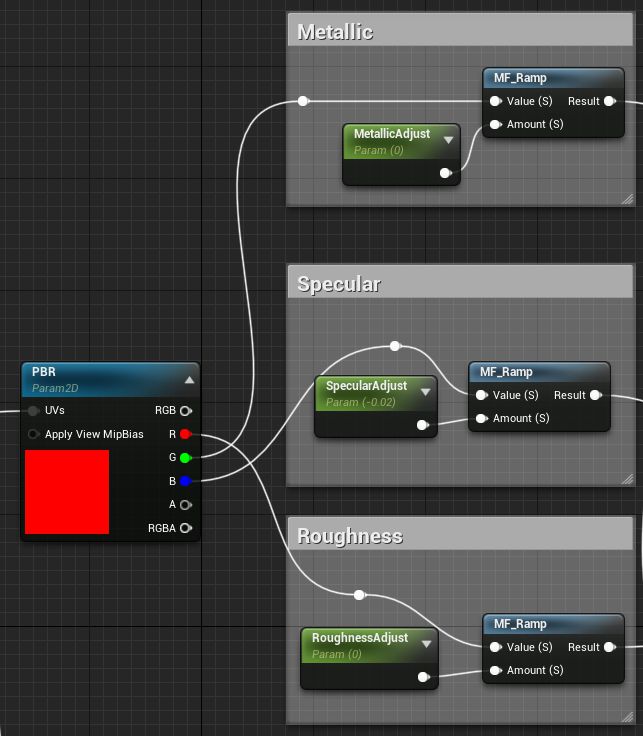
Make MSR Maps rdLODtools can also create Metallic, Specular and Roughness texture for the LOD – this helps give things like buildings more reflection and depth.
They do take more memory for each LOD and the rendering time is extended slightly.
The maps are stored in one texture using separate channels.
Bake AO rdLODtools can add shading to your billboards by pre-calculating the effect on the Diffuse from the rendered AO. This can help with adding shadow to parts of the LOD that are obscured by light with the full mesh.
Cast Shadow This option gives the Billboards a shadow. An extra plane is added to the mesh (totaling 4 triangles) at right-angles to the viewing plane. This gives better shadows. Shadows and shading on the Billboard LODs can help make it look like the full poly LODs.
HDR Selecting this option saves the frame data in high resolution HDR format for higher quality. The textures are fout times the GPU memory when doing this.
Area 3: Billboard LOD Settings
There are a number of options you can use here to customize your Billboard LOD:
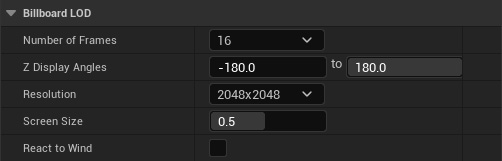
Number of Frames Each Frame in this Billboard is rendered from an angle around the source mesh. The more frames, the smoother it rotates and transitions from the higher LOD, but will be rendered at a smaller resolution (not usually a problem when viewed from a distance). The more frames there are, the better the Normals will be too – I’d recommend nothing less than 16.
Start and Stop Angles Specifies the angle range to render. Sometimes your mesh will only be viewed from certain angles – for instance buildings in a city in the distance. These options allow you to limit the frames of the billboard to this angle range. Looking directly at the mesh is 0°, to the left is -90°, to the right is 90°, behind is -180° and 180°.
Resolution A small resolution is almost always fine but sometimes some objects can view very well quite close up too. In cases like that it can pay to remove intermediate LODs, use a higher resolution here and increase the Screen Size.
A good way to work out how big to make the resolution is to work out how big the LOD will be when it appears – you can take a snapshot of the scene and measure it in a paint program even. I often make them appear at about 50 pixels at 1080p so that would be 100 pixels at 4K – multiply that by the square root of the number of frames and you’ll have an idea of the ideal resolution.
Eg. My LOD’s appear at around 100px@4K – and I have 16 frames. 100px multiplied by 4 (square root of 16) is 400px so a 512px resolution will be more than enough.
Screen Size This is the screen percent the Billboard LOD should be displayed at, 1.0 being full-screen.
For better performance, a higher Screen Size can be used. 0.33 is a Screen Size I often use when want to check the transition line between LODs – for a balance between quality and speed a number like 0.09 is good (the default).
React to Wind This activates wind movement in the material shader so the foliage still appears to move with the wind. As it’s a Billboard LOD the wind effect is kept to a simple sway motion – you can control the speed and strength from the Billboard Material Instance.
Area 4: Execute Buttons

Set as Default This option sets the current settings as the default. If you’ve already created a billboard in a mesh – those settings will still over-ride the defaults (in single mesh mode, multiple-selected meshes use the default).
Duplicate and Create This option duplicates the selected mesh before creating the LODs. Useful to keep a backup, especially if centering the pivot point.
Create Creates the specified Billboard LODs for the mesh and closes.
Cancel Closes the Billboard Creation window without making any changes.