Tool 5: Create Cubic LOD
A Cubic LOD is a cube with faces displaying each side of the mesh.
By themselves they’re only useful for plane buildings – but with some simple slicing and shifting faces in a modelling app such as blender you’re able to quickly and easily create quite solid looking distance LODs that render quickly and use little GPU memory.
To edit these, create a Cubic LOD for your mesh, then export the textures that are created. You can download the Cube Mesh from here (it has specific UVs)
Import the textures to your modeller, then just slide the faces in places where the textures show a gap from the sides – slide the sliced face until it matches those seams.
Once you’ve done that, you just simply import your new mesh into UE and add that mesh to your main mesh with either the Epic “Add LOD” option or the rdLODtools Combine LODs option.
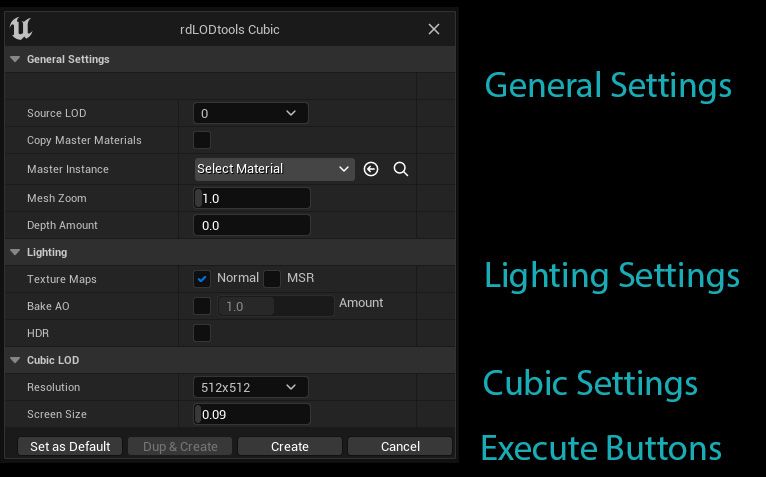
The Cubic Creation window, like the other Billboard windows is broken into 4 sections. Each of these sections is explained in detail in the following pages
Note: The General and Lighting sections and Execute Buttons are the same as for the Billboard Creation, to find an explanation for each option, check the Billboard Creation Window section earlier in this document

Resolution A small resolution is almost always fine but sometimes some objects can view very well quite close up too. In cases like that it can pay to remove intermediate LODs, use a higher resolution here and increase the Screen Size.
Screen Size This is the screen percent the Planar LOD should be displayed at, 1.0 or higher being full-screen.
For better performance, a higher Screen Size can be used. 0.33 is a Screen Size I often use.