Prev Tutorial – Next Tutorial – Manual – rdLODtools Home – Tips & Solutions
rdLODtools Tutorial 1 – A simple tutorial on Trees
OK, so we’ve covered all the concepts and the UI by reading the manual – now to put it into practice…
A good starting point is a tree – they are fairly straight forward, the only thing to keep an eye on is the Subsurface color – the color that shows through when the sun is behind the tree.
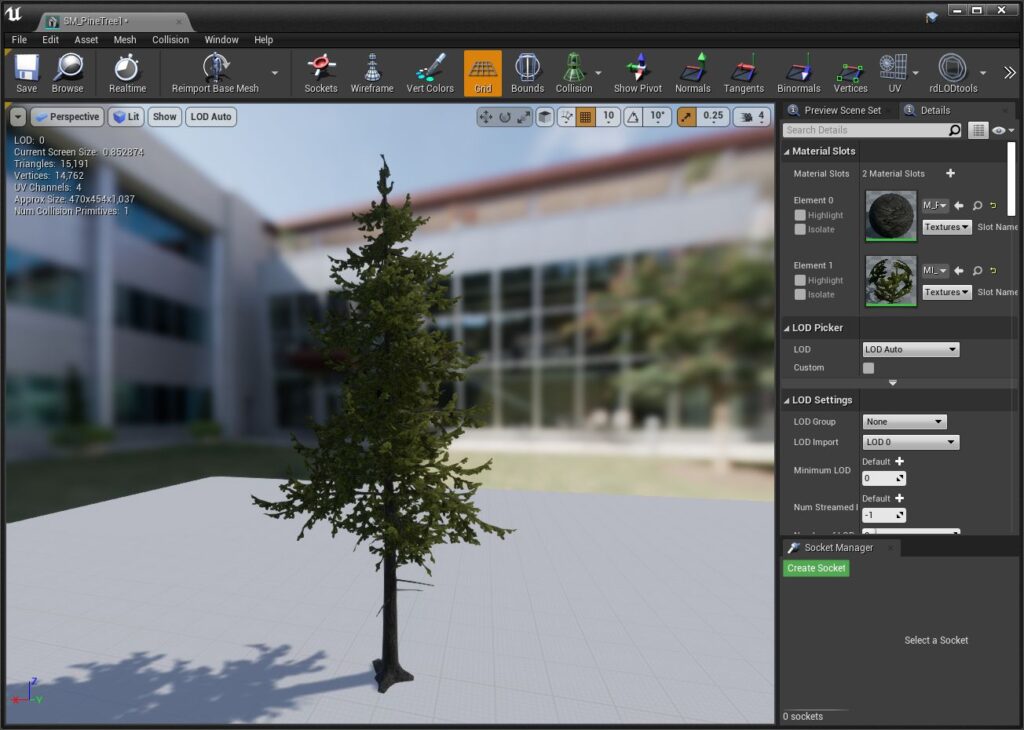
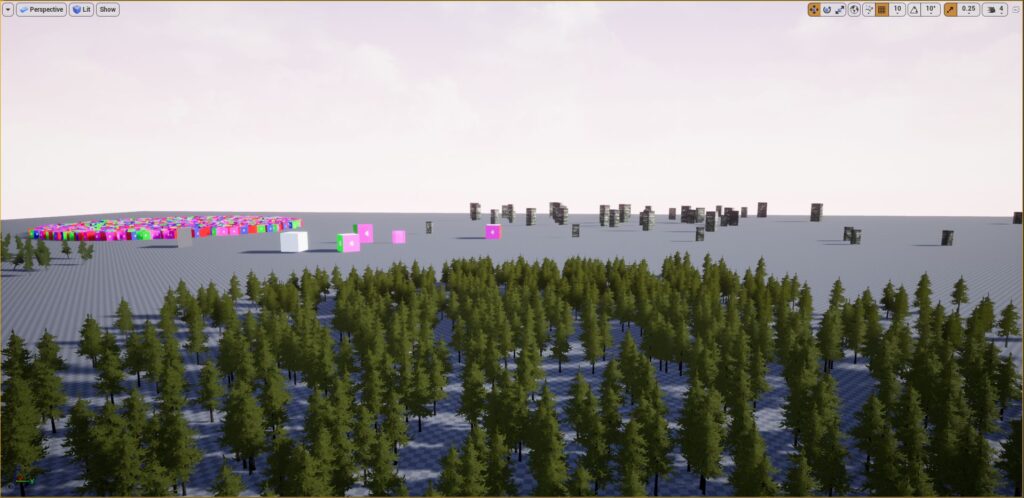
- So let’s start by opening a tree in the Mesh Editor – I’ve chosen my favourite tree, the Pine from the Epic Glider example – it already has one of the best Billboard LODs I’ve seen built into it, just a single frame but it has very nice Normals and has been rendered at a slight angle (or multiple angles) to show the trunk and root system nicely. The mesh has been designed for performance so is nice and lightweight – when combined with the Billboard LOD you can have millions of them in your scene before you see any significant frame drop.
- For this example we are just going to remove all other LODs contained in the mesh except for LOD 0.
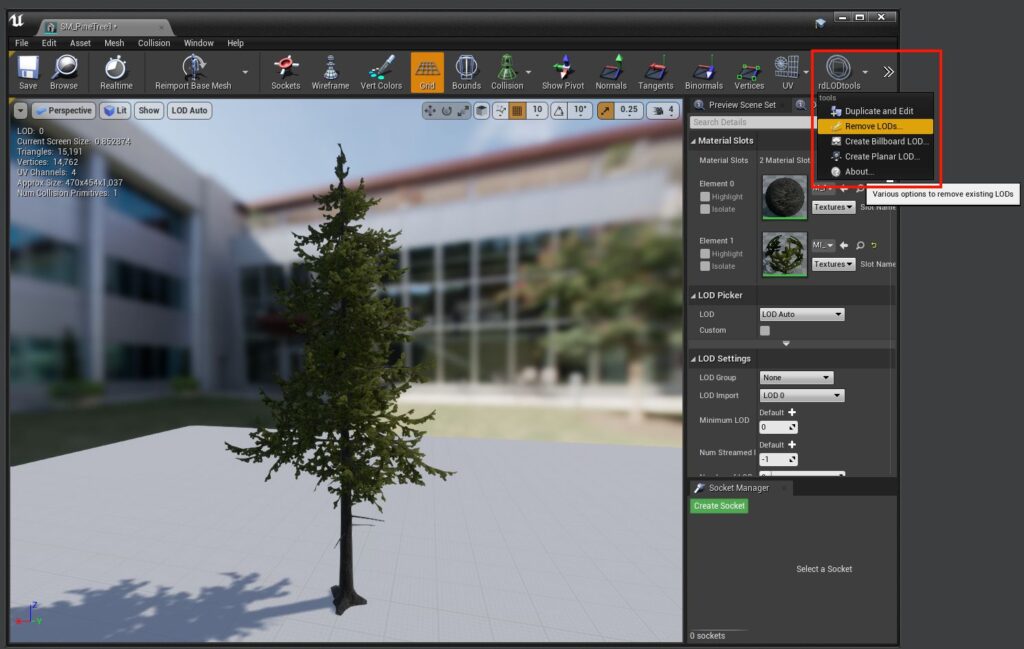
Select the “Remove LODs…” option from the rdLODtools Toolbar Button (top-right of your editor window, you may need to expand the size of the window or click on the “Right Arrows” to see it.
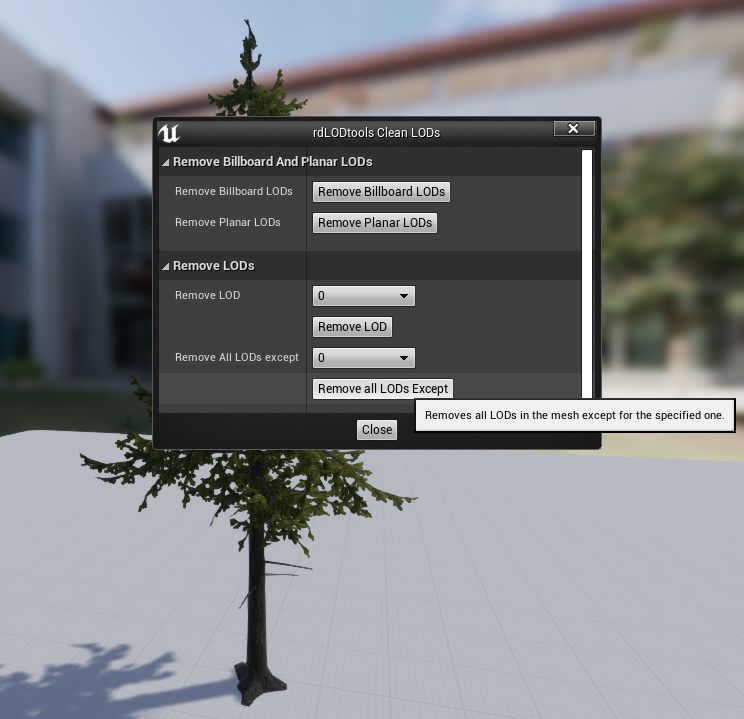
Click on the “Remove all LODs Except” with the default “0” as the exception.
This will remove the other LODs, and make sure the editor is showing LOD 0.
Now we are ready to create our Billboard LOD…
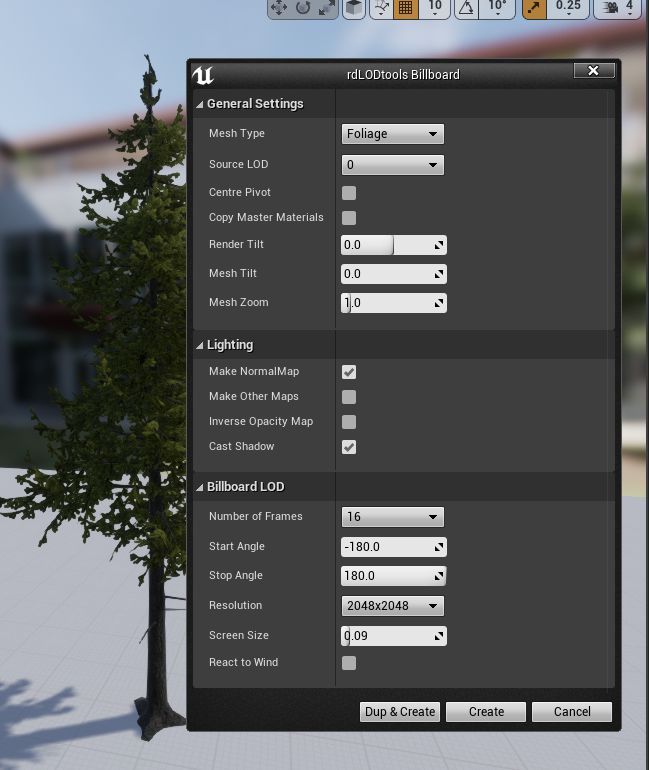
- Now open the rdLODtools “Create Billboard LOD” option from the rdLODtools Toolbar Button. The Billboard creation window then opens.
If you can have the Material Editor positioned in such a way that you can also view the scene at the same time it’s much better.
This gives 16 frames with 360° rotation, a Diffuse Map at 2048×2048 and a Normal Map at the same (the Normal Map also contains an AO Map in the Alpha channel). The Screen size is quite low at 0.09 so the Billboard LOD won’t appear until it is quite far away.
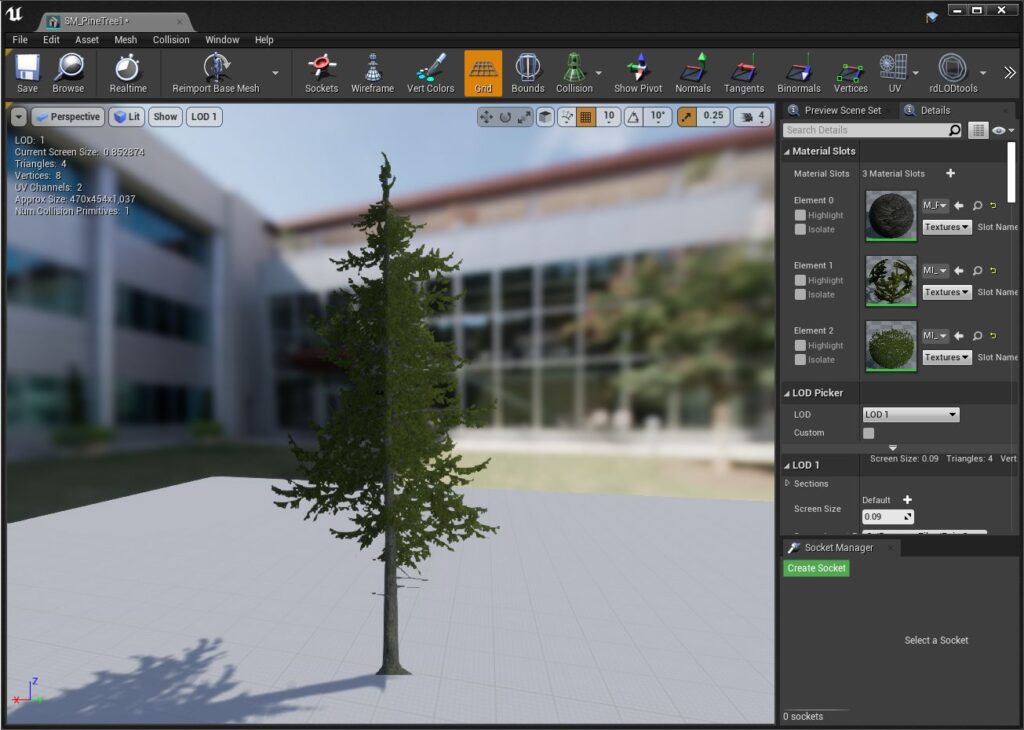
- After clicking “Create” and selecting LOD 1 from the editor viewport we get a Billboard LOD that looks like the snapshot to the right – it has all the detail but the colors just don’t look right.
That’s because we have to set the “Subsurface Color” of the tree – the Material the LOD uses defaults the Subsurface Color to a limey green color – this tree has quite a strong yellow to it.
So we open the new LODs material (you can browse to it from the “Element 2” material slot) and add some trees into a scene to simulate how they will be in the game (for this example it’s just a blank scene).
If you can have the Material Editor positioned in such a way that you can also view the scene at the same time it’s much better.
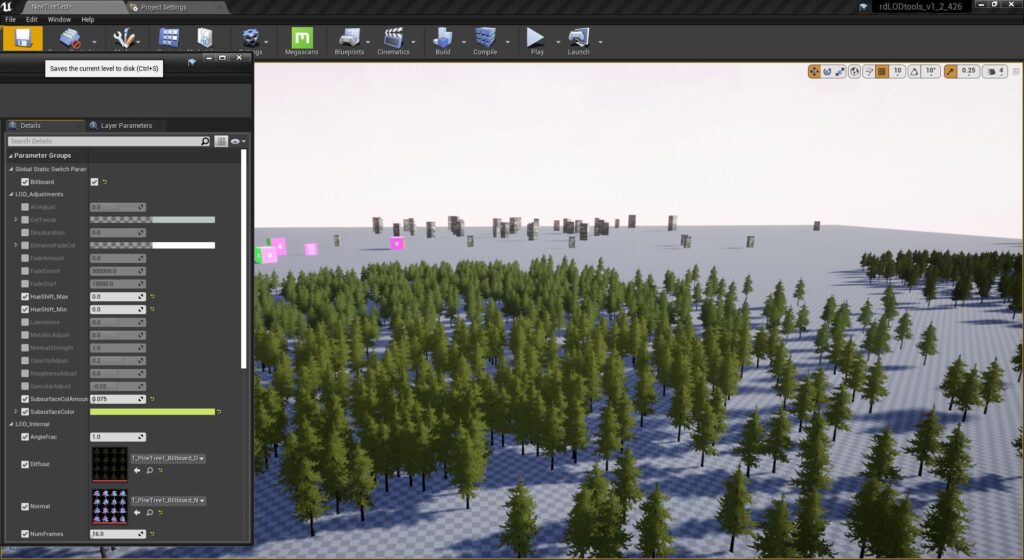
Now with some trees in the scene it’s possible to get the right colors and depth adjustments for the LOD. Change the “SubsurfaceColor” setting to a bright yellow (full red and green, no blue) and then play around with the “SubsurfaceColAmount” value until it looks good. (I found 0.085 pretty good) Increasing the Normal Strength on these trees also looks good, so I increased that to 1.1 and to counteract I lowered the Luminence to -0.25
And that gives us the following result: