rdSplineTools Tutorial 5. Handling Spline Blueprints
Last Updated: 7th August 2023
Tutorial created using rdSplineTools version 1.00
Often when working with splines, you have a Blueprint that fills out the spline in some way with meshes.
If those meshes can be changed at any position along your blueprint – you’ll need to be able to reflect the correct meshes/indexes in each SubSpline.
rdSplineTools provides the ability for the tool to communicate with your Blueprint directly when it needs to be updated in some way for spline changes.
By implementing the following functions you can support split splines in your own Blueprints.
Step 1. Create a Blueprint with a Spline Component.
The first thing is to create the Blueprint, just create it as normal, base it on an Actor. Once open in the editor, add a Spline Component to the Blueprint.
Change the Mobility of the Root Component of the Blueprint to Static.
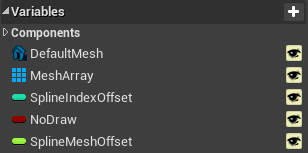
Step 3. Add the variables
Firstly, Add a StaticMesh Reference Variable called “DefaultMesh” – this will contain the default mesh that gets filled along the spline.
Then create an array of StaticMeshes – this is the list of meshes where you can over-ride any to a custom mesh.
Now add an Integer variable to the Blueprint, and ensure its default is 0. This is what we use to control what the SubSpline offset into the mesh array is. rdSplineTools handles working out what the offset is and passes it to your Blueprint by calling the functions below. Call it “SplineIndexOffset”.
Also add a Booleen variable called NoDraw so we can turn off spline mesh creation when we want.
The last one is “SplineMeshOffset” – that’s just the carry-over from the previous sub-spline, it’s a float.
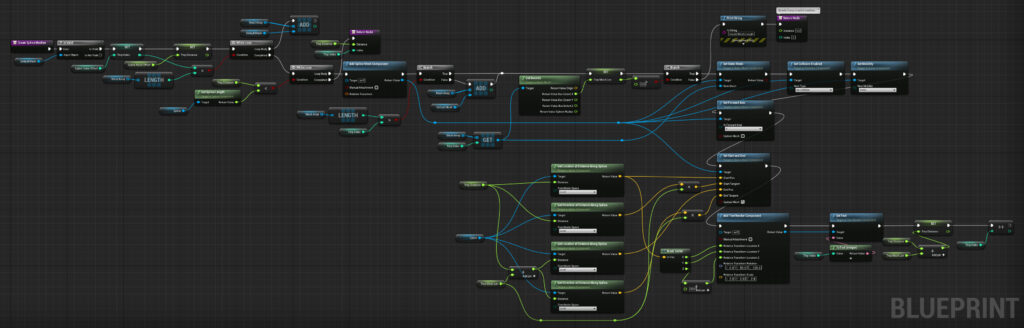
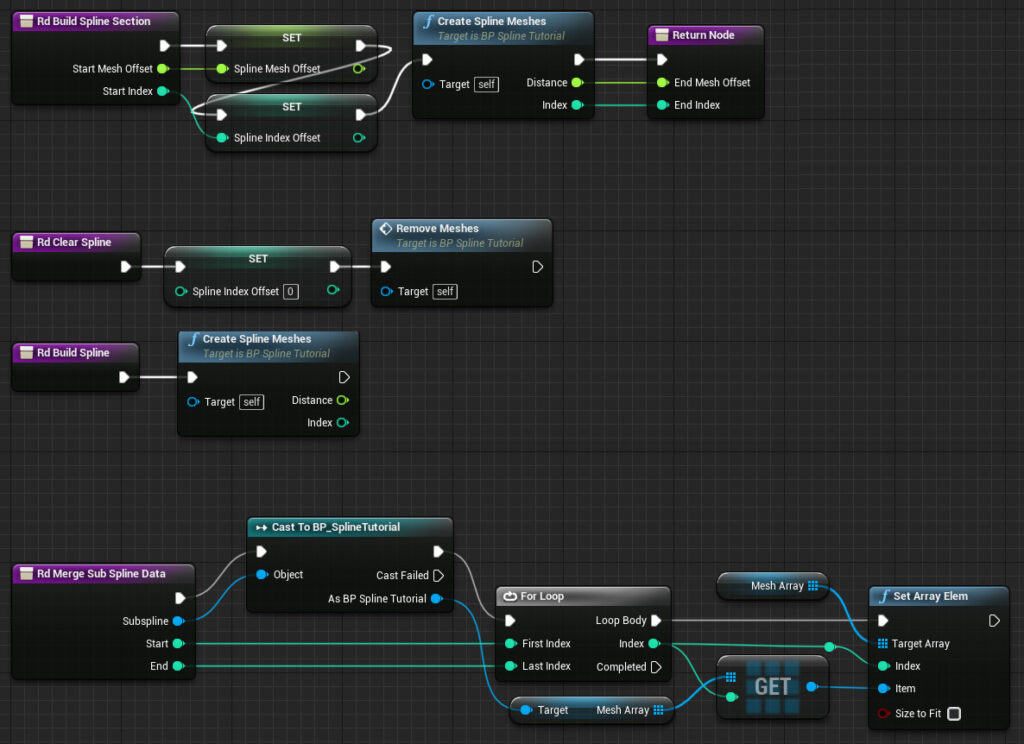
Step 3. Create the Following Functions
Add this code to a Function called “CreateSplineMeshes” to your Blueprint (it adds the SplineMeshes along the spline). This is just a simple example with the only features being that you can change the mesh at each point in the spline by using an array of meshes, the index matching the spline point. The Blueprint creates text at each mesh point with it’s index so it’s easy to find where you want to change.
The complete blueprint is downloadable here (UE4.25 and up)
You can view these Blueprints online here.
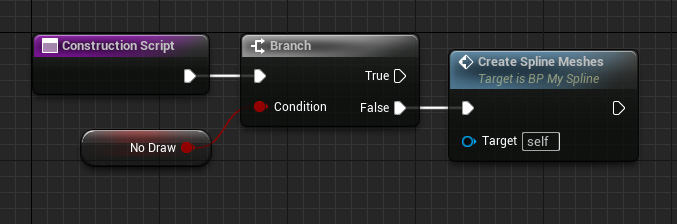
Step 4. Call our new function from the ConstructionScript.
Now we can call that from the Blueprints Construction Script so it builds it whenever the actor is edited. If NoDraw is true, it skips the creation.
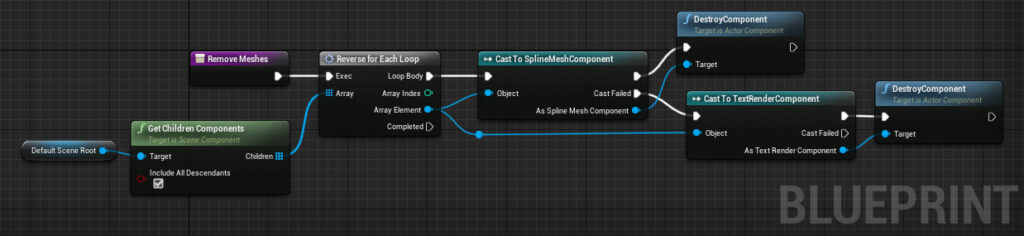
Step 5. Add the following Functions.
Now to add support for the rdSplineTools functions, create the following Functions. Make sure that “Call in Editor” is ticked for all of them.
Step 6. Add to the level.
That’s all the Blueprint needs for a bare-bones SplineMesh creator – compile and add to the level.
If you want to create a fancy “snap” for your blueprint, you can also create a function called rdGetClosestSocket() that returns a Vector.
Step 7. Customize the Mesh Array to have different Meshes for the SplineMeshes.
Just choose a default mesh – the array will be automatically filled to the correct amount. Then you can just change meshes at any point through the array. When/if you merge the splines back together, the new meshes you selected in the subspline are copied back to the main spline data with the rdMergeSplineData function.
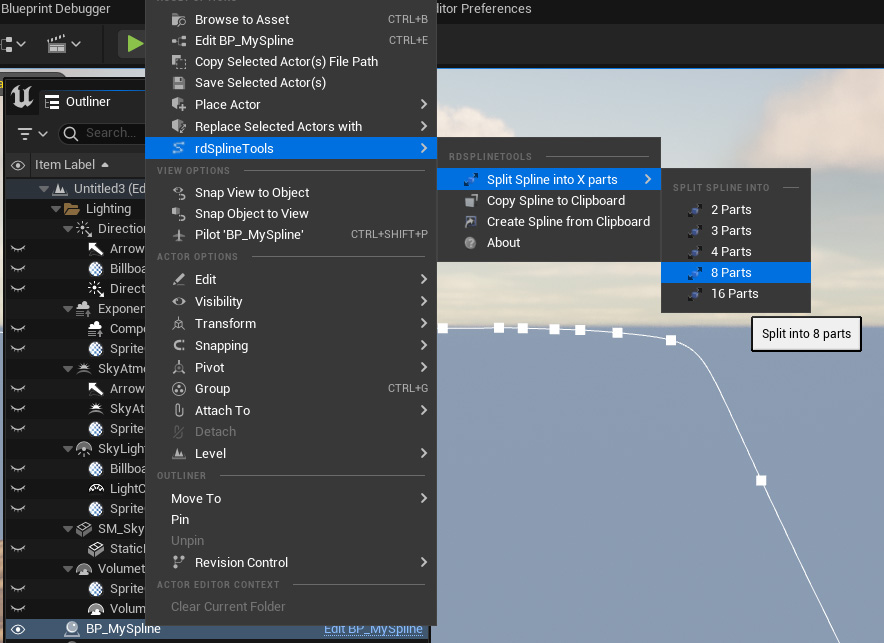
Step 8. Split the Spline and Note the SplineMeshes are correct.
Simply right-click on your Spline Blueprint and select the Split, using the split amount you’ve chosen for the spline.
Step 9. Done.
That’s it. You’ve created a Blueprint that can be split into multiple parts and retain their custom meshes etc.