rdTexTools Tutorial 10 – Creating and Using Signed Distance Fields
Last Updated: 6th Feb 2023
Tutorial created with rdTexTools v1.10
Signed Distance Fields are a great way to store a texture such as a bit of text in a small size, but render at larger sizes with smooth edges.
This Tutorial is going to Create a Signed Distance Field for a texture containing some text and then render that on screen.
Step 1. Import the Desired Texture to your project
You can use any monochrome image you want, but you can download this one Here if you wish.
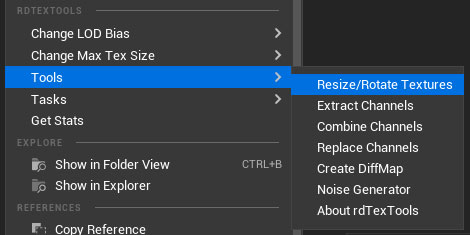
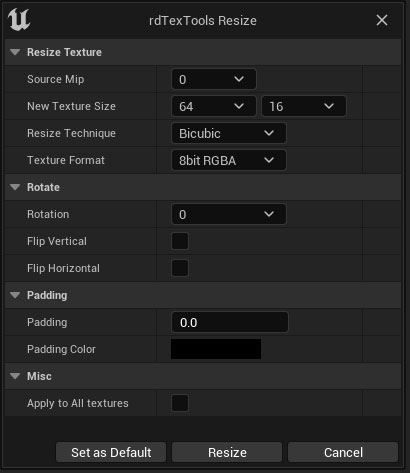
Now in UE, open it in the Texture Editor, and use rdTexTools to resize it (a duplicate) to 64×16 pixels.


Step 2. Create Signed Distance Field from the texture

Now you can save that and go back to the File Browser.
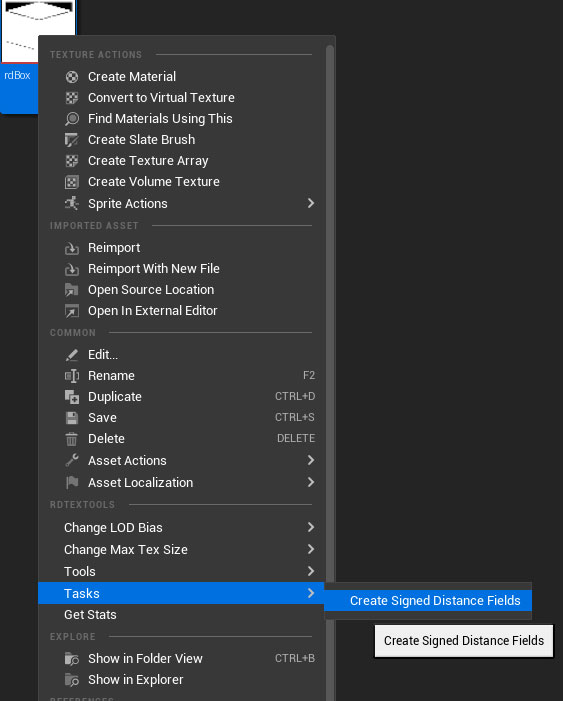
Right Click on the texture and choose “Create Signed Distance Field” from the Tasks menu in the rdTexTools menu section.
That creates the new texture, suffixed with “_sdf” in the same folder.
Now you’ll need to resize that texture (unless you want it non power-of-2). Just repeat Step 1 with the Resize, back down to 64x16px.
Step 3. Create a new Material
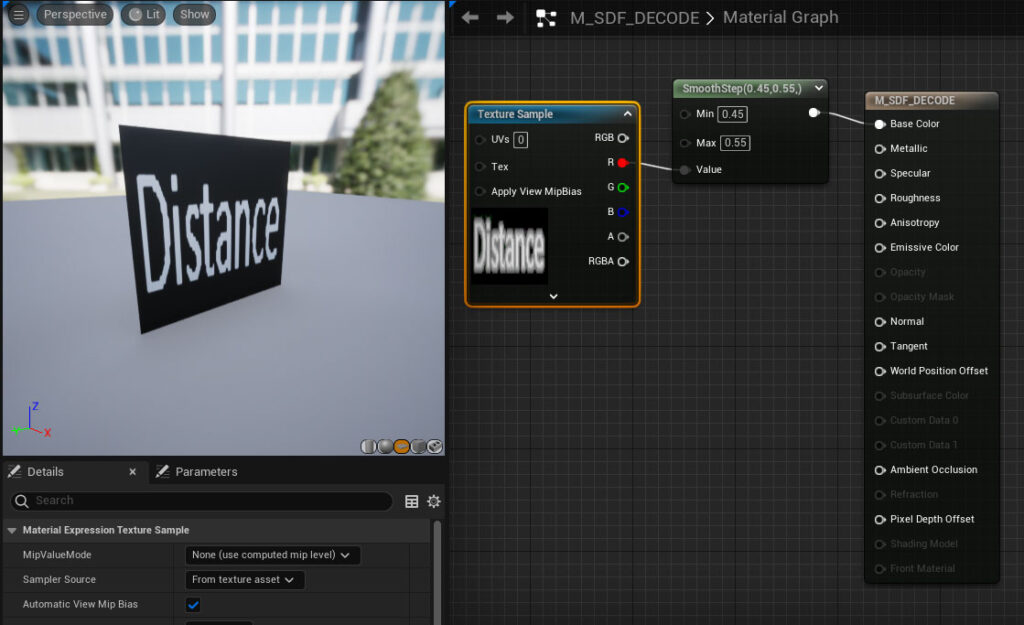
Now all that’s left to do is make a material to display the texture. Create a new material, and drag the texture into the material, now just hook it up like this (this one is about as simple as it comes, you can make them smoother):

Step 4. Done.
That’s it – that’s how to use the simple, 2D Signed Distance Fields.