rdMeshTools Tutorial 4 – Spatial UVs
Last Edited: 29th August 2023
Spatial UVs are extra UV maps added to your StaticMeshes, arranged in a way that their UV values are actually their spatial position within the mesh, between 0.0 and 1.0.
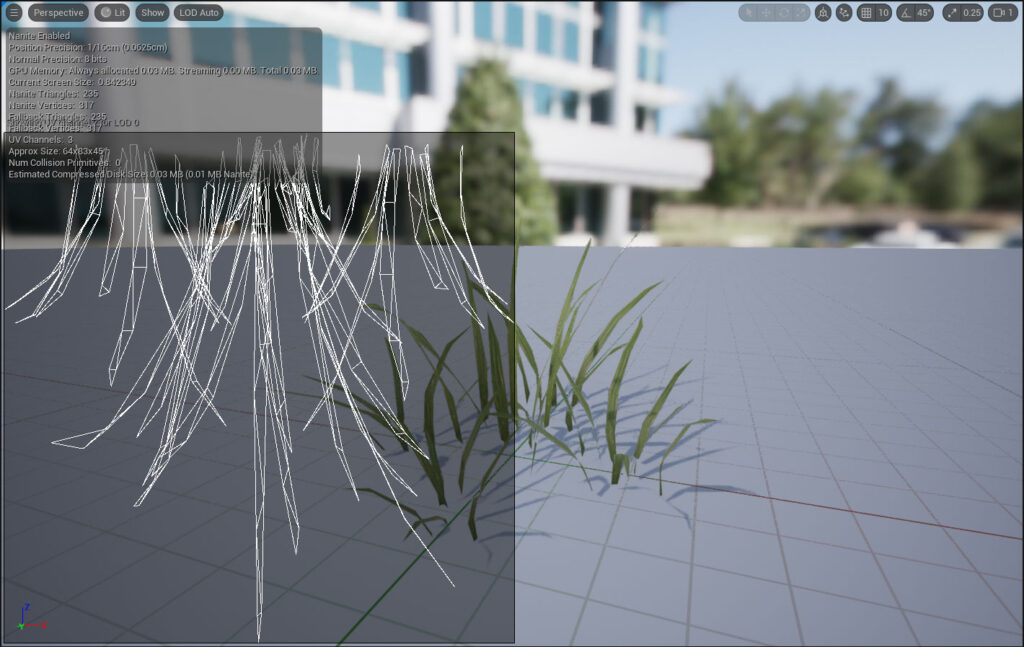
These can be very handy for extremely fast, per pixel local location information from your materials. For meshes such as grass which have low vertex counts and high per-pixel render counts it can’t help but free up GPU cycles.
There are methods to programmatically calculate the spatial position, but it’s not always accurate.
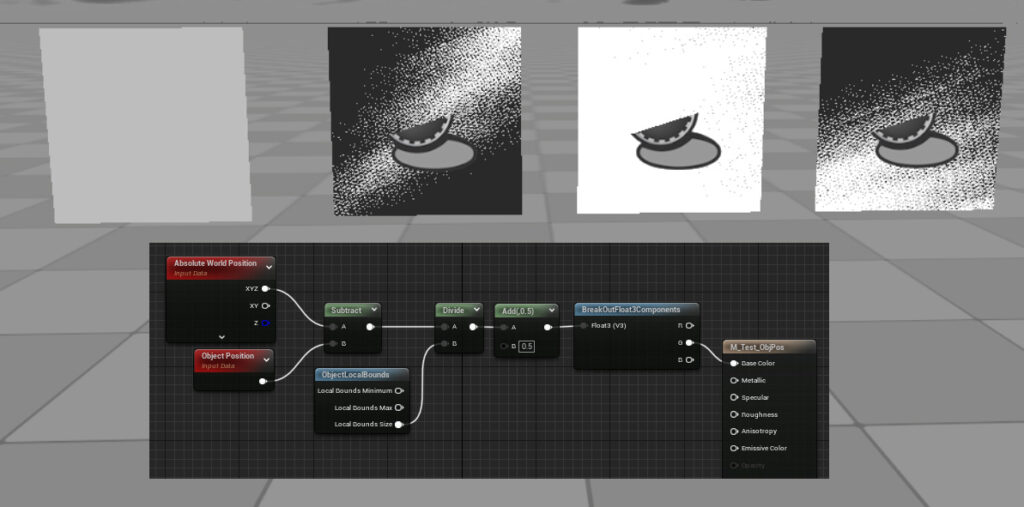
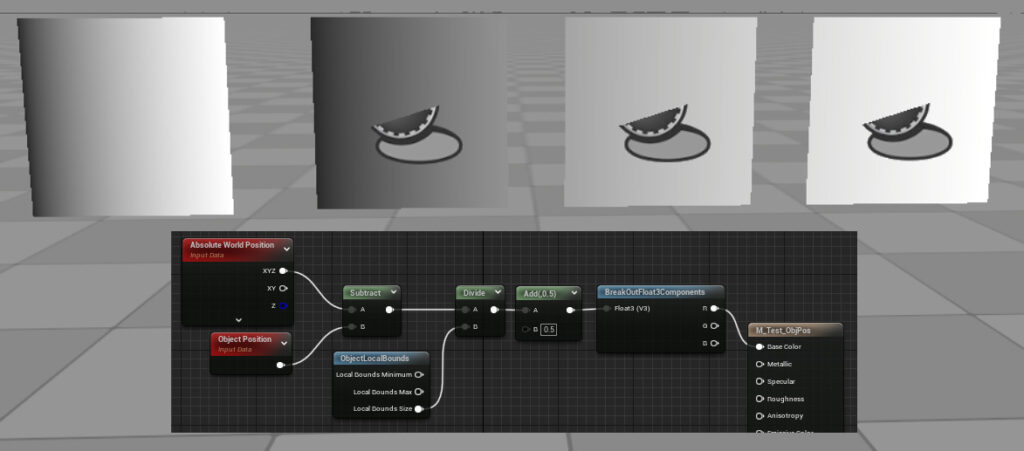
UE5.1 introduces a fix for the Instanced Bounds problem with the InstanceBoundsExtent and InstanceBoundsCenter now being passed to the shaders uniform struct which is accessible through a custom HLSL shader node. You can get the information with “GetPrimitiveData(Parameters).InstanceLocalBoundsExtent.xyz” and “GetPrimitiveData(Parameters).InstanceLocalBoundsCentre.xyz”.
If you want the radius you can do something like:
float3 be=GetPrimitiveData(Parameters).InstanceLocalBoundsExtent.xyz;
return distance(be/2.0,-be/2.0)*0.5;
This tutorial will go through the steps in creating some spatial UV maps and then using them in a grass mesh to apply fake shading, and limit the wind movement to the stalk as it gets closer to the ground.
Step 1. Select your grass mesh and create the UV maps

The first step is to choose your grass and to paint some onto your landscape to get a reference for your changes.
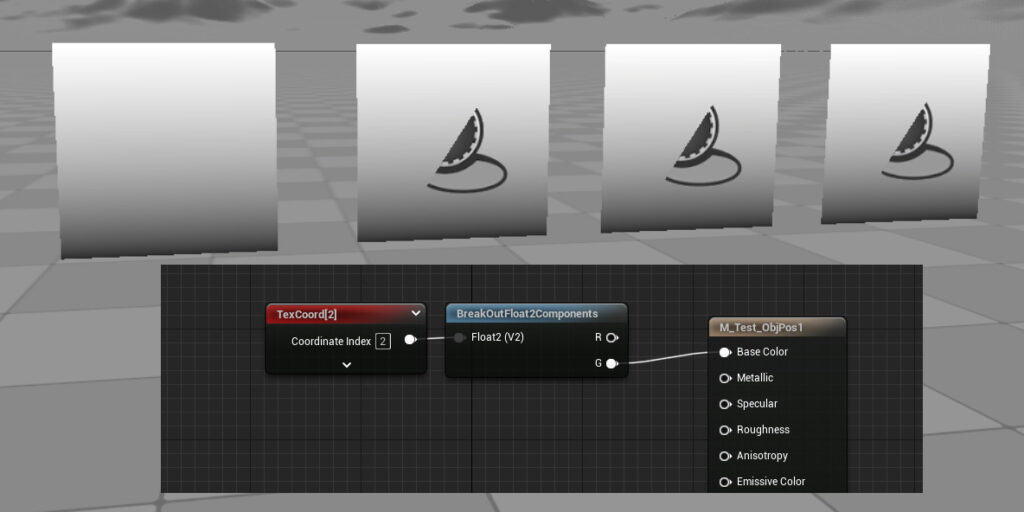
Once you’ve done that, we can simply add a UV map to the mesh with the spatial values needed, right click on the grass mesh and select “Add Spatial UV map -> XY”. If you view the last UV map in the StaticMesh editor now, you’ll see something like:
Step 2. Create a copy of the grass material
Now trace through your grass material to the Master Material, and make a copy of it. Then point the Material Instance (if it exists) to the new copy. Open the new copy in the Material Editor so we can start editing it.
Step 3. Change the material to add fake shading
The first thing I like to do is add a subtle shading to lower parts of meshes – not just grass. It adds depth to mesh with a cheap calculation. Just mix multiply the materials BaseColor by the spatial Z position like:
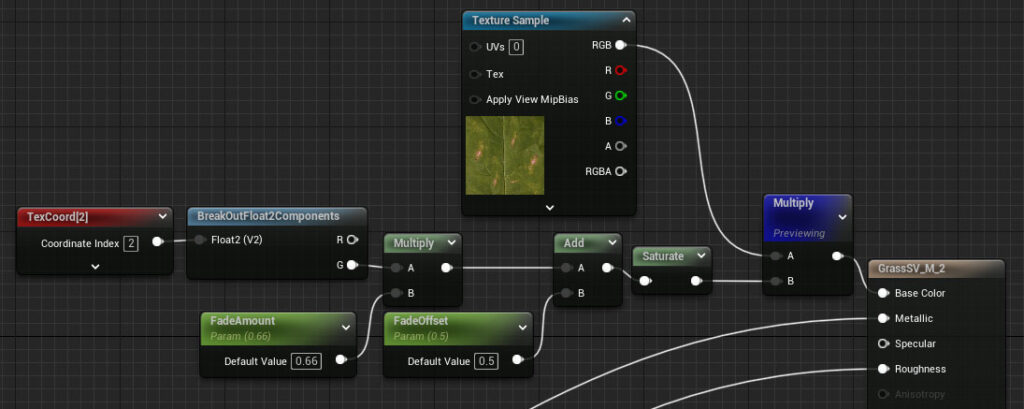
The TexCoord is using UV map 2, the newly created spatial map. This is just a simple way of doing it, there is a lot more that can be done.
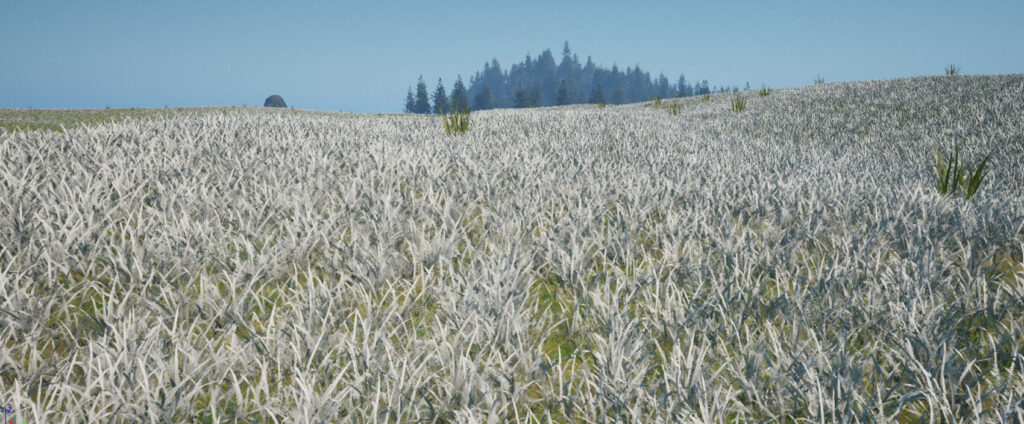
Out of interest, this is what the UV map V value looks like when plugged into the BaseColor:
Step 4. Change the material to limit the wind movement
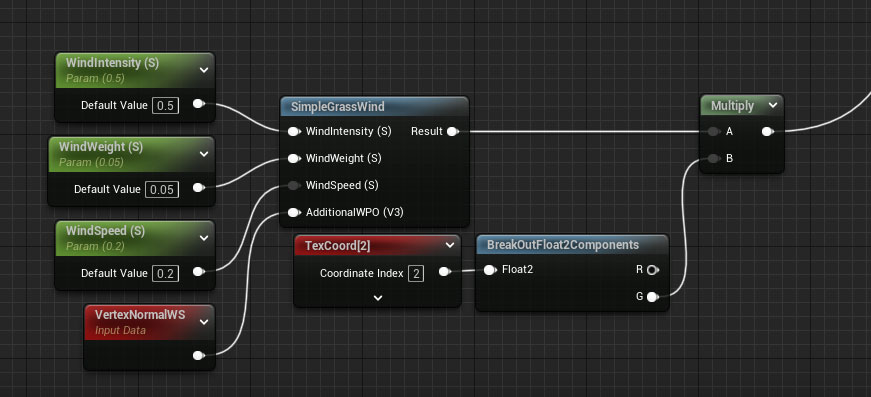
The other thing to do is multiply out the WPO wind offset by the height off the ground – keeping the main stalk firmly in the ground and only swaying the extremities. Just multiply it with the direct output from the UV:
Step 5. Done.
Adding those two changes to the material produce the following results:

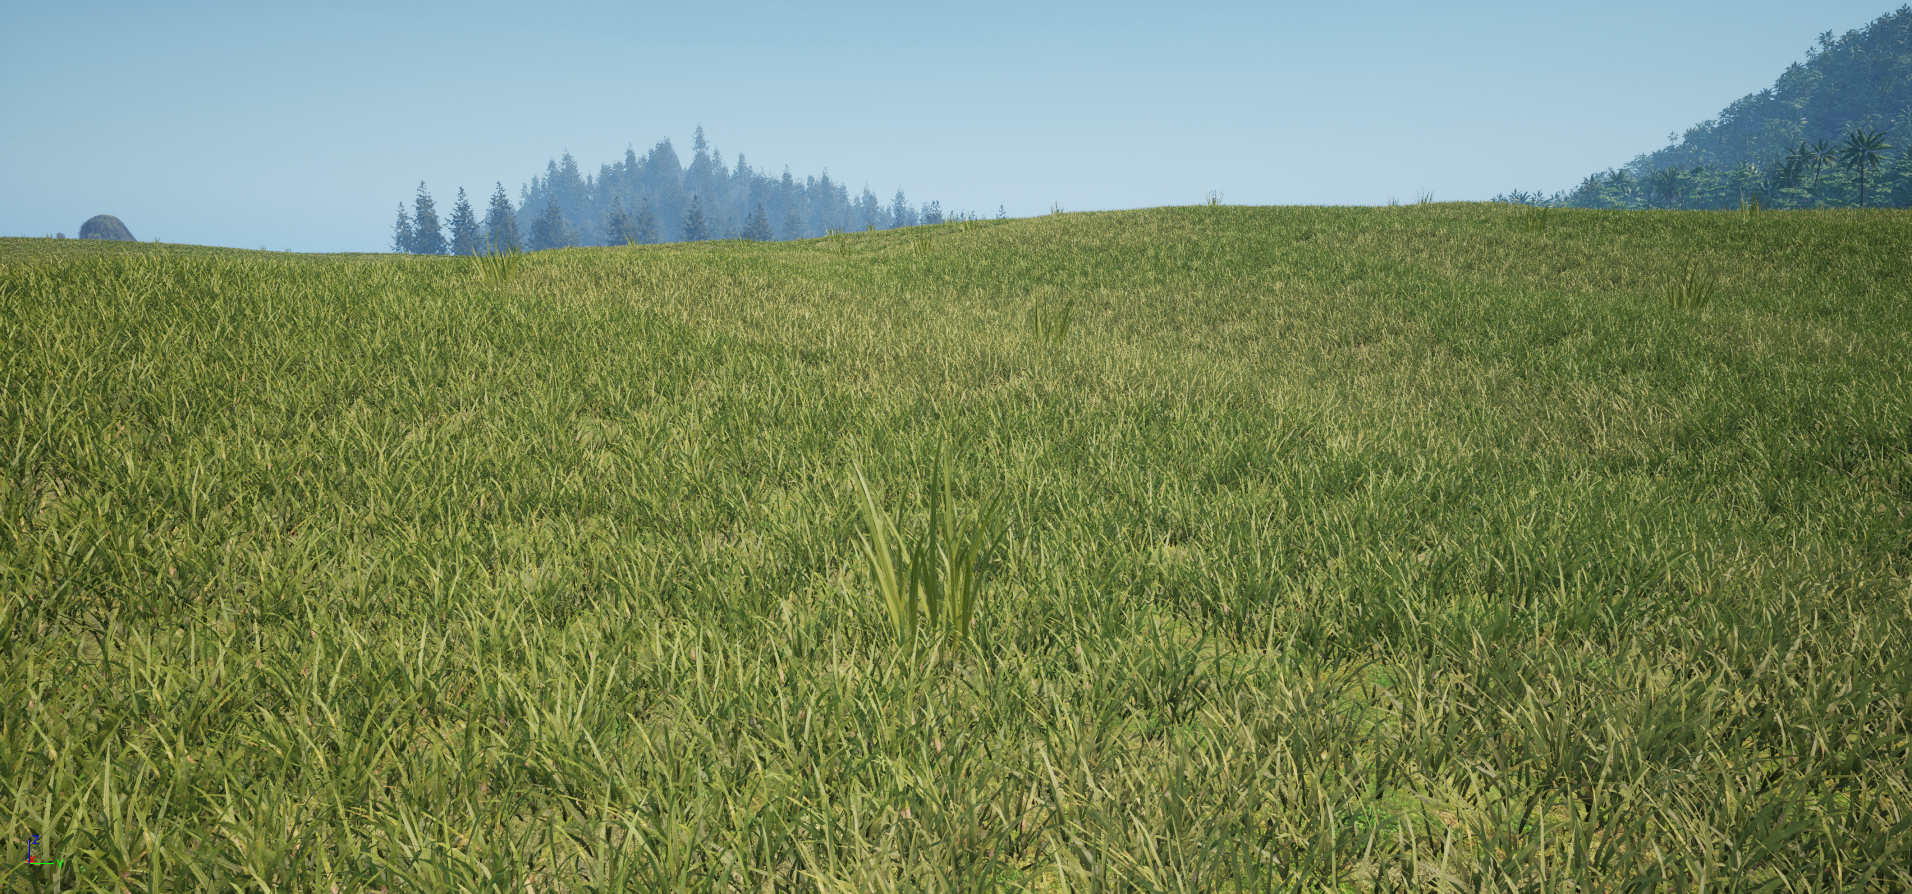
Below is a video of the grass using the normal SimpleGrass WPO:
And below here is one where the SimpleGrass WPO is multiplied out with the Spatial UV height to fix the base on the ground: