Chapter 3 – The Drop-Ins
There are 3 different Drop-Ins included with rdBuildBuddy, each is SubClassed from rdObjectFactory which is the class that creates new Actors, Meshes and Instances. Each of these DropIns has the settings shown below:
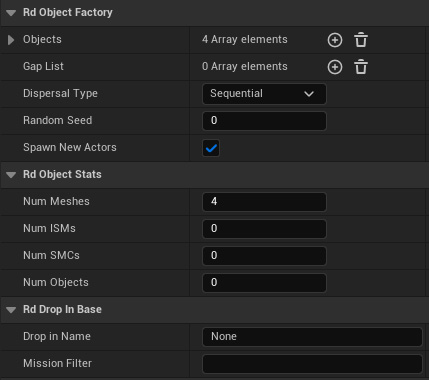
You can add any number of Objects to the “Objects” list – they can be Static Meshes or Actors such as Blueprints. see the next section for more details on adding them.
The Dispersal type controls how the objects are added, “Sequential” selects each object in the list sequentially, looping around. “Random” chooses one from random. “All” places all objects in the list at each point in the build,”Pairs” adds 2 objects at a time sequentially, “Triplets” adds 3 objects at a time sequentially.
The RandomSeed value here can be used as the Seed for all objects random values – if you’re using Blueprints as objects, created with rdBPtools – those will use this Seed as well.
The “Spawn New Actors” option spawns new Actor Objects when ticked – when not ticked, they are added as Child Components.
The “Stats” section of the details pane just lists the number of objects your build’s have created.
The other options are “Drop In Name” – this allows you to specify a name for the dropin, can be useful for debugging, and “Mission Filter” – the DropIn will only create actors when the specified “Mission” is active.
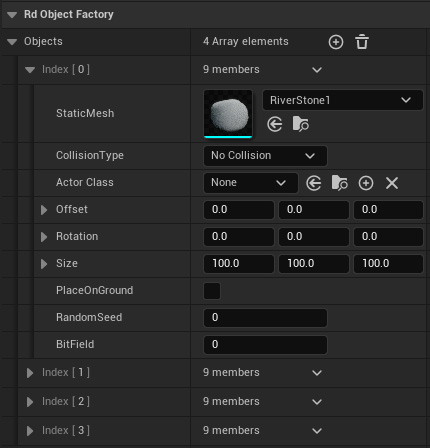
Each Object you add to the Objects list has the options as shown to the left. You can choose a StaticMesh and Collision Type (for Instancing) or an Actor Class in the selector.
Each object can have it’s own offset, rotation and over-ridable Size (non-zero).
When “PlaceOnGround” is ticked, the object will be placed on the ground, either the landscape or any meshes already lying on the ground. When it’s not ticked, the Z position will be used.
You can also specify a Random Seed unique for this object, and a 64bit Bitfield, each bit denoting a custom value to pass through to the object being created (useful for rdBPtools created Blueprint Objects).
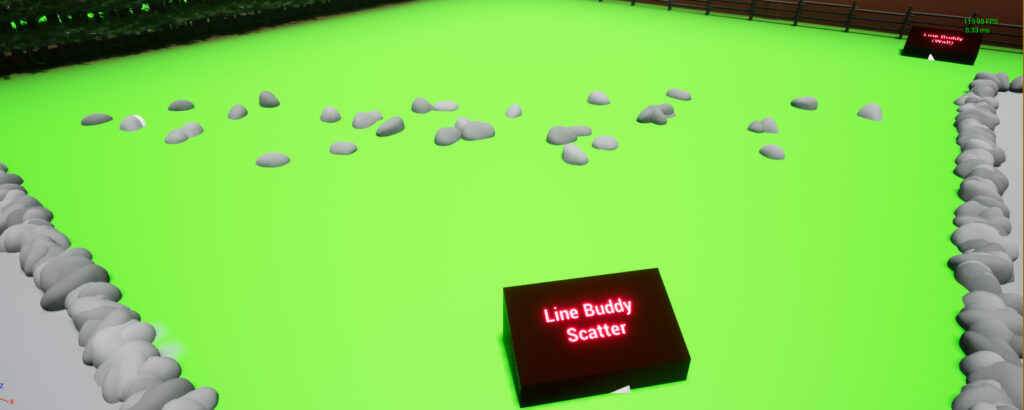
1. Scatter
The Scatter Drop-In is a Scatter System with all the normal settings to control the variation, density and object collections. The objects can either be placed on the ground or at specified z locations.
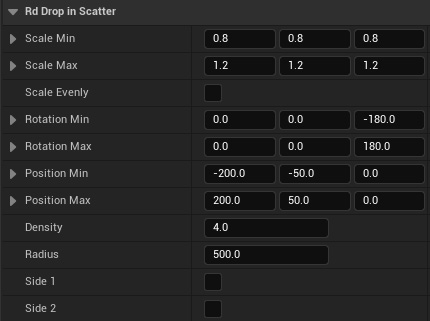
You can control how the objects are placed from the Scatter section of the Details Panel (be sure to select the DropIn Component first).
The “Min” and “Max” values define the range of randomness for each property.
The Density is how many objects to add per unit of length of the scatter (i.e. per cm) – something like “0.1” gives 10 objects per cm.
The Radius is the Point based Scatter – it’s the radius from the center of the Placement Actor.
2. Distribute
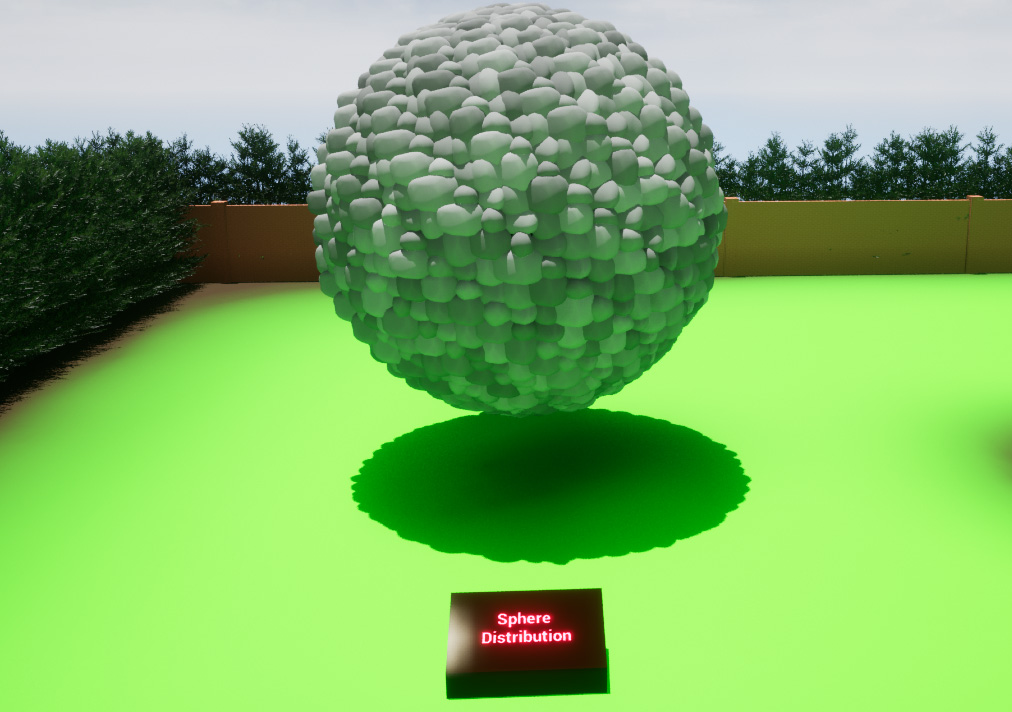
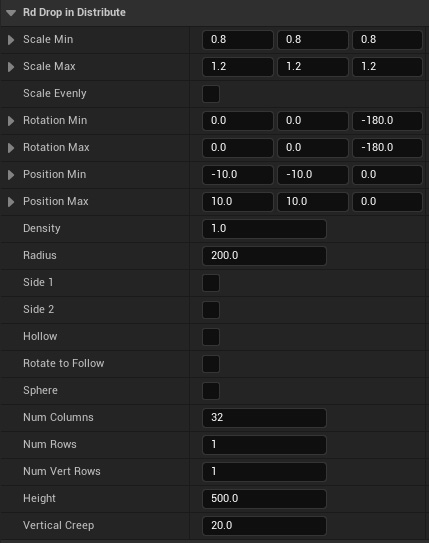
Similar to the Scatter system but with distributed gaps. You specify how many objects per level/row/column and they are spaced accordingly. Like the Scatter, the Objects can be a collection of meshes and/or actors, including other Blueprints.
The Density etc work the same way as the scatter.
There are extra options available to distributed objects, you are able to specify the number of levels, rows and columns and the objects will be distributed in the space set.
You are also able to select if the objects are only distributed around the perimeter (Hollow).
There is also an option for Spherical placement – and an option to add “vertical creep” to each object placed.
3. Wall
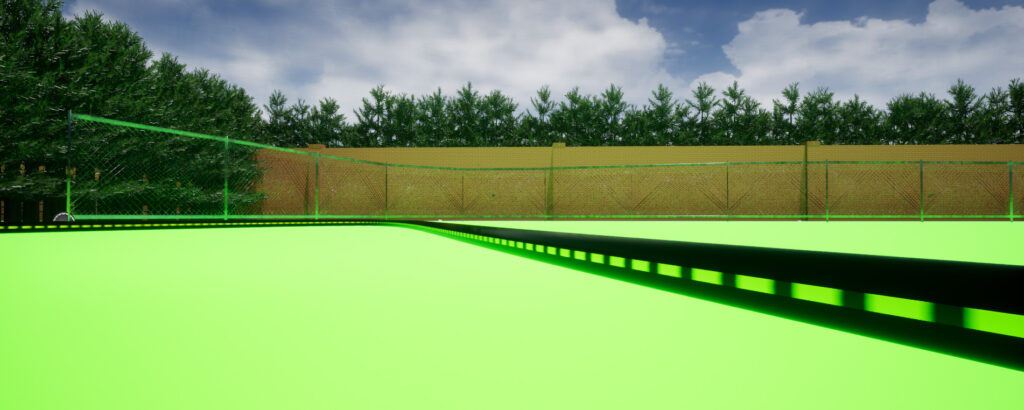
The Wall type is a Wall/Road/Pipe system, placing the collection objects along their path with the objects dimensions used as the distance between objects. This works in much the same way as any other wall/road/pipe creating type systems except it’s not just restricted to Splines – you can use boxes and lines too. The Walls can have levels too. Note that objects created with this tool will only conform to the spline if they’re a SplineMesh, and you have sub-divided the mesh.
