rdTexTools Tutorial 11 – Using Materials to create Textures – part 1.
Last Updated: 29th June 2023
Tutorial created with rdTexTools v1.20
rdTexTools version 1.20 introduces a new tool that allows you to create new textures using a Material as the modifier to your selected textures.
There are two versions, one that runs the material over each of the selected textures, producing a new texture for each – and another that passes all selected textures to a single material, producing one new texture.
This tutorial uses the first technique to create a series of new textures rendered with a sepia tone:
Step 1. Create the Material
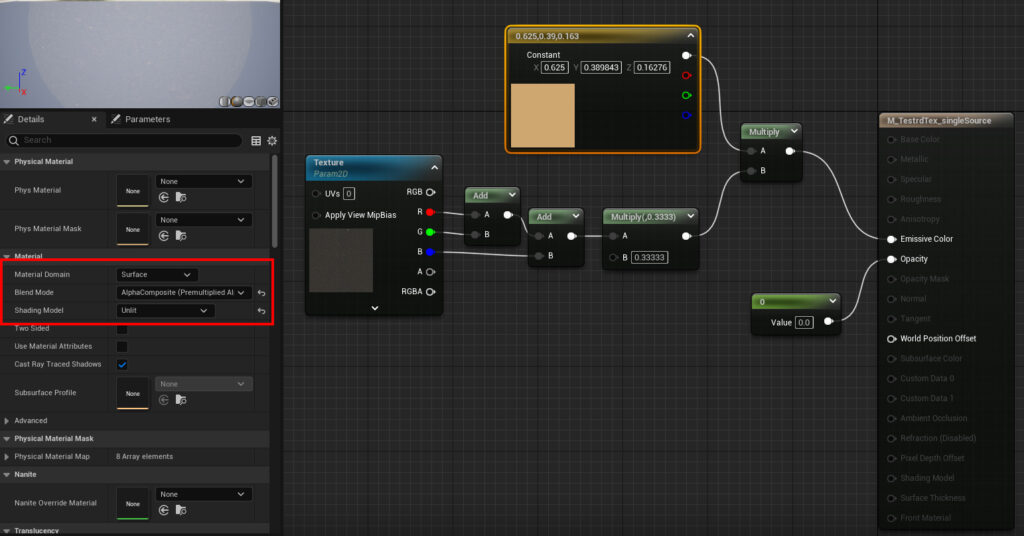
The first step is to create a material to use to convert the textures. Create a Material in the usual way, give it a name you’ll easily find, and set it “PreMultiplied Alpha Composite” – and “Unlit”, then add the following code.
Note that the “Texture Sampler” is a “Texture Parameter” called “Texture”.

Once you’ve made that, just save it and close the material editor.
Step 2. Select the Textures
Select all the textures you’re wanting to create sepia versions of.
Step 3. Run the Material Tool
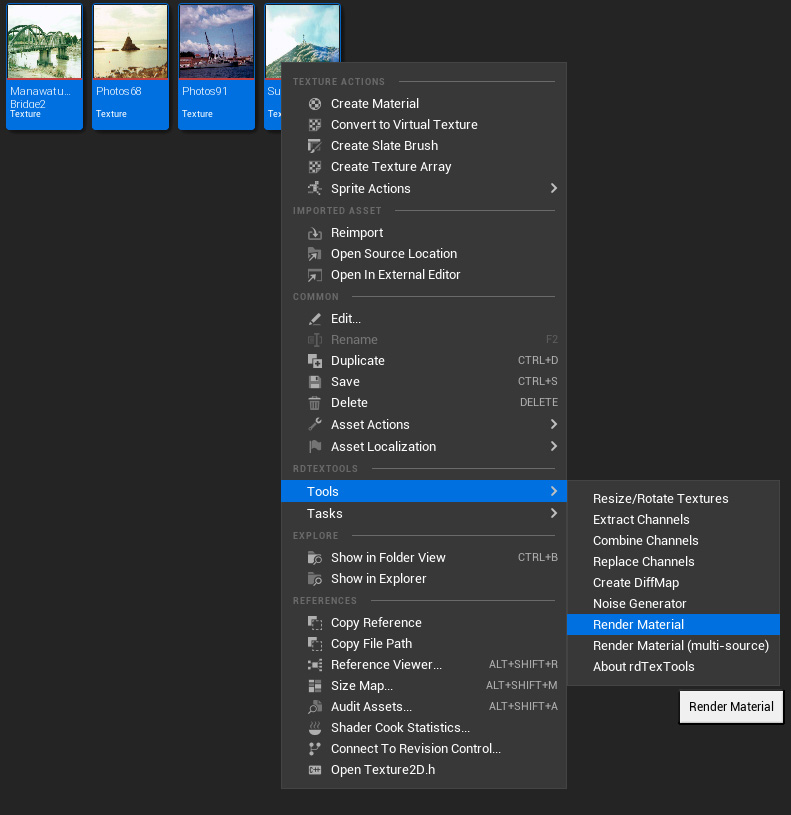
Now right-click and choose the “Material” tool from the rdTexTools section of the menu. That will open the window below:


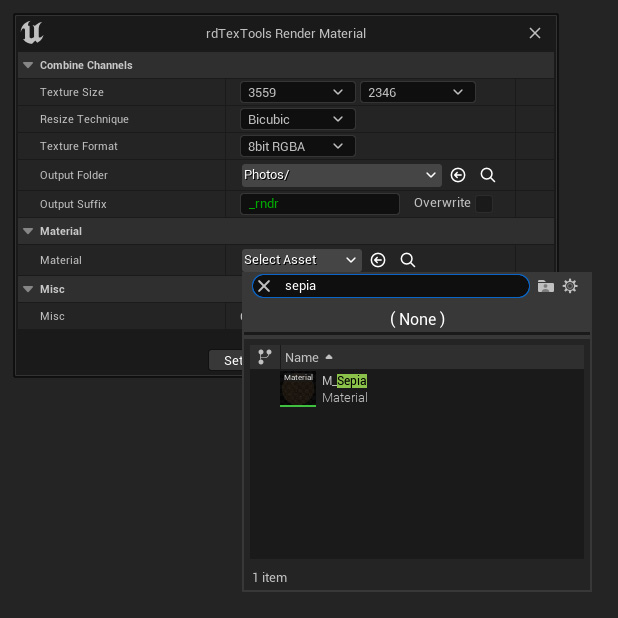
Then choose your sepia material in the Material selector, and ensure you’re happy with the suffix. Then just click “Render”.
Step 4. Done.
Now you will have additional textures with the Sepia rendering:
