rdTexTools Tutorial 5 – Creating Hard or Soft Masks
Last Updated: 13th December 2021
Tutorial created with rdTexTools v1.10
Introduction
One of the things the “CreateDiffMap” tool does well is create masks of existing textures.
The masks can be either Hard (1.0 for on and 0.0 for off) or Soft (ranging between 0.0 and 1.0 depending on the tolerance).
The created masks can be used for many things, you can directly use them in your material blueprints to apply effects to masked areas such as rust or wear, use them as a mask to draw detail into a material from a generic texture – eg use 1 set of textures for concrete for all your meshes, using just a mask for where it should be rendered, or even use the masks for the “CreateDiffMap” tool itself to only scan or apply to the masked pixels (See the HDRI tutorial for an example).
Step 1.
In this tutorial I’m wanting to create a tag type wall decal texture to put on the brick wall in the garden demo.
- Either open the texture in the UE Texture Editor and Select “CreateDiffMap” from the rdTexTools toolbar menu or select a texture in the content browser, right-click and select “CreateDiffMap” in the Context Menu.
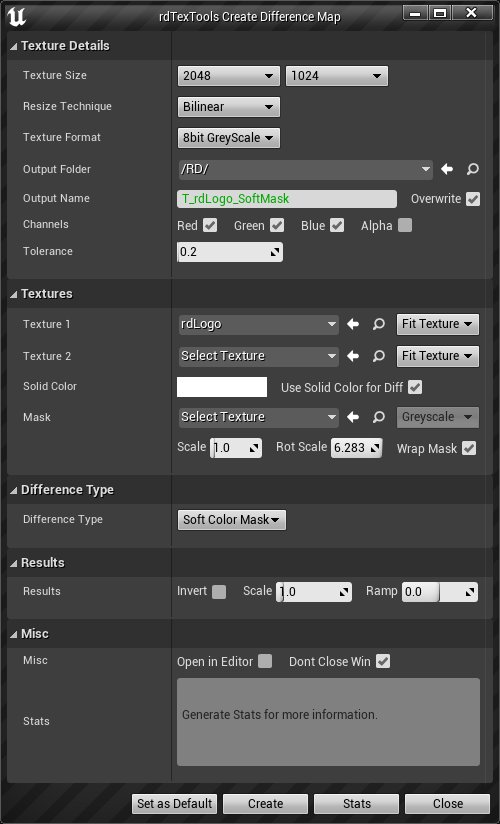
- Select the resolution you want, make the format 8bit Greyscale and select an output name for the texture.
- Set the Tolerance to 0.2 – that removes any of the dark blue areas and concentrates on the white.
- Leave the R, G and B channels ticked (not alpha).
- Select the logo texture as Texture1 and tick “Use Solid Color for Diff” and leave as white for the comparison.
- Select “Soft Color Mask” as the Difference type, then select “Create”.
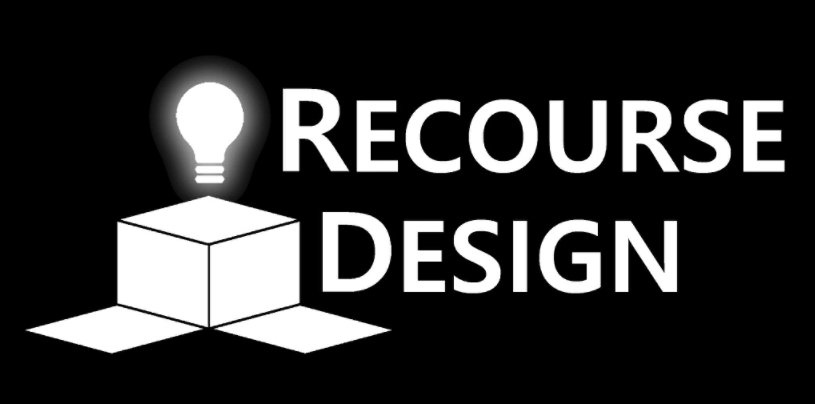
This creates a texture like the one to the right where pixels that were close to the Solid Color we used are colored white or a shade of depending on how close to the color the original pixel was.
The next step is to warp the mask a bit to give it some style…
Step 2.
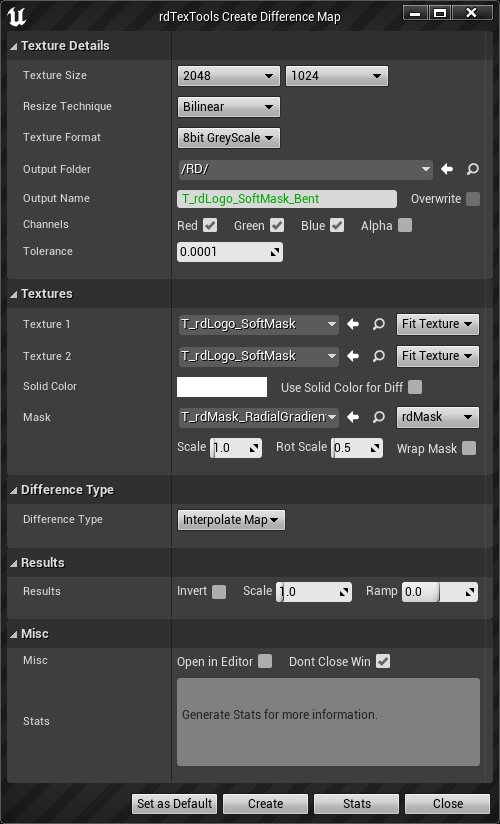
- Open the CreateDiff tool again, and set a name for the warped texture, keep the resolution and format the same as the original, and the tolerance can be the default.
- Select the SoftMask just made as both the Texture1 and Texture2 (make sure “Use Solid Color” is unticked).
- Select the RadialGradient rdMask (download from here)
- Set “Interpolate Map” as the Difference Type.
- Click “Create”
This gives us a warped logo as below:
Step 3.
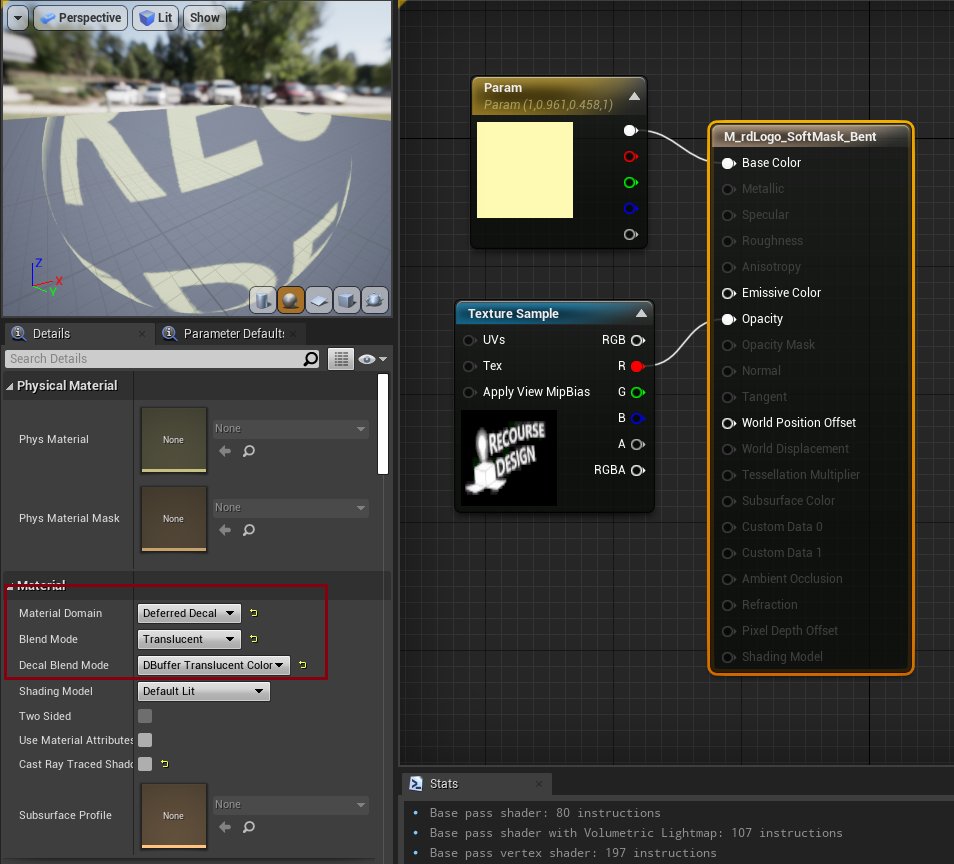
- Create a material (In the tutorial it’s called “M_rdLogo_SoftMask_Bent”) and change the Material Domain to “Deferred Decal”, the Blend Mode to “Translucent” and the Decal Blend Mode to “DBuffer Translucent Color”.
- Add the Mask we created in Step 1 and link it to the Opacity Input of the Material.
- Add a Color of your choice and link it to the Base Color.
This is of course the simplest use of masks – they can be used for many things, but this should give an idea on how to go about creating and using them.
