Step 2.
The next step to creating the landscape is to Choose and optimize the textures.
For the tutorial, all the textures were downloaded with Quixel Bridge and then manually imported into UE by dragging them into the appropriate folders. If you plan on using the Specular, Roughness, AO and Displacement textures by themselves without combining into a SRAODP file you will also need to change the compression types on those textures to “Alpha” to use full pixel resolution and stop them applying SRGB.
You can also import them with the Bridge plugin. This can also create materials for each texture set and sets the correct compression types, saving a lot of time – but as we’re focusing on optimizing and de-tiling the textures for this tutorial we’re creating our own materials.
For reference, these are the texture sets used in the tutorial:
- Gravel – Surface > Gravel > Construction > Crushed Stone
- PottingSoil – Surface > Soil > Mud > Soil Mud (Darkened to 0.5)
- MossyStones – Surface > Moss > Mossy > Mossy Creek Stones
- Mud – Surface > Soil > Mud > Soil Mud
- SoilMulch – Surface > Soil > Mulch > Soil Mulch
When it comes to naming your textures – How you do name them will affect your workflow going forward.
It pays to try and follow the Epic conventions, e.g. prefix with T_ and specify the map type with a suffix, e.g. _D.
This allows tools such as the rdTexTools Resize to be able to locate associated textures by checking the suffix.
To save a lot of time in later steps you can also add more prefixes. In this tutorial all the landscape textures will be prefixed with “T_MS_L_” – the T for Texture, the MS for MegaScans and the L for Landscape.
With those prefixes it’s possible to go to the root (or any) folder of the project in the Content Browser, and just type “T_MS_” to list all MegaScans textures in the project, or “T_MS_L_” to list all of the Landscape textures specifically.
Then you can easily select all and apply bulk operations to them.
It also makes it easier when searching through a drop-down list of materials, you can just type T_MS_L_ into the search box and it will filter to just your landscape materials.
The same applies for foliage and surfaces so you can filter those out too.
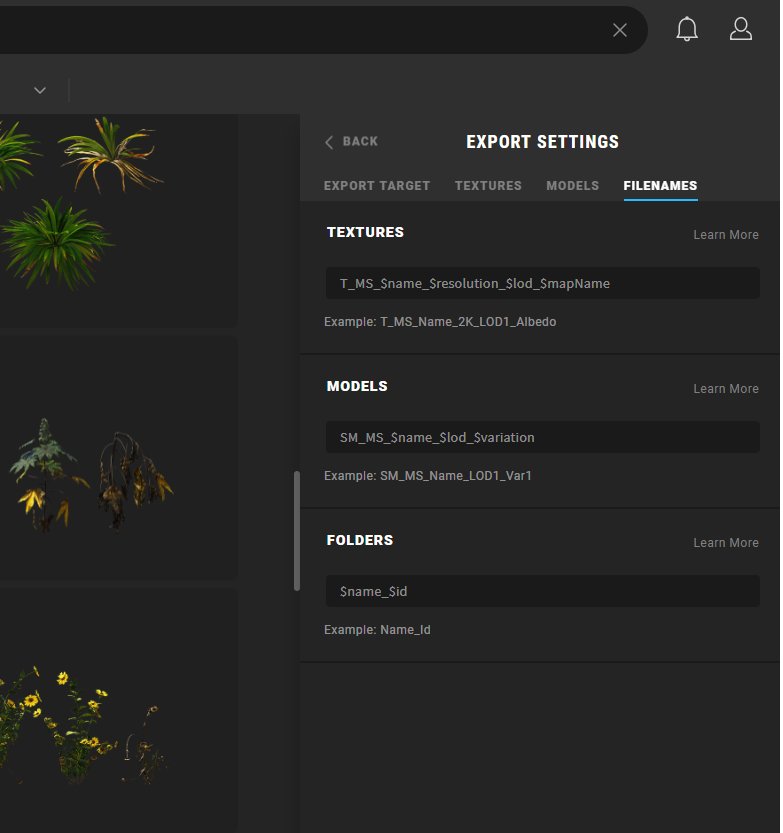
If you’re using the Bridge Plugin for importing the materials and textures directly from Bridge, you can specify how each of the imported textures (and meshes etc) are named.
Just go to Edit->Export Settings and then Select the FILENAMES tab in the properties pane. From there you can use the built-in variables along with the UE conventions.
For example, for Textures, it can be T_MS_$name_$resolution_$lod_$mapName.
It still needs to have the “$mapName” renamed to the Epic standard of _D for diffuse etc – and if you’re using sub-type prefixes (e.g. _F for foliage) you will need to add those.
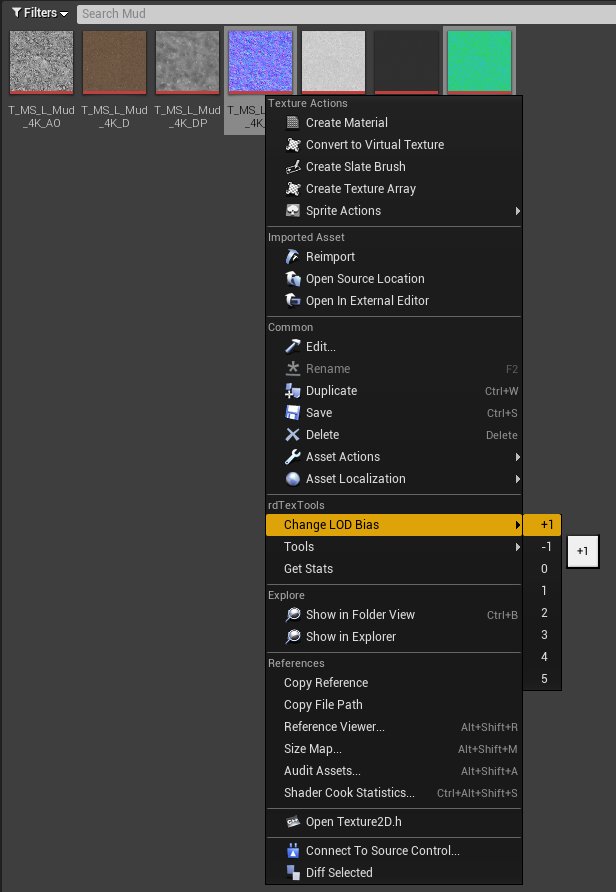
Follow the steps below for each Landscape Layer material set:
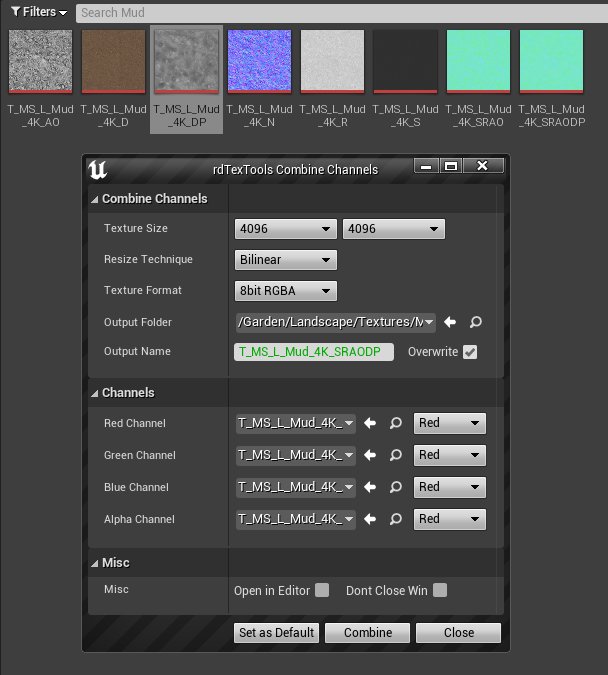
- Right Click one of the textures in the Texture Editor and select Combine Channels from the rdTexTools section of the menu.
- Select the resolution you want and set the Format to 8bit RGBA.
- Choose a name for the combined texture, I suffix with “SRAODP” (Spec,Rough,AO,Displacement)
- Select the Specular texture in the Red Channel, the Roughness texture in the Green Channel, the AO in the Blue Channel and the Displacement in the Alpha Channel.
- Click “Combine” and the new texture will be created.
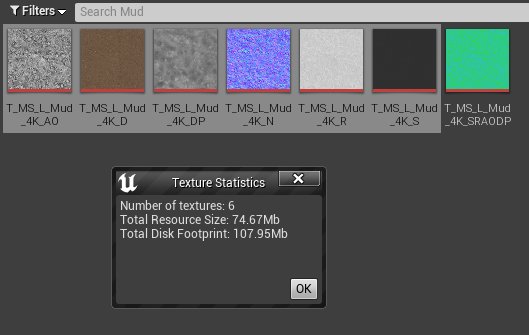
The total size of the original textures will vary depending on whether you have downloaded 8bit or 16bit versions of files. With all the best quality textures, the total size can be 234.67Mb for each texture set. Some of the textures may be compressed with alpha when they don’t contain alpha data, so it pays to go through your textures and check for that. With the 8bit versions and no alpha that comes down to 74.67Mb – in this tutorial it’s using a combination of both, but the figures for calculating the reduction are based on the 8bit versions.
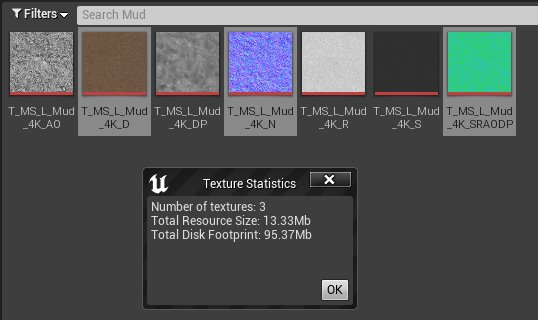
This reduces the number of textures from 6 to 3, and the GPU memory drops from 74.67Mb down to 53.33Mb – if you aren’t wanting the displacement map that would be 32.Mb.


Then change the LOD Bias on those textures to 1 (forcing 2048×2048).
This reduces the GPU memory down to 13Mb for this Landscape Layers textures.
Now the final step is to take the Normal and SRAOFP textures down to 1024×1024. The tessellation is set to around 6 pixels so a smaller Displacement map doesn’t show any difference and the Specular, Roughness and AO don’t show much as they’re interacting with the lighting. The normal can be smaller as the tessellation adds lighting to everything – plus the de-tiling and puddles would hide any noticeable difference anyway.
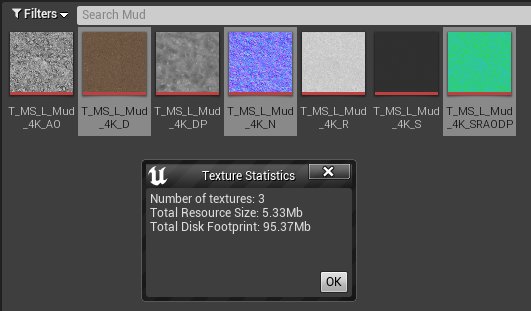
This reduces the GPU memory usage for each texture set down to 5.33Mb – bringing it down to 7% of the original 4K textures or 28% of the original 2K textures. A huge saving.
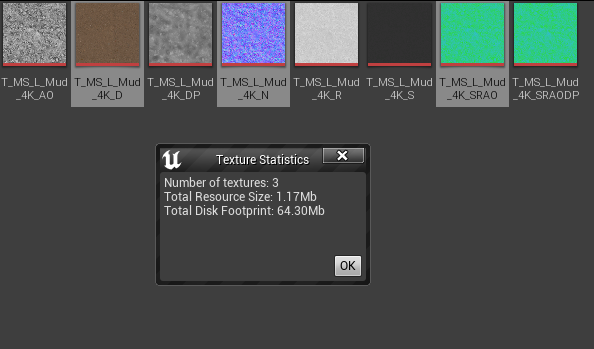
If you’re wanting to optimize for mobile platforms you can take it even further – firstly you won’t need the displacement map so that can be omitted, and the packed SRAODP texture size can be reduced to 512×512, as can the Normal. The diffuse can be sized to 1024×1024. Often you’ll only want just the diffuse and normal for mobile too, so that’s less.
Each texture set with SRAODP is 1.17Mb.
Each texture set without is 1.00Mb.
So for the all the textures used in all the layers of the landscape (excluding masks) we get these results:
- Original 4K textures – 30 textures, 373.35 Megabytes GPU memory
- Original 2K textures – 30 textures, 93.35 Megabytes GPU memory
- Optimized for PC – 15 textures, 26.65 Megabytes GPU memory
- Optimized for Mobile – 15 textures, 5.85 Megabytes GPU memory (5.00Mb without SRAODP)