rdBPtools Tutorial 19 – Converting to LevelInstances/PackedLevelActors
Last Updated: 19th July 2023
Tutorial created using rdBPtools version 1.10
Note: This Tutorial is for UE5.0 and above. UE4 does not support LevelInstancing.
With version 1.10 of rdBPtools came a new tool to convert your Blueprint Prefabs over to either LevelInstances or PackedLevelActors. These are basically “levels” that can be either be resident or streamed in multiple times throughout your level. (They don’t use any VRAM until they are streamed in if that’s what you’ve set up).
If you have many different types of Prefabs, each using individual meshes and textures, then LevelInstances can be a great way to optimize your memory usage. The down side is that they can cause a stutter while streaming.
You can combine both Blueprint prefabs and LevelInstance prefabs to very good effect – adding randomized rdBPtools blueprints inside of the LevelInstances is a good way to have your cake and eat it too.
Having a good understanding of Level Instances can help, the official documentation is at:
https://docs.unrealengine.com/5.0/en-US/level-instancing-in-unreal-engine/
This tutorial is simply going to convert our convience store blueprint prefab into a level instance prefab:

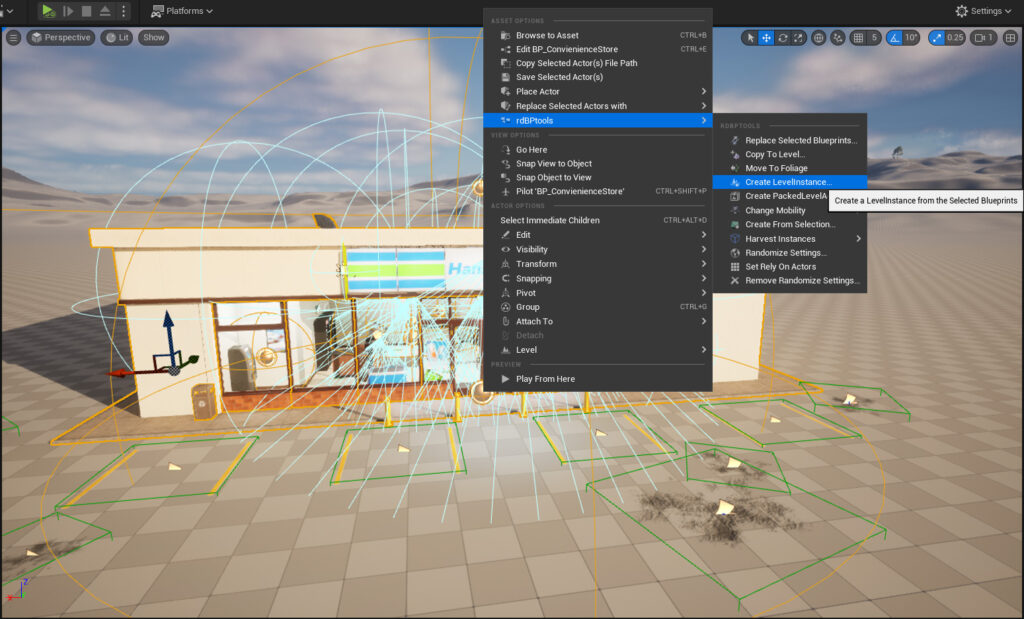
Step 1. Select the Blueprint, and Right-Click – select Create levelInstance
In this example, where using a Blueprint that was created in an earlier tutorial. Any Blueprint will do though, there is nothing specific. Just select the Blueprint in your level, right-click and select “Create LevelInstance” from the rdBPtools section of the menu:
Step 2. Select a pivot
A window will open (there may be a long pause if there are many objects in your blueprint) – from here you can select a pivot type from the drop-down box.
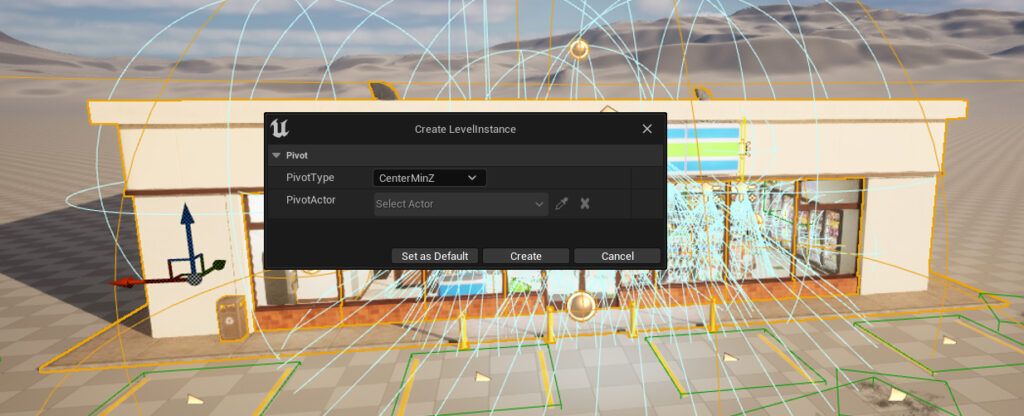
Then a browser dialog will open from where you can select a name for the LevelInstance.
Once you click OK to that – the LevelInstance is created.
Step 3. Set up the newly created LevelInstance.
This will then go ahead and create the LevelInstance – for complex Blueprints such as the convenience store it can take quite some time.
Once it’s done – you can double-click the new level in the content browser to open it and edit it.
Step 4. Done
That’s it. Now the LevelInstance is ready to be used in your levels.