rdBPtools Tutorial 6 – Setting StaticMeshes Instance Configuration
Last Updated: 30th March 2024
Tutorial created using rdBPtools version 1.20
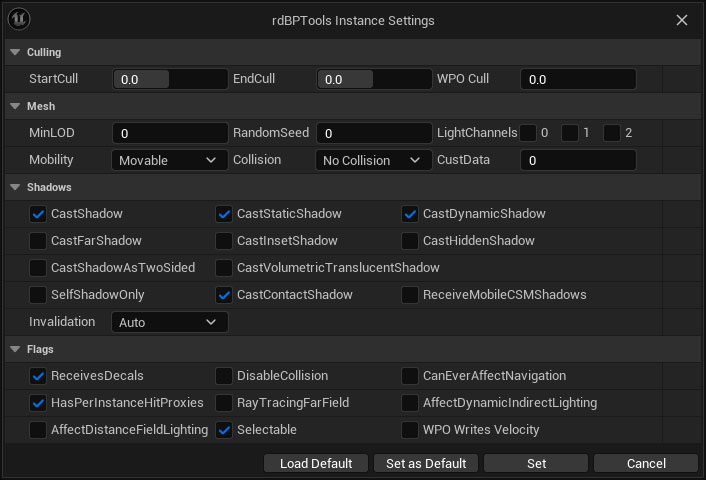
Another tool included with rdBPtools is the “Set Instance Settings” tool.
This tool allows you to configure any/all Static Meshes with their own Instancing Settings, like shadows, culling, lightmaps etc.
The information is stored in the StaticMesh itself and is transporting along with the mesh, so once you made these settings you don’t have to make them again.
If you’re wanting to have the same StaticMesh with different settings, Duplicate the Mesh and set each copy to how you want them rendered, just remember which is which…
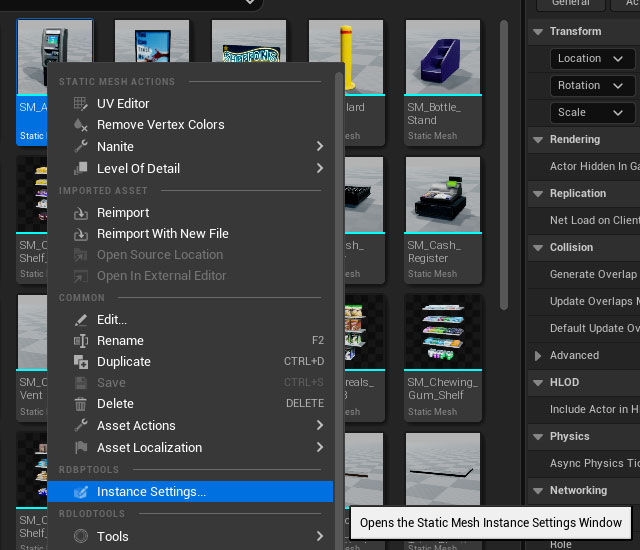
To Change these settings, just select as many as you wish in the Content Browser and Right-Click – select “Instance Settings…” from the rdBPtools submenu in the Content Menu
This opens the Window with your Options. To find out more about each option, look at Epics Documentation on their Foliage Instance Settings:
The options in this window support Indeterminate values, so if you change some values with a selection of meshes with various settings, the unique values will not be changed.