rdBPtools Tutorial 23 – Building HLODs from rdPrefabs
Last Updated: 27th January 2024
Tutorial created using rdBPtools 1.12
Firstly, if you’re not familiar with building HLODs, visit the link below to learn the process:
By default, when building HLODs when using Instanced Static Meshes or ChildActors, they will be missed from the build.
To overcome this, rdBPtools has tools built in to convert the prefab to using StaticMeshComonents for all instances – the HLOD can be built using those, then the prefab can be converted back to using instances.
You can convert multiple prefabs at once by selecting all you want in the HLOD and using the context menu.
This tutorial shows how to switch to static meshes, create the HLOD and then switch back.
Step 1. Create some assets on a landscape tile for HLOD’ing
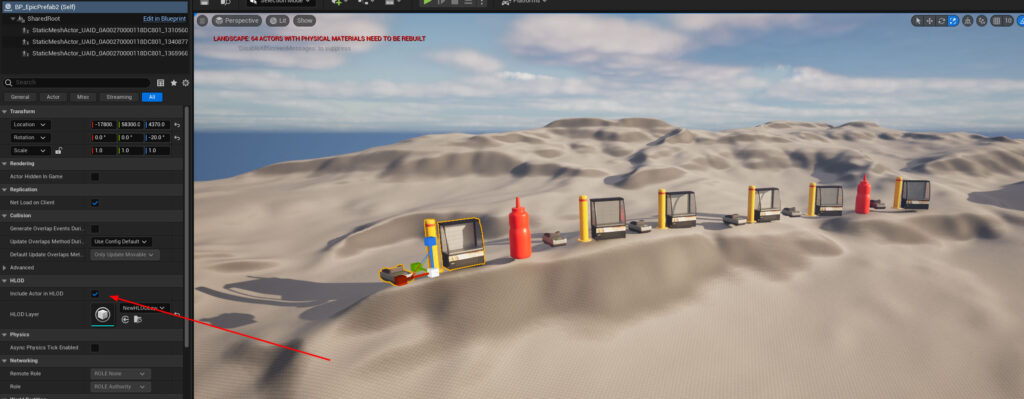
The first step is to add some assets to the landscape for the HLOD conversion. Make sure that “Include Actor in HLOD” is ticked for each actor and the HLOD layer is selected (or set the default layer in world settings).
In this example, a type of each different prefab is included – using the Epic Convert to Blueprint, and rdBPtools native instances, native components, rdInst instances and rdInst components. It highlights what can be converted.
Note: if you want to include third-party prefabs that don’t work with HLOD, convert them to rdBPtools prefabs first.
Step 2. Switch to Static Meshes
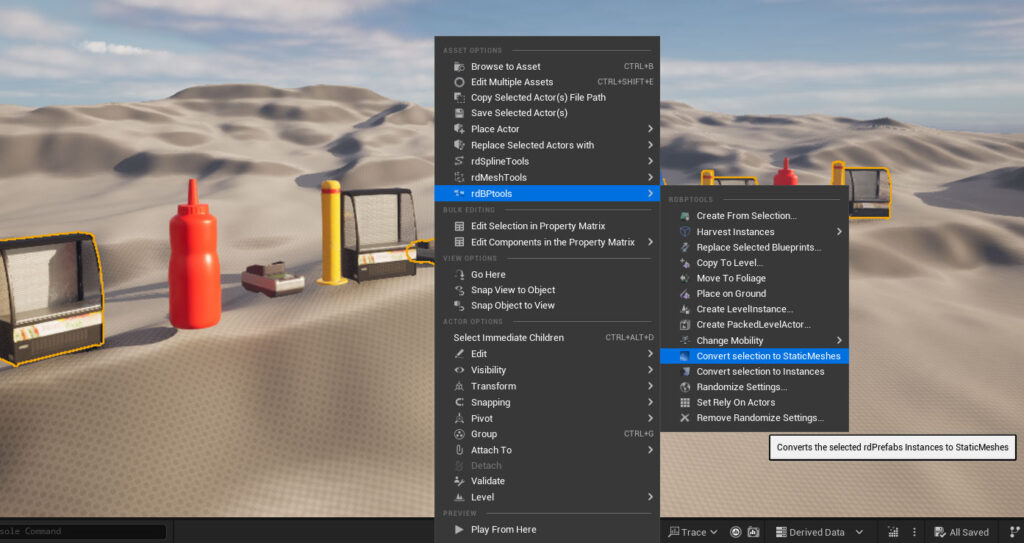
Now select all the Instance and Child Actor based prefabs you’re wanting in the HLOD. You can do this either in the level itself or in the world outliner.
Right-Click and select the “Convert to Static Meshes” in the rdBPtools section of the context menu.
Step 3. Create the HLOD
Now build the HLOD. The method of building is described in the document linked above. It’s fairly simple just to create a batch file which executes the HLOD build commandlet. The document is using UE4, just change it to your current version, this tutorial uses UE5.3, installed in the default location so the batch file/dos command is (replace the project and the map name with yours)
"C:\Program Files\Epic Games\UE_5.3\Engine\Binaries\Win64\UnrealEditor.exe" MyProject.uproject MyMap -run=WorldPartitionBuilderCommandlet -AllowCommandletRendering -Builder=WorldPartitionHLODsBuilder
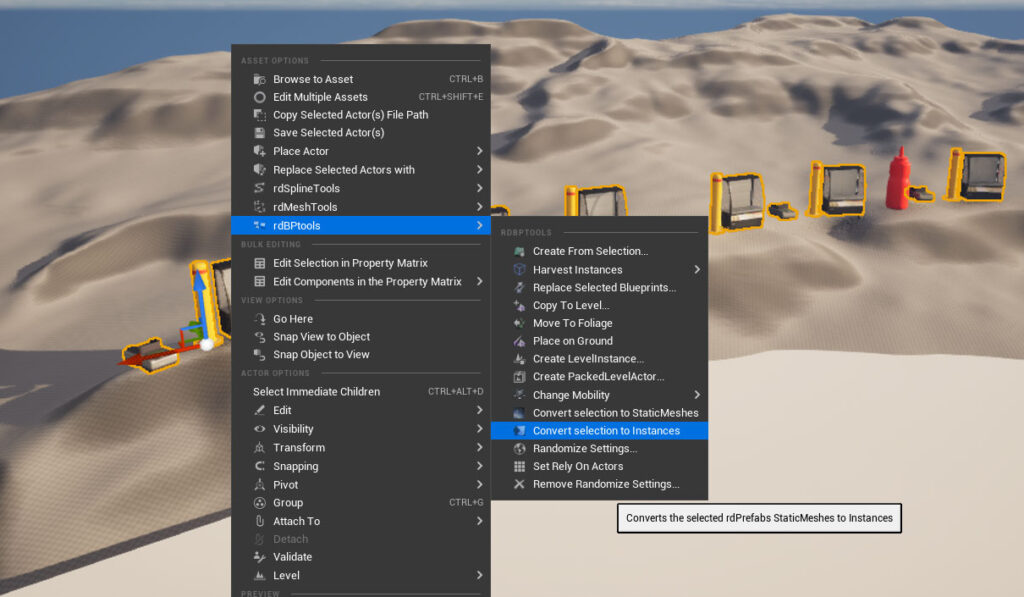
Step 4. Switch back to Instances
Select your prefab actors again, and now select the “Convert to Instances” option in the context menu.
Step 5. Done
That’s it – you can test by moving far away from the area where the HLOD is built until it switches in – then move closer again to switch it out.