rdInst Tutorial 20 – Creating a simple Pool Manager for any Actor types.
Last Updated: 22nd August 2023
Tutorial created using rdInst version 1.23
You can use rdInst to Pool any type of actor, it doesn’t have to be subclassed from rdActor.
This tutorial goes over creating a simple Blueprint to handle all actor pooling and using the pooled actors from the First Person template.
You can download the Pool Manager Blueprint Here (UE5.2).
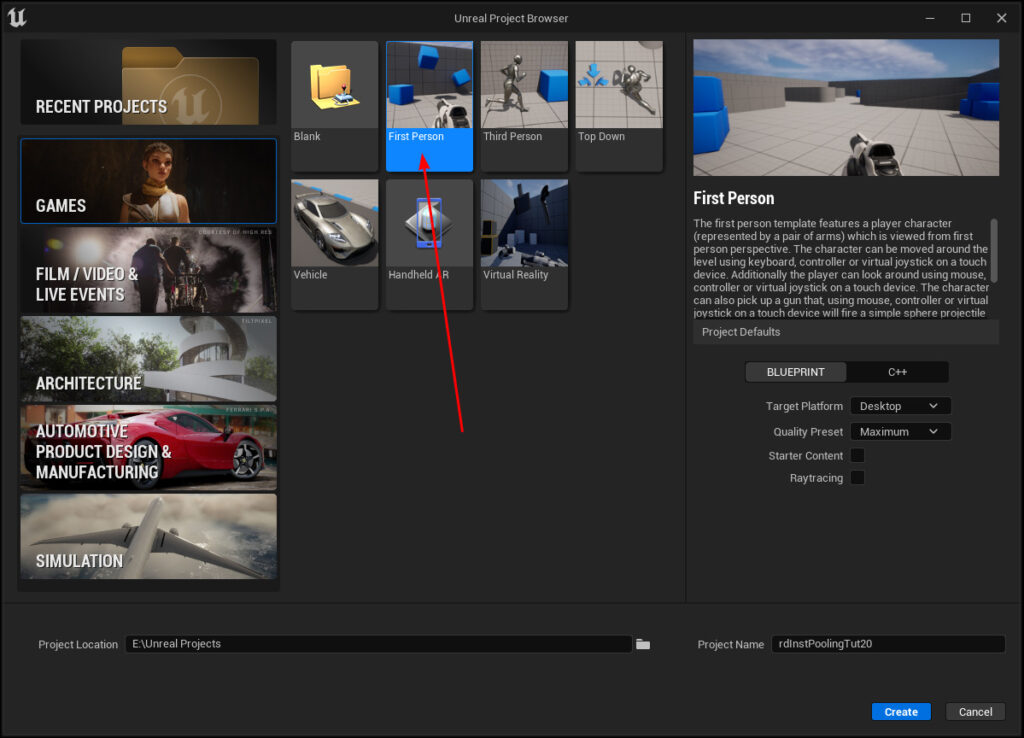
Step 1. Create a new project based on the First Person template.
Create a new project based on the First Person template, and enable the rdInst plugin from the Edit->Plugins menu.
Step 2. Create the Pool Manager Blueprint.
Create a new Blueprint Actor subclassed from rdActor.

Step 3. Create a Function for creating the Pools.
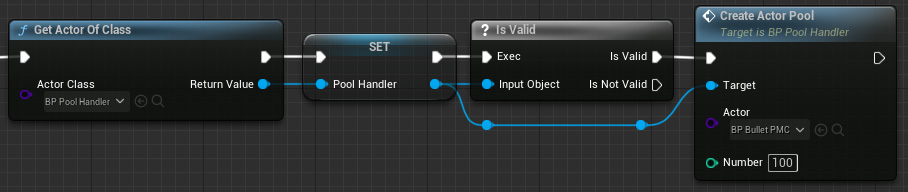
The first function is called by your PlayerCharacter in its BeginPlay to pool the actors. Create the function and make it like the snapshot below:
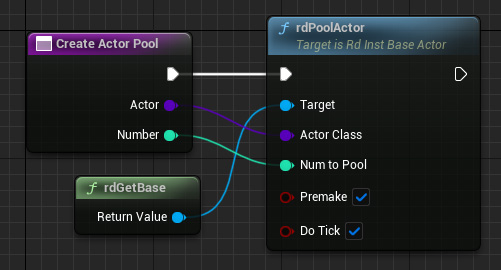
Make sure that “Premake” is ticked, and if you’re using the tick, make sure that’s ticked too.
If you are wanting to specify is the actor is pre-made, or has tick, add parameters for those too.
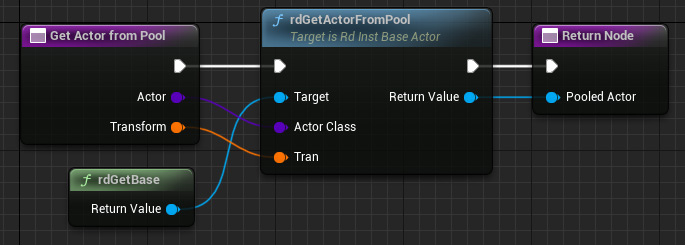
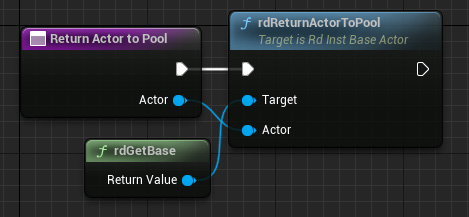
Step 4. Create Functions for Pooling and Releasing Pooled Actors, and the Listener.
Now we make the Pool and Release Functions:
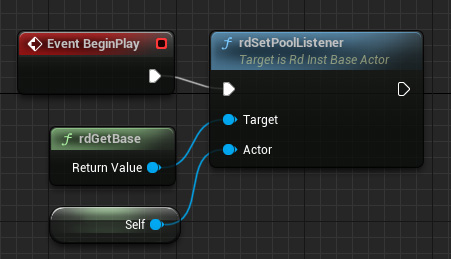
Now in the BeginPlay of the Blueprint, set the Pool Listener to this Blueprint:
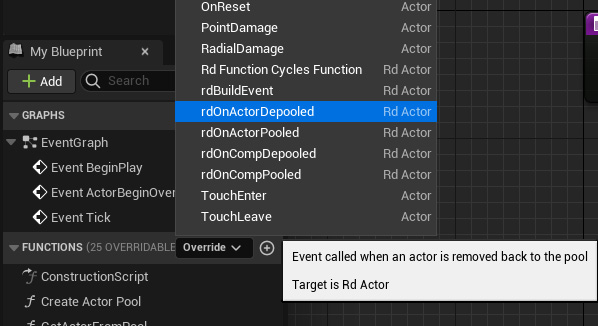
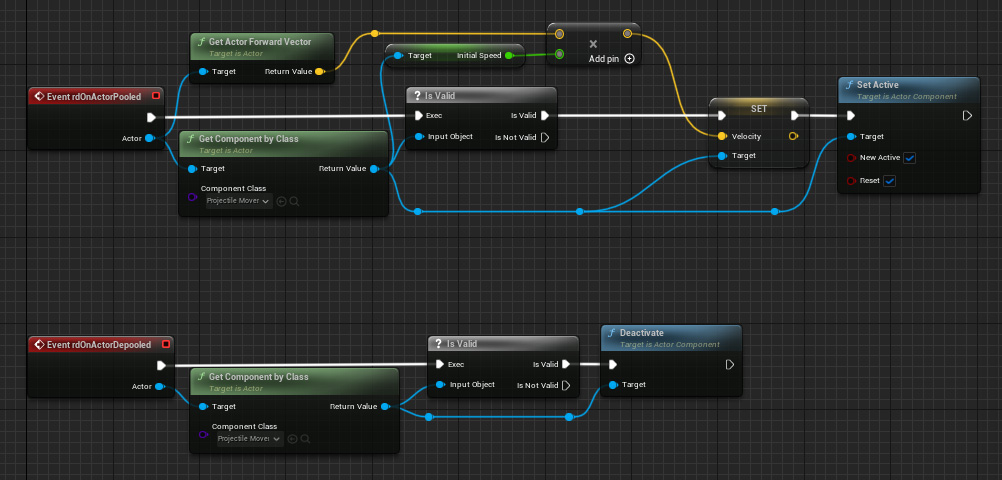
And Override the two Pool Events:
Step 5. Compile and add to your level.
You can just drag the compiled Blueprint actor into level to use – or you can spawn it dynamically – just make sure that it has been spawned before your Player Characters BeginPlay is called.
Step 6. Add a Variable to your Player Character for Referencing the Blueprint.
Add a new variable to your BP_FirstPersonCharacter Blueprint and set to a reference to the BP_Handler. Make sure that it’s public (the eye is lit).

Step 7. Create a Blueprint for your projectile, using whatever Actor type you wish.
If you’ve already got a projectile actor, you can use that, otherwise a simple project actor with a ProjectileMovementComponent like in Tutorial 19 will suffice.
Step 8. In BeginPlay, set that reference and Pool your projectile Actors.

Just add those nodes at the end of the existing BeginPlay event in your PlayerCharacter blueprint (BP_FirstPersonCharacter).
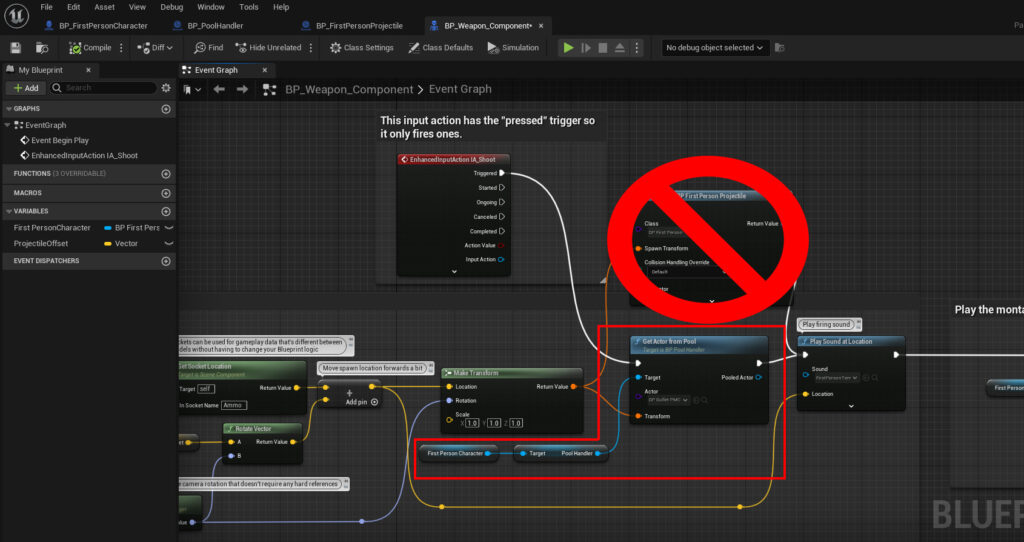
Step 9. In your Fire event, replace the default projectile spawning with the Pooled Actor.
Now all that’s left is to get those projectiles to fire. The Fire event is triggered from the BP_Weapon_Component, so open that in your Blueprint and just add the nodes outlined in red – they replace the “Spawn Actor” so unlink that.
Note: If you’re projectiles are not based on rdActor, to return them to the pool you will need to have a reference to the PoolHandler Blueprint in your Projectile code.
Step 10. Done.
That’s it – you should now have pooled projectiles.