rdInst Tutorial 34 – Saving and Loading rdProxy States
Last Updated: 19th February 2024
Tutorial created with rdInst version 1.35
Download Project file (UE4.27 up)
Manual Page for rdProxy States
Sometimes when you want to use proxies – you need to be able to save the state of the actor when it’s swapped out – and load it again whenever it’s swapped in.
rdInst provides a State saving system based on UDataAssets – you Subclass a Blueprint off the base “rdStateDataAsset” and add whatever variables you wish to it. Then you pass that Blueprint to the State values when creating your proxy. To get that information in and out of your actor, you have to implement two small functions to pass it through.
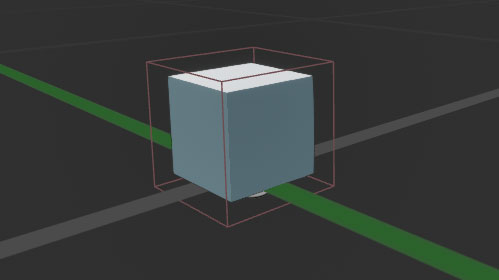
This tutorial will spawn some cubes on the level – when you hit them, they change color – that color is saved in a DataAsset, and restored when swapped back in.
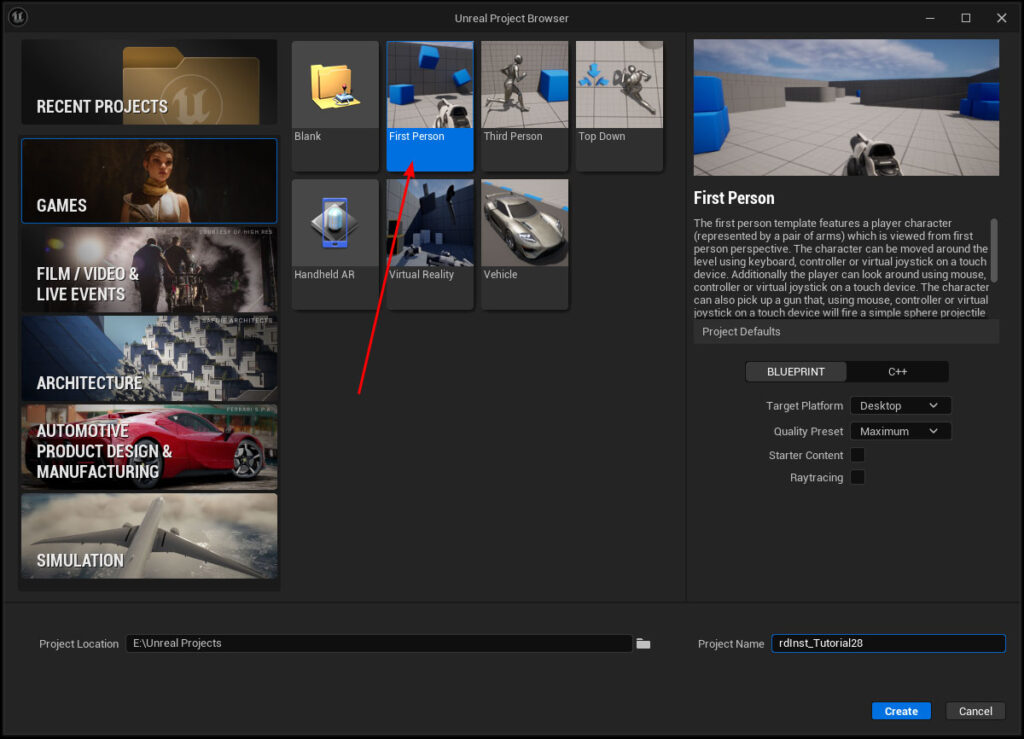
Step 1. Create a new project based on the First Person Template
Either create a new project, or download the project from the link above.
Step 2. Create a Blueprint Subclassed from rdStateDataAsset
Create a new Blueprint that’s subclassed from “rdStateDataAsset” – subclassing like this makes it easy to select the correct DataAsset, and the base StateDataAsset has a bool you can use to indicate that Proxy Actors referencing it shouldn’t fire the Load and Save events.
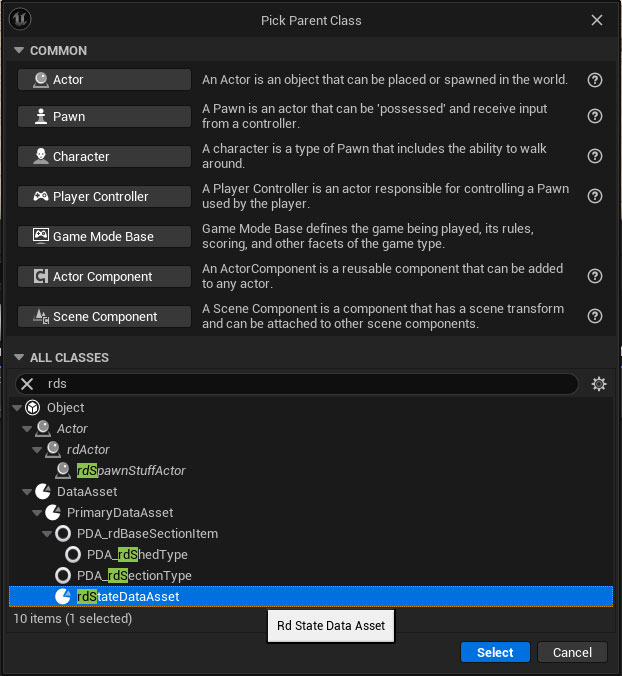
Call it “Cube_ProxyStateData_Base” and open it in the Blueprint Editor. This is our Base DataAsset.
Add a new variable of type LinearColor, and call it “Color”.
Now Create a new DataAsset and select “Cube_ProxyStateData_Base” as the parent. Call this one “Cube_ProxyStateData”.
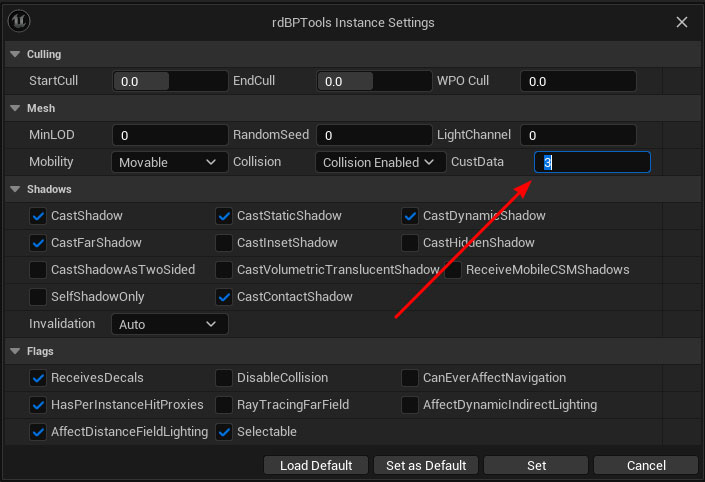
Step 3. Duplicate the System Cube Mesh
Duplicate the System Cube mesh into the Content Folder. Now using rdBPtools, right-click on the mesh and select “rdBPtools->Instance Settings” from the menu. From there, change the “CustData” value to 3. That instructs the Instance Generators to allocate 3 floats per instance for custom data.
Edit the mesh, and change the material to “M_ProxyCol” once you’ve created it in step 5 – it does that in the Blueprint, so this bit is not essential.
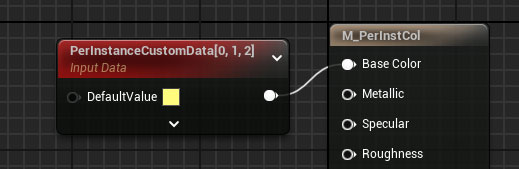
Step 4. Create a Material that uses the per-instance custom data to change color
Create a new Material and just add a “PerInstanceCustomData(0,1,2)” to the BaseColor. Save this as “M_PerInstCol”.
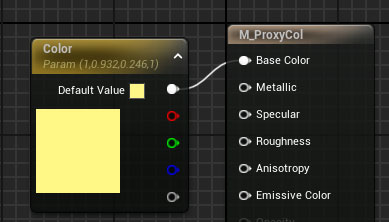
Step 5. Create a Material that has a parameter to change color
Create another material called “M_ProxyCol” and set the BaseColor to a Vector Parameter called “Color”.
Step 6. Create a Proxy Actor and implement the Load and Save States
Now create a new actor subclassed from rdActor – this is our Proxy Actor – call it BP_ProxyActor.
Make a copy of the Epic Cube – copy it to your Content Folder and change the material to “M_PerInstCol”.
Add that Cube, then a Box Collision Component and size it to the size of the cube – or slightly larger – leave both so their centers are at 0.
In the tutorial we also created a thin cylinder at the bottom to show the difference when playing
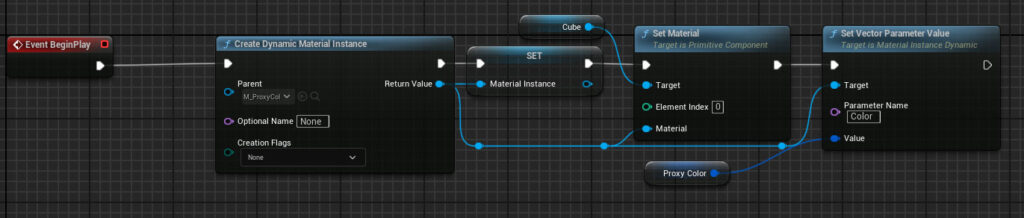
Add a variable of type “Material Instance – Dynamic” and call it “Material Instance”. Then add this code to the BeginPlay
Add an Event Handler to the Collision Boxes “Hit” Event and add the following code:
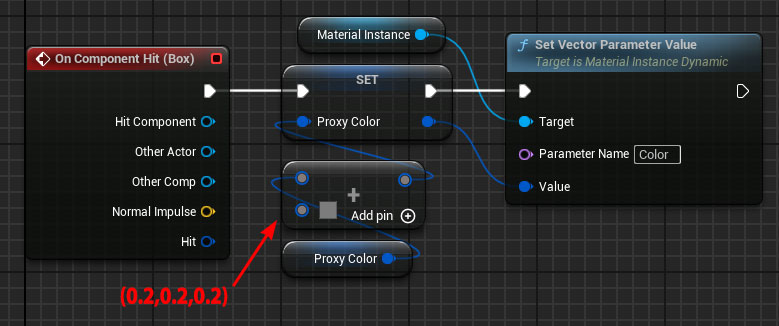
This just lightens the color a bit each time the cube is hit.
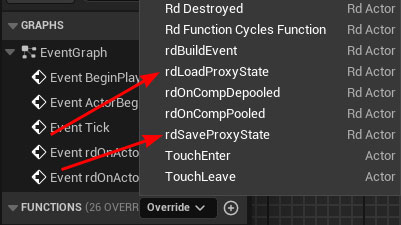
Now you can override the Load and Save Events:

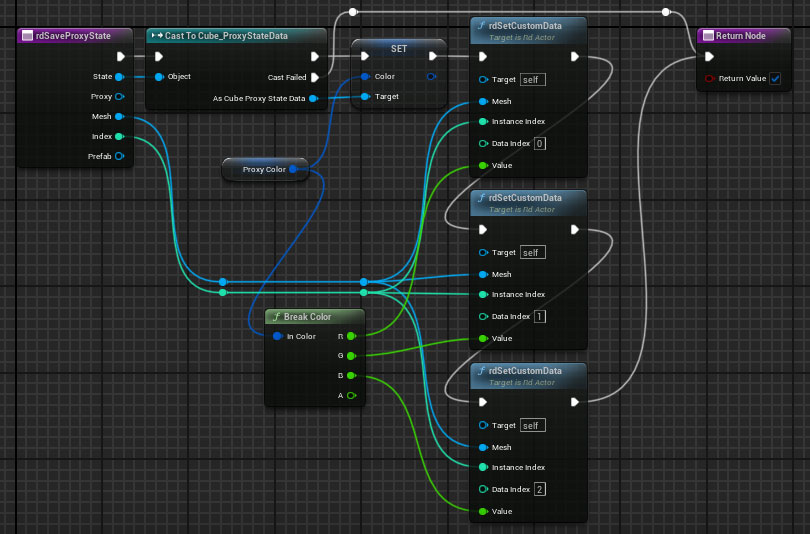
You can see that this also sets the main mesh instances custom data to the color too.
Step 7. Add a rdPopulate Actor, add the Cube to the items list and assign the proxy
Now add a rdPopulate Actor to the level and snap it to the landscape size. Drag the Cube you copied previously into the “Drag-in Meshes” and open up the SpawnData section, then items – and assign the Proxy to our BP_ProxyActor and set the State value to our new ProxyState BP. Set the Offset Z to 150 as well.
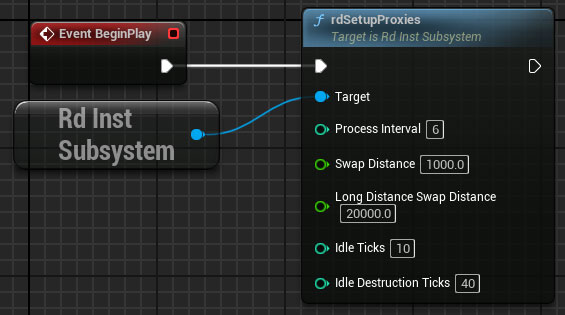
Step 8. Add a SetupProxies call in Level Blueprint
Open the Level Blueprint, and in the BeginPlay Event, add a call to SetupProxies, setting the interval to 6 frames.
Step 9. Done – Play the level.
Now just play the level and shoot the cubes keeping an eye on their colors.