rdInst Tutorial 27 – Long Distance Proxy Actors
Last Updated: 5th February 2024
Tutorial Created with rdInst version 1.35
Download Project File – 132MB (UE4.27 and up)
Long Distance Proxies are similar to the basic proxies, but are swapped at a greater distance. This system is handy for swapping things like AI characters/vehicles from ISMs/HISMs to their fully animated skeletal meshes at a distance close to the horizon and for triggering spawn points which can then spawn actors, proxy instances or prefabs, or even more spawn points.
You can have states for your AI/Vehicles etc, just create a data asset containing the information required (e.g. health, stamina, weapon type etc) and implement the load and save state functions which get called when swapping in and out of the proxy.
This tutorial shows how to add long distance proxy actors, swapping a simple AI bot and spawning them from spawn points.
We use the First Person template for this as it has a projectile, and add the third person content for the skeletal mesh and animations.
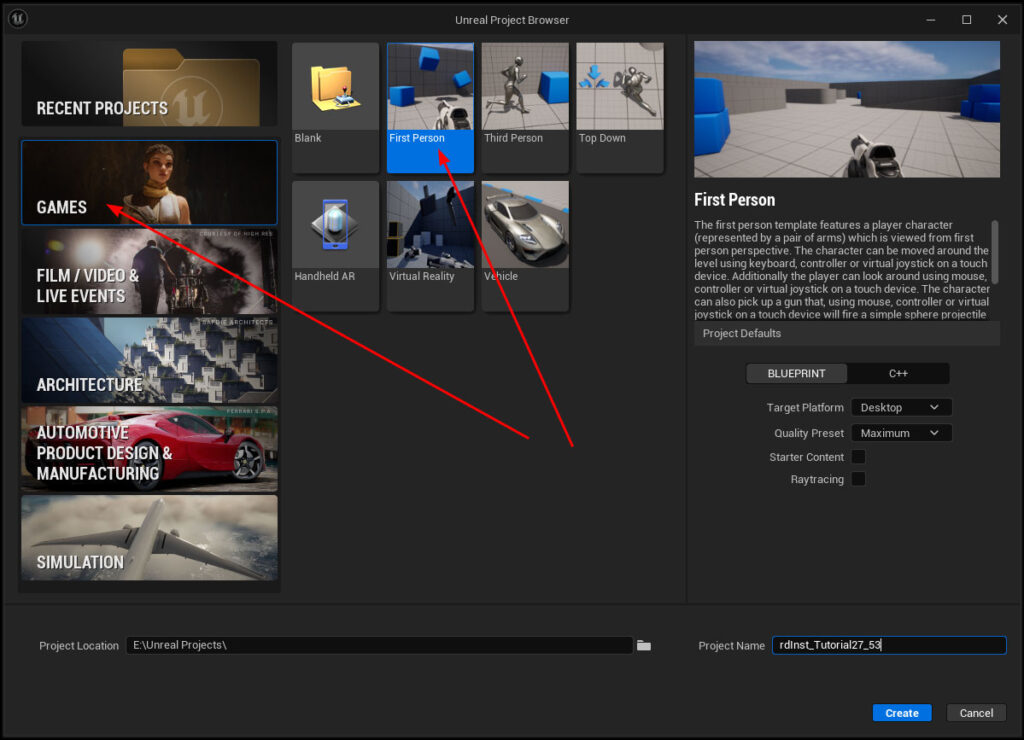
Step 1. Create a new project based on the First Person Template
Create this, or you can download the project (UE 4.27 and up) from the link.
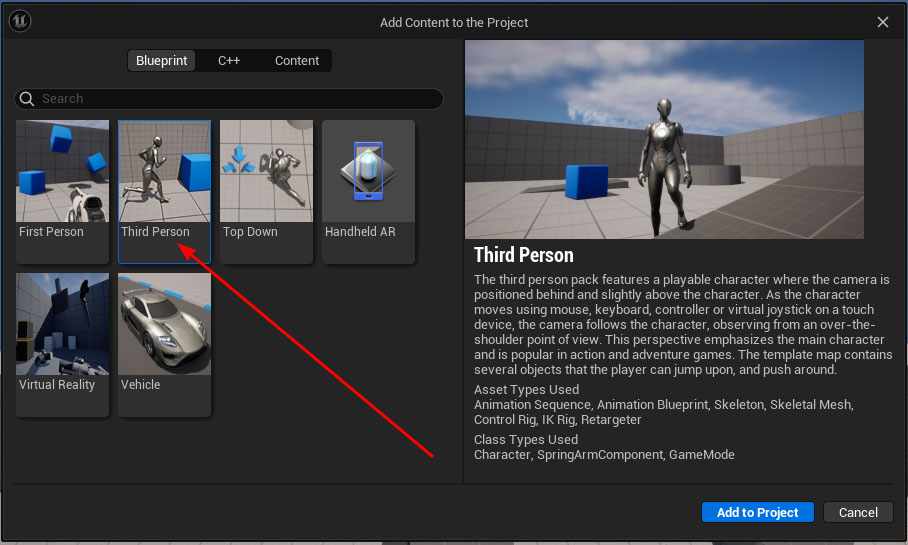
Now click on the Add(+) button at the top/left of the content browser, and select the “Add Feature or Content Pack” option.
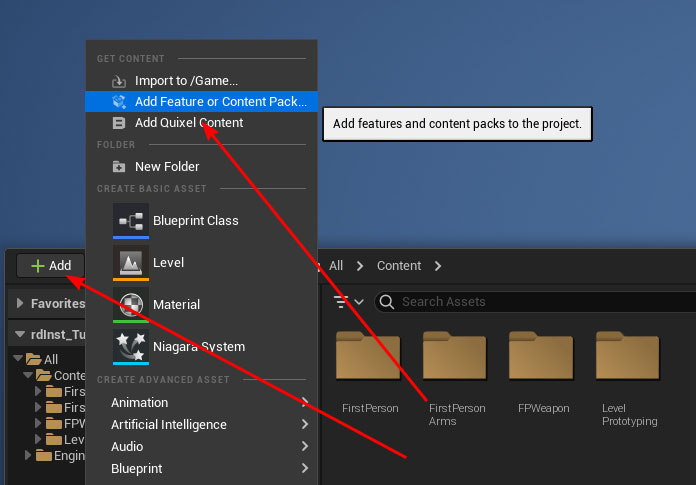
Choose the “ThirdPerson” template from the list and click the “Add to Project” button.
Step 2. Create a StaticMesh from the Idle Pose of Manny or Quinn
Now we create our static mesh which will be used for the instancing.
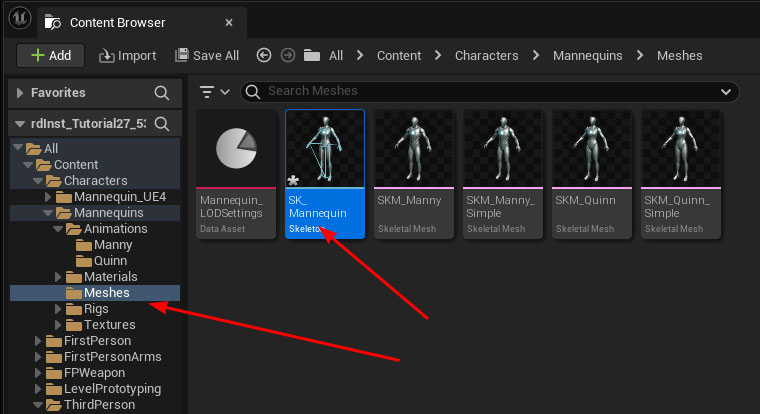
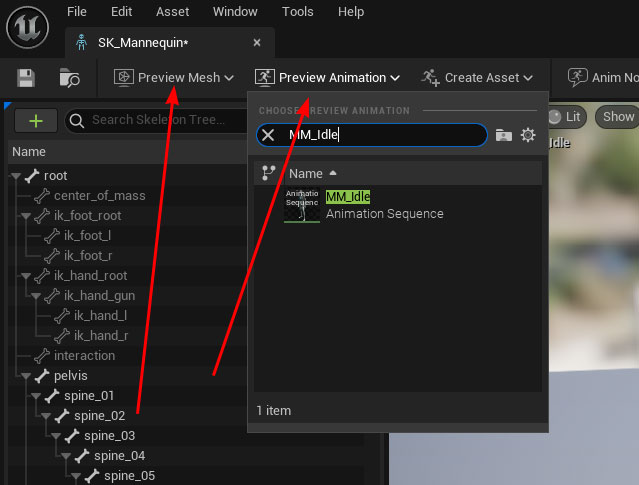
Open SK_Mannequin in the Characters/Meshes folder in the SkeletalMesh Editor, select either Manny or Quinn as the preview asset and select the MM_Idle animation from the “Preview Animation” drop-down.
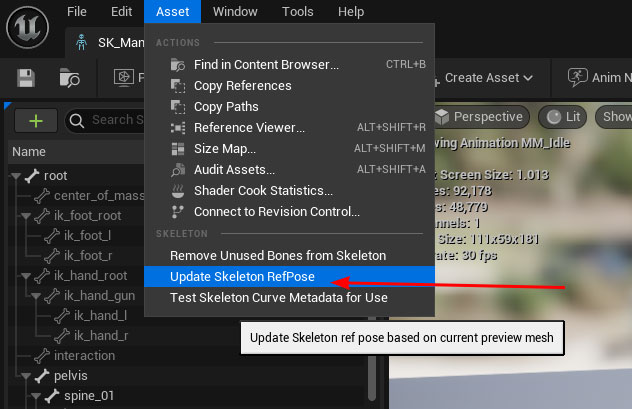
Now select “Update Ref Pose” to set the Idle frame as the default pose for the Skeleton.
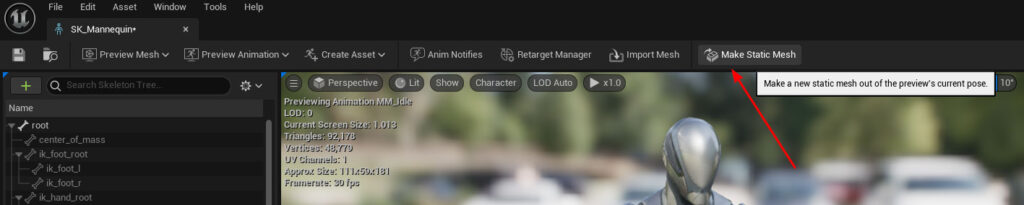
Now click the “Make Static Mesh” button and choose a name and location to save the mesh.
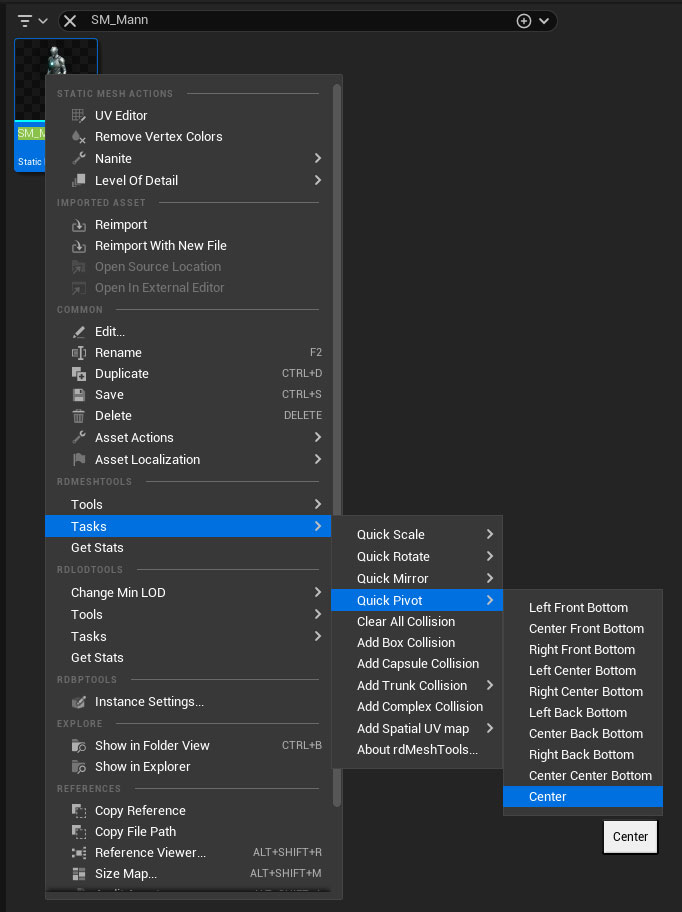
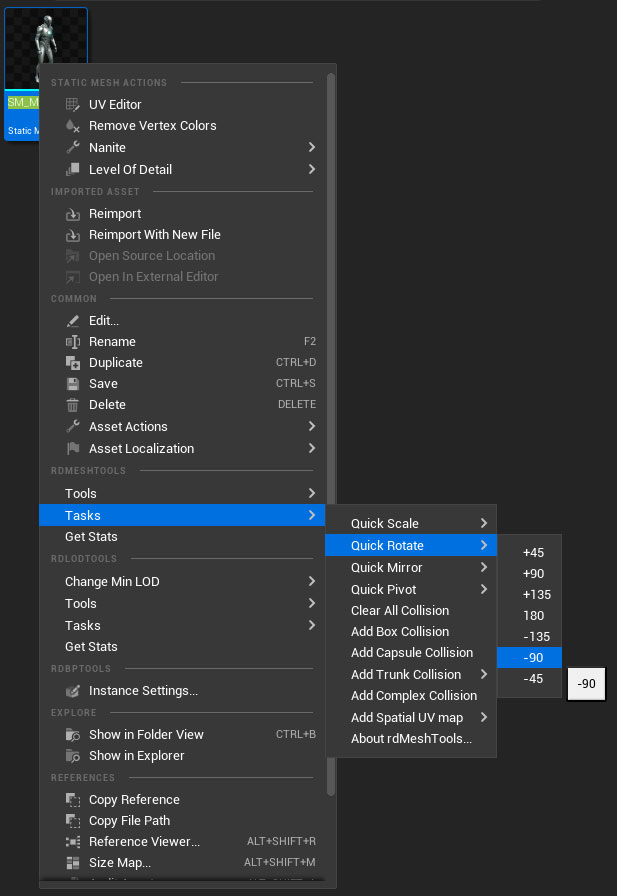
Now there’s one more step – the Pawn we created uses a capsule component from which the mesh needs to be centered – to get the static mesh instances and the pawns to align correctly, we need to set the pivot to the center of the new mesh. The mesh also needs to be rotated by -90 degrees.
There are numerous ways to do this – I use rdMeshTools and use the context menu option to center the pivot:
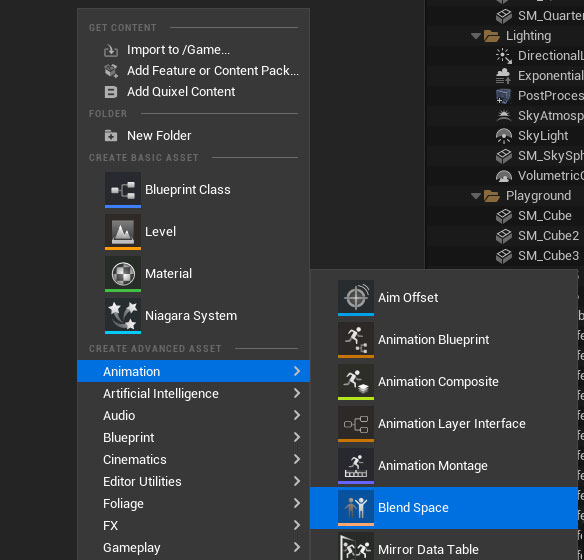
Step 3. Create a BlendSpace for the skeleton
Right-Click in the Content browser and select Create New BlendSpace”, call it “BS_SimpleAI”.
Select the “SK_Mannequin” as the Skeleton.
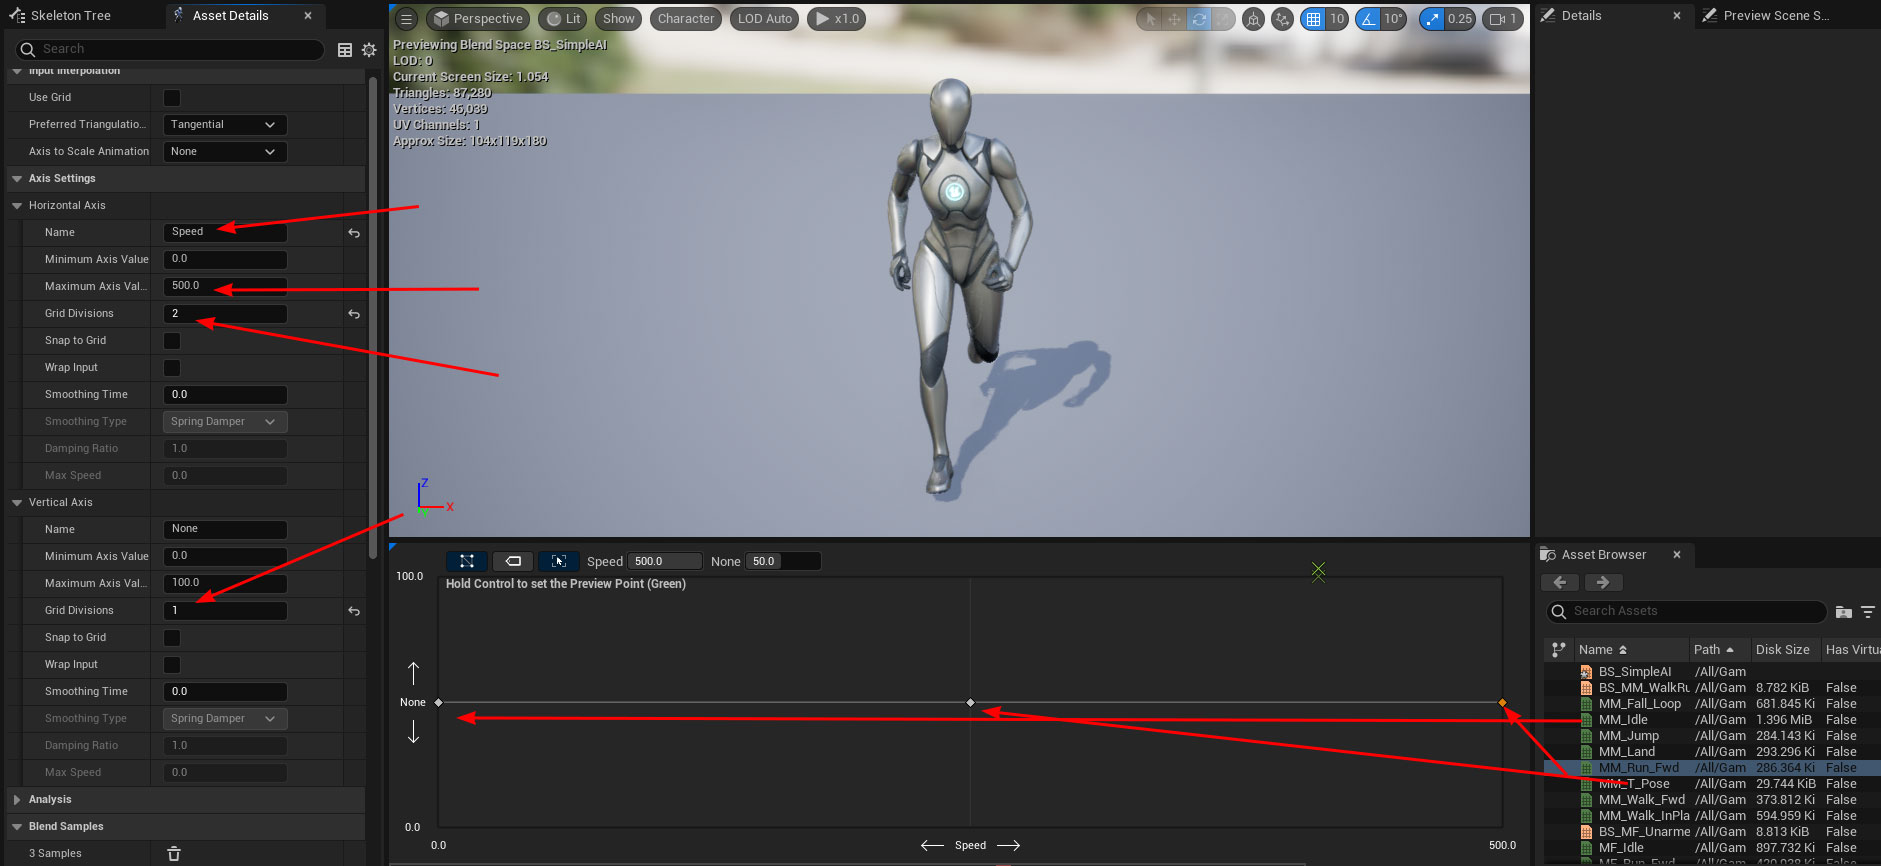
Open that up into the editor and set the Axis Settings, and add the Idle, Walk and Run animations to 0,50 – 250,50 and 500,50 respectively.
Step 4. Create a Blueprint for the AI
Right-Click in the content browser and select New Blueprint, and choose “Character” as the parent class.
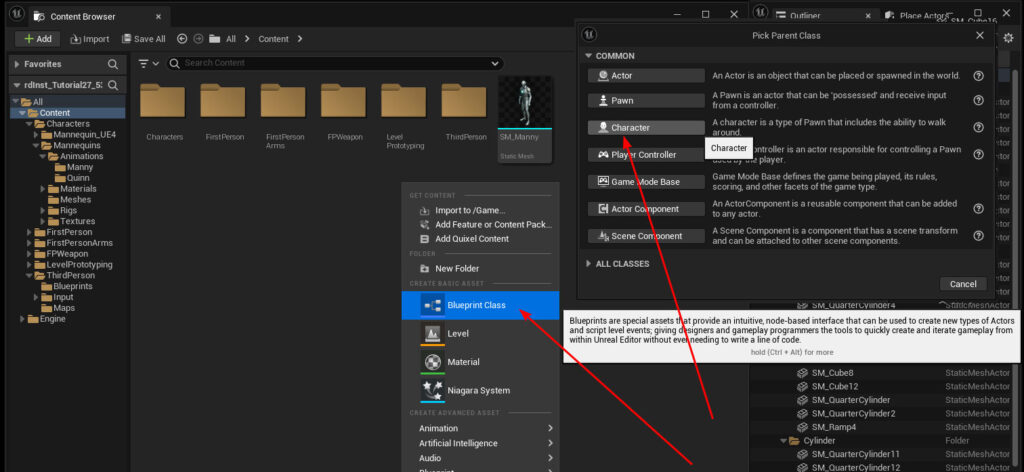
Call it something like “BP_SimpleAI”.
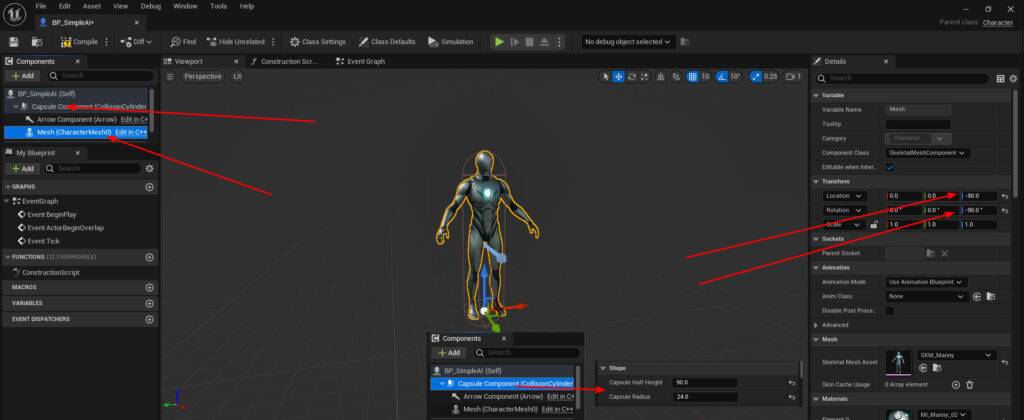
Open this in the Blueprint Editor, then select the “Mesh” component and select either Manny or Quinn from the “Skeletal Mesh Asset” drop-down.

You’ll need to move the mesh down 90 units and rotate it by -90 in the Yaw to align correctly. Also scale the Capsule so it fits closer to the body and covers the head.
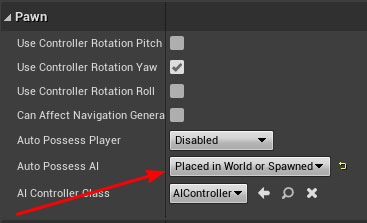
Select the Blueprint in the Component Outliner, and change the Auto Posses AI to “Placed in World or Spawned”.
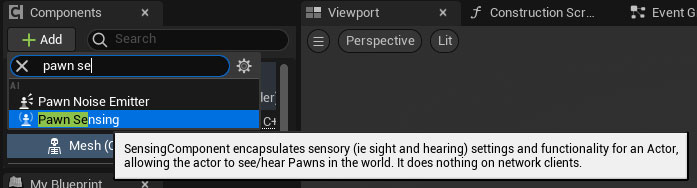
Now add a “Pawn Sensing” component to the Blueprint, turn off “Hear Noises” and change the “Peripheral Vision Angle” to 60 degrees.
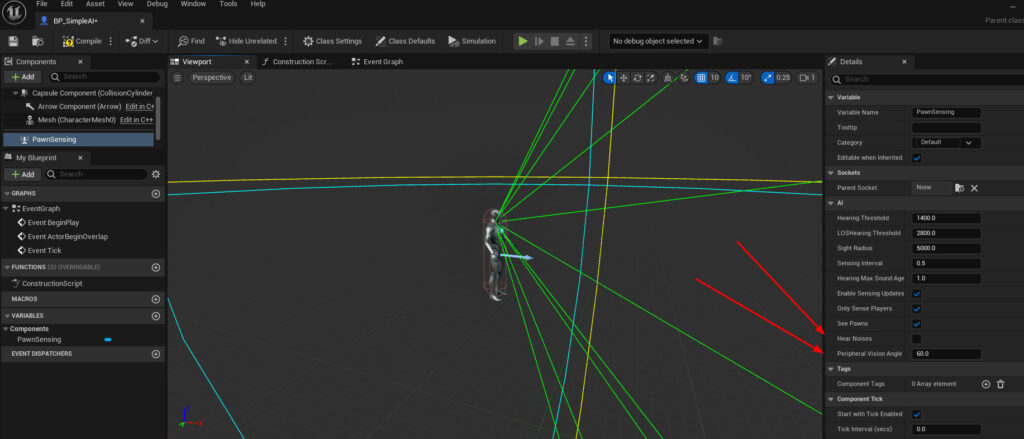
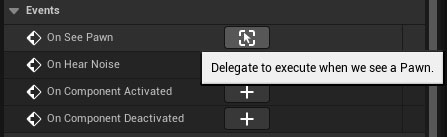
Scroll down the details panel a bit, then click on the “On See Pawn” (+) to add an event.
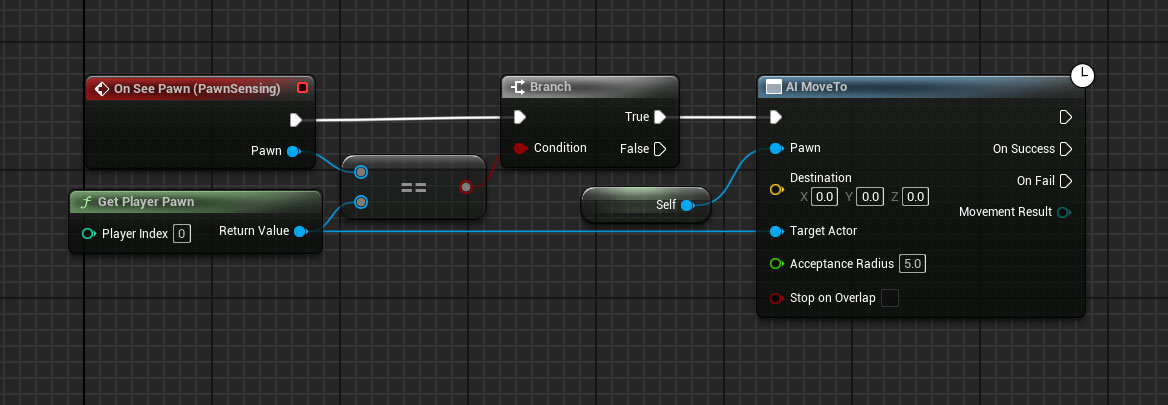
Now add the code below to the new event:
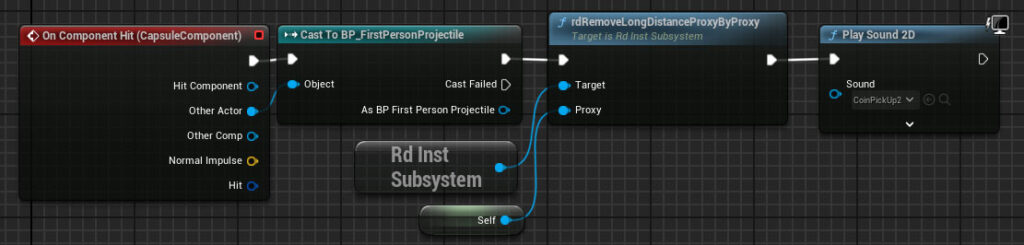
We need to remove this AI from the level and from the proxy system when it’s hit by a players bullet – Add a Hit Event for the Capsule and add the following code:
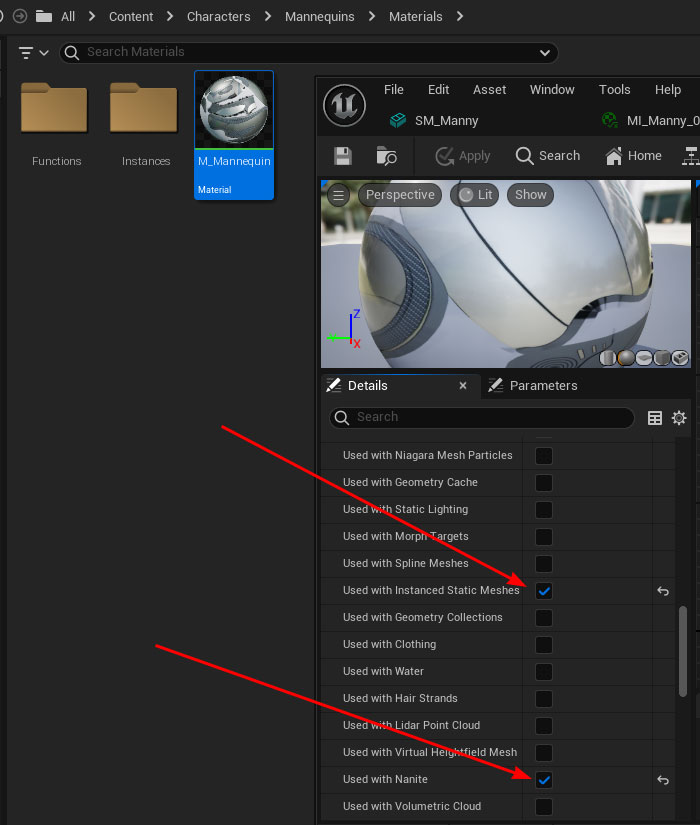
The materials used for Manny and Quinn are not set to support Nanite and Instances by default – you’ll need to open the main material in the Material Editor and tick those options:
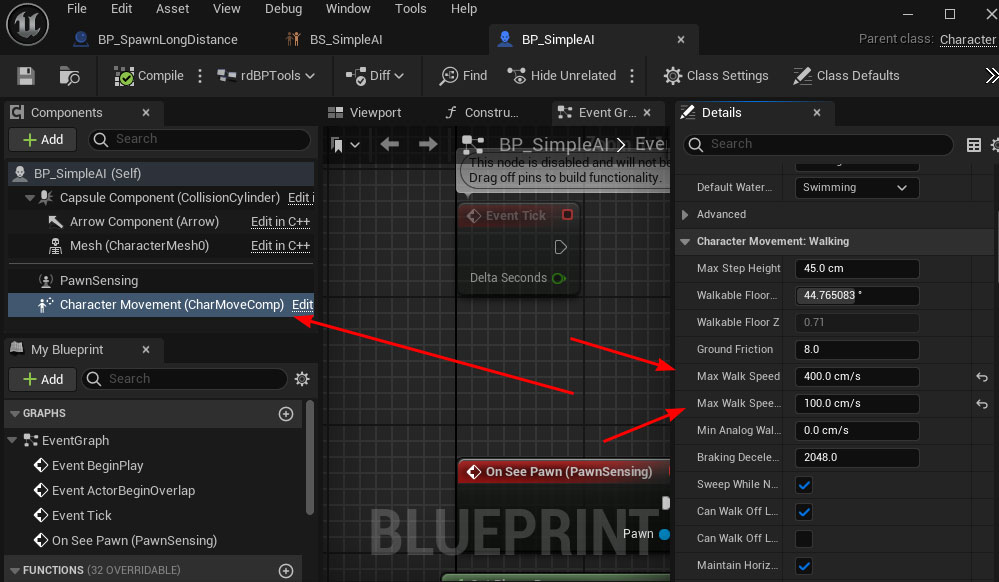
The last thing to do is slow the movement down – click on the MovementComponent, then in the Details tab change the Max Walk speed to 400cm/s and crouched speed to 100cm/s.
Step 5. Create a simple AnimBlueprint for the AI
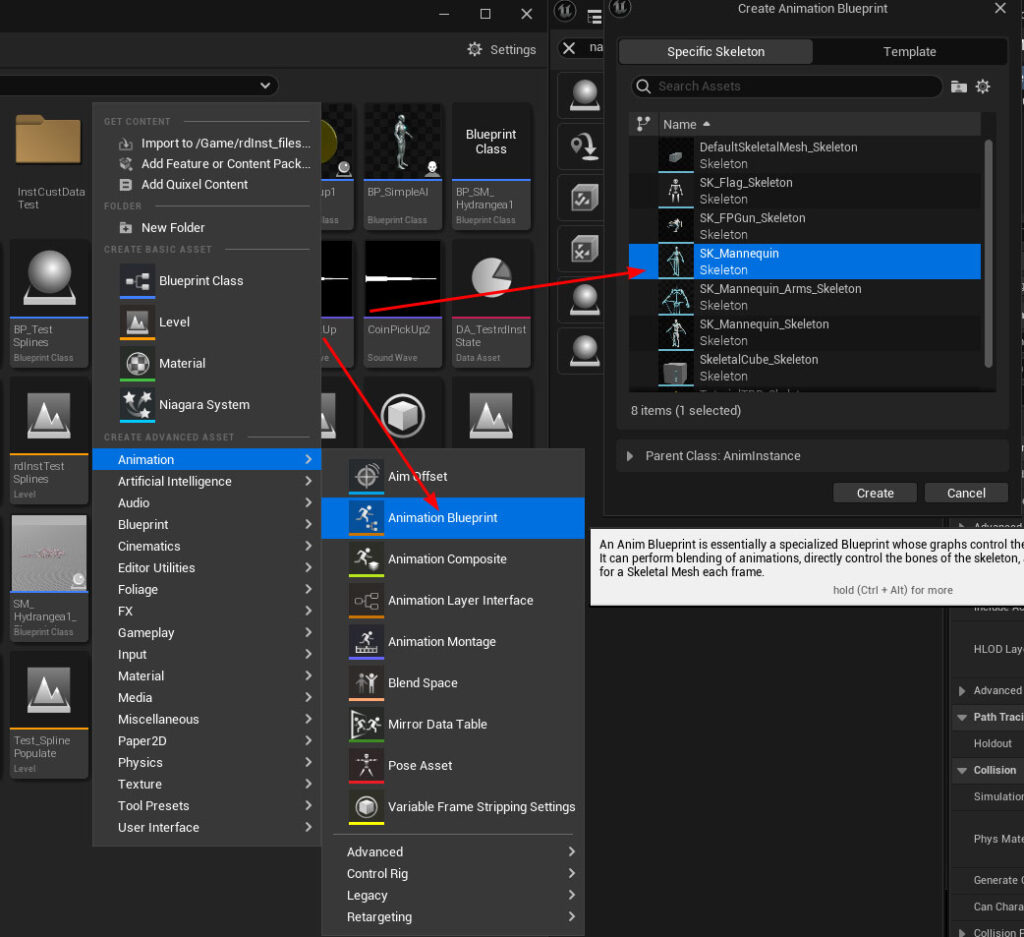
Now we create an Animation Blueprint using the SK_Mannequin skeleton.
Right-Click in the Content Browser and select Animation->New Animation Blueprint – select the SK_Mannequin skeleton for the blueprint. Call it “ABP_SimpleAI”.
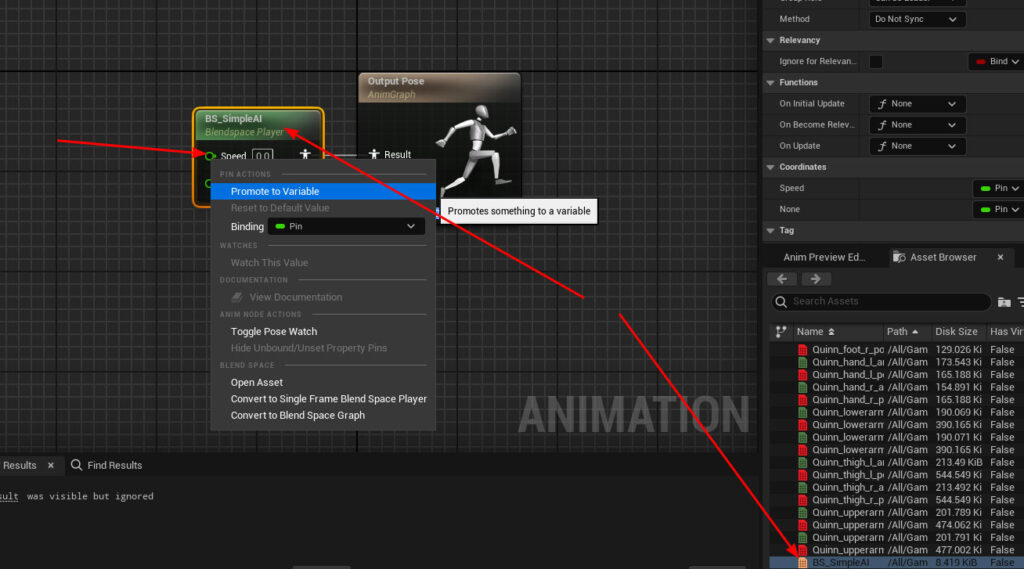
Now drag the BlendSpace asset created previously into the graph and hook it to the “Result” pin.
Then right-click on the “Speed” input pin on the Blendspace and select “Promote to Variable”.
Now we need to set that speed variable, go to the Event Graph, and add the code below.
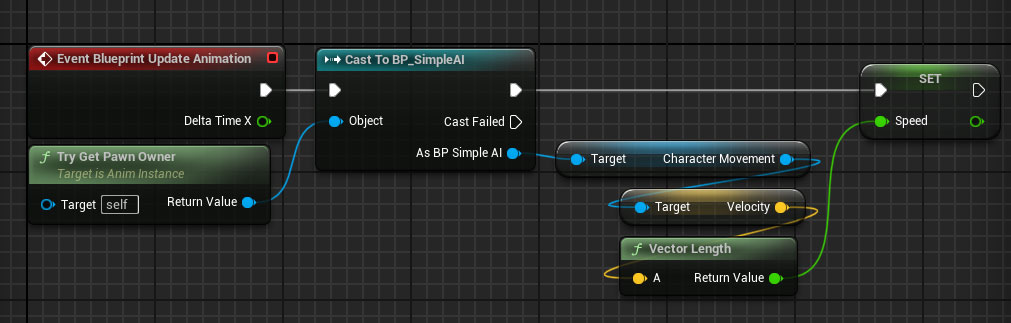
Done, compile and save the Blueprint.
The final step for this is to now point your BP_SimpleAI mesh to this Anim Class, select the “Mesh” component in the BP_SimpleAI editor and in the details panel, go to “Anim Class” and set it to “ABP_SimpleAI” – make sure the mode is set to “Use Animation Blueprint”.
Step 6. Create the NavMesh
Add a NavMesh actor to your level and size it to where you want the AI to be able to move. You can use the ‘p’ key to toggle preview mode.
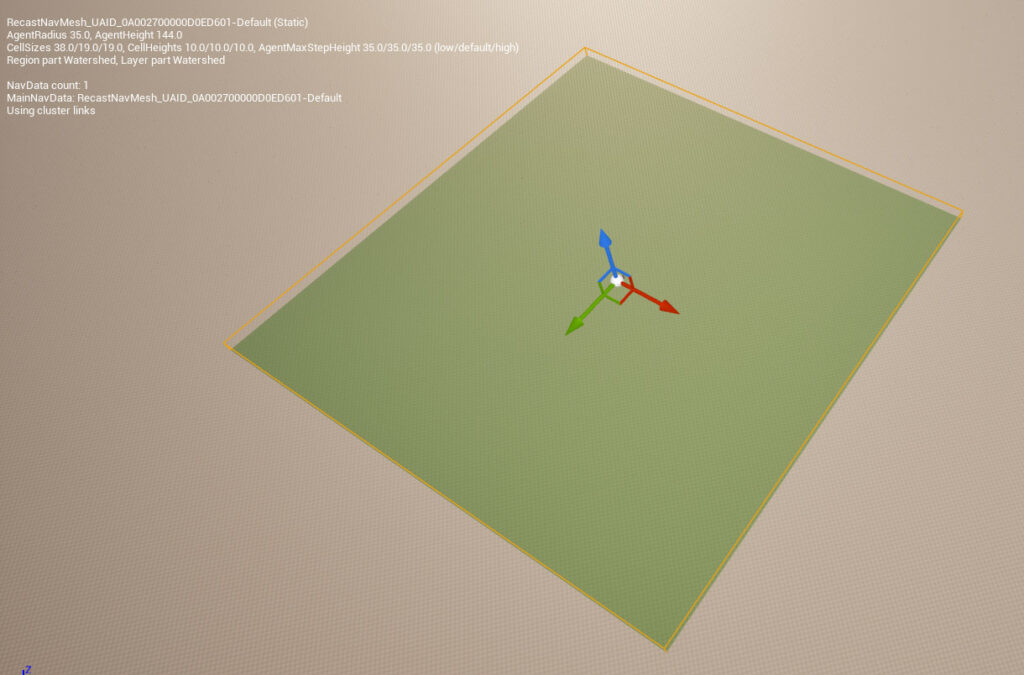
Once you’ve done that, you can drag a SimpleAI BP into your level and play to test the AI follows you.
Step 7. Create the Spawn Blueprint
Now we create a new Blueprint parented to rdActor, call it “BP_SpawnLongDistance”. Set the rdActors “Actor Mode” to “None”.
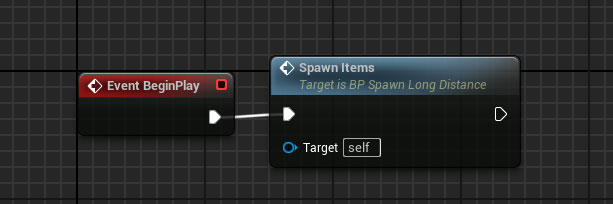
Create a function called “SpawnItems” and add the code below. Note that we don’t pool this actor. The PawnSensing component doesn’t like to be pooled. It is recommended to pool them though if possible, and a more powerful and robust method is to use AIPerception component.

Now call that function from the Blueprints BeginPlay event.
Step 8. Set the Proxy Manager in the Level Blueprint
Open the Level Blueprint, and in the BeginPlay event, add the initialization code below:
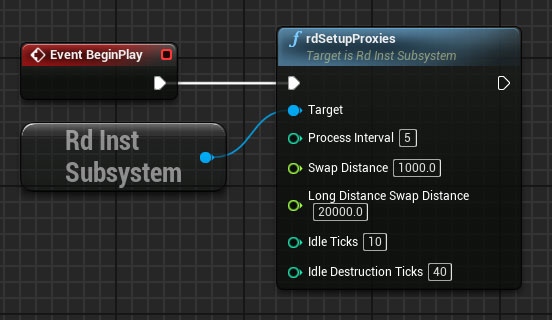
If you can’t see “rdInstSubsystem”, you may need to copy it from another function and paste into here.
Step 9. Done, Test
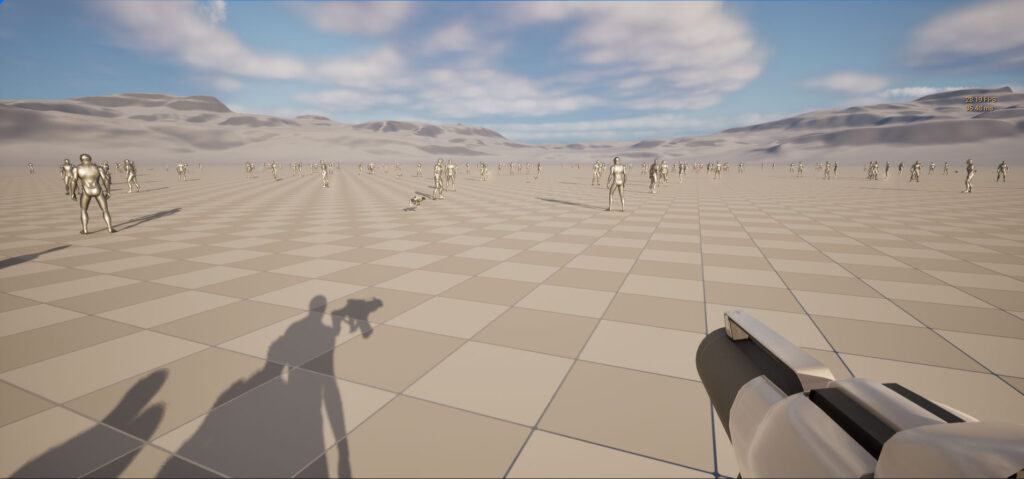
That’s it – all that’s left to do is add the BP_SpawnLongDistance Blueprint into your level, in the middle of your NavMesh – add some of the FirstPerson weapon pickups to the level and play.
And as a comparison – this is it running using the conventional methods of spawning: 28FPS.