rdInst Tutorial 26 – Instance Proxy Actors
Last Updated 3rd February 2024
Tutorial was created using rdInst version 1.35
Download Tutorial Project (UE4.27 and up)
Instance Proxy Actors are Actors that you can assign to individual ISMs, HISMs or instances of a specific mesh.
When your player comes into close proximity to one of these instances, it is seamlessly replaced with a fully interactive actor – then when the player moves away, it’s swapped back to an instance.
It may seem a bit strange to have the interactive actor as the proxy and the ISM/HISM as the main – but the paradigm fits as the default of the mesh instance is so much more efficient both at runtime and in the editor, thinking of them as instances helps with the perspective of efficient handling and rendering of large amounts.
This can be a huge optimization for things such as collectables, interactive buildings, vehicles etc.
All you need to do it add your instance index (or mesh) to the proxy list and the rest is handled automatically.
In this tutorial we’ll make a simple collectable, and use proxy instances for it in the distance. To make it easy to see the pickups and interaction, create a project using the Third-Person Template.
This uses the simplest and fastest type of proxies – it assigns a proxy actor to a specific mesh, so all instances of the mesh will be swapped to the proxy – no instance index look-ups needed.
Step 1. Create a new Blueprint based on rdActor
This will be our pickup, it will simply have a collision sphere. To differentiate it from the main instance, we also add a small cylinder at the bottom of the mesh.
Seeing as the pickup coin is identical to the instance version, there’s no need to hide that one and show another – we just set the “don’t hide” flag so the instance stays visible along with the interactive actor (that’s done in a step below).
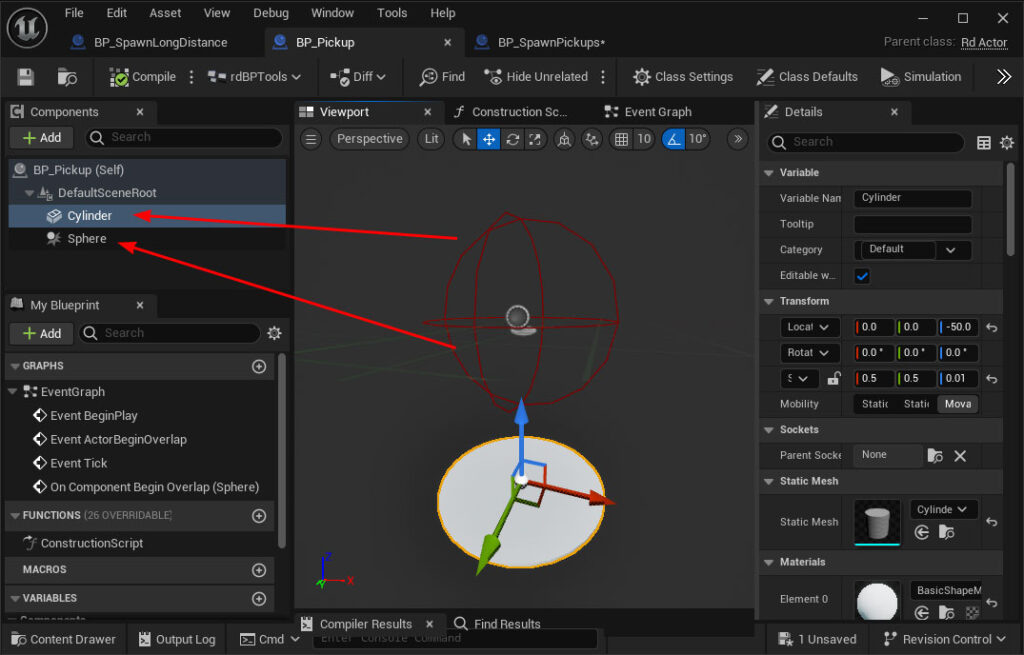
Click on the “Sphere”, and in the details panel scroll down to find the events – Add a Begin Overlap handler:
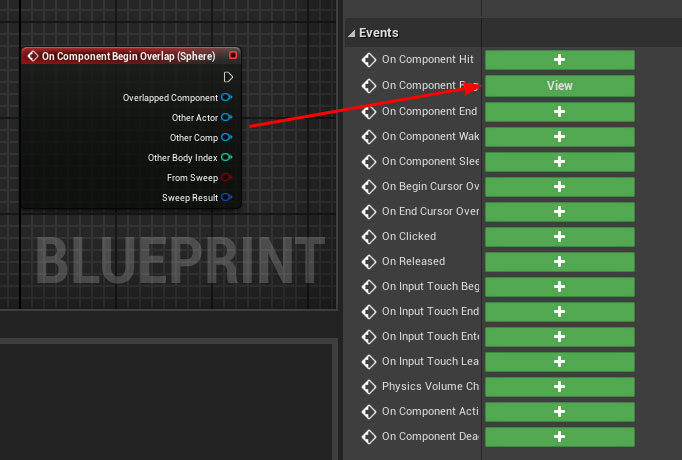
Then add this code to that handler:

That’s the pickup done. You can drag that into your level and test by running over it with the player.
Step 2.
The default proxy settings should be good for most applications, but for the sake of completeness we now add some code to the level blueprints BeginPlay to set the Proxy configuration:
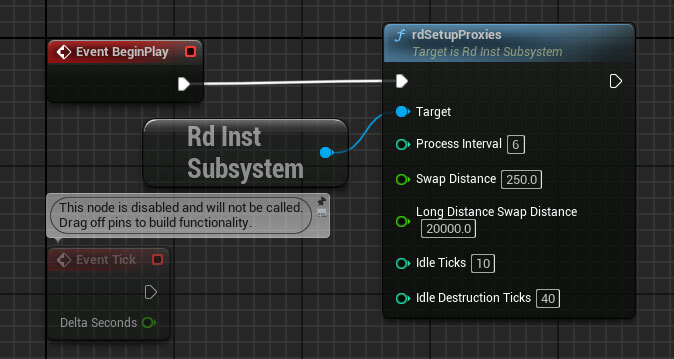
The Process interval is how often to process the proxies – when 0, it does nothing – otherwise the value is the number of ticks to wait between processing – a value of 6 processes the proxies once every 6 ticks, or around 10 times a second.
The Swap Distance is the distance in world units to swap the instance or prefab to the proxy – the proximity to the player. The smaller the distance, the less processing is needed, so it’s good to keep this as short as possible.
The Long Distance Distance controls how far away you swap in the long distance proxies.
The Idle Ticks controls when to replace with the instance/prefab again, the higher this value, the longer the proxy remains active (good if just looking around a small area)
The Idle Destruction Ticks controls when to replace a destructible proxy back to either it’s original or destroyed instance/prefab.
Step 3.
Now we spawn some coin instances into the level, instructing them to use the pickup proxy.
Create a new Blueprint called “BP_SpawnPickups”, Subclassed from rdActor and open it in the Blueprint Editor.
Create a function called “SpawnPickups” and add the code below:
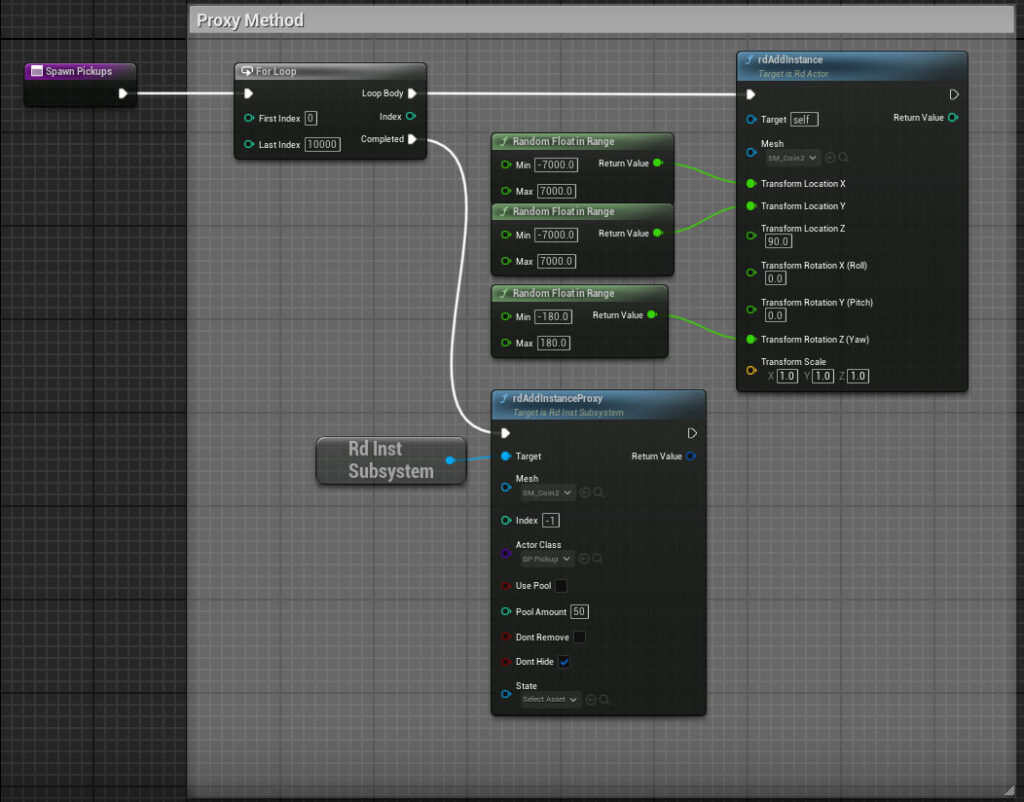
Note that the “Don’t Hide” is ticked so the coin instance remains visible.
This adds 10,000 instances to the level and assigns that mesh a proxy. Note that the index is -1, when it’s 0 or higher it assigns a proxy to that instance, when -1 is assigns the proxy to all instances of that mesh.
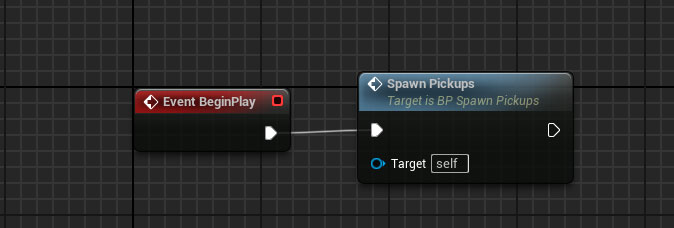
Now call that function from the BeginPlay event:
Step 4. Play the Level
Now just play the level and move around picking up the coins.
Note that as we’re using a very simple pickup actor, in UE5 the speed increase is only going to be around 10-20 FPS faster than conventional actors – but the more complex the pickups (or whatever your actor is) – the faster it gets. In UE4.27 there is a larger increase in FPS.
There is another huge benefit to using this system. When spawning items from spawn points – you can spawn instances that have other proxies. This not only is vastly faster than spawning items (and faster than pooled items) – it significantly reduces the number of actors you’ll ever need to pool.
