rdInst Tutorial 22 – Using the Procedural Population Blueprint tool
Last Updated: 29th January 2024
Tutorial Created using rdInst version 1.30
Download Population Blueprint (4.27 up)
Download Splatmap (4.27 up)
Download Tutorial project (4.27 up) (contains Population BP and splatmap)
Note: rdInst version 1.35 now contains a C++ class that covers this functionality and more, see Tutorial 38.
New to version 1.3 of rdInst is the Procedural Population tool.
This is a combination of a Blueprint containing a volume and calls the c++ rdInst population system.
This tool provides you with the ability to populate your map with foliage and scatter at runtime, everything scaled to your scalability settings.
It has a general fill volume setting, or works with multi-channel SplatMaps to control exactly how you want your foliage populated.
Each Scalability level has it’s own settings, including SplatMap so you can control exactly how many objects get built.
Before getting into the tutorials, here’s a quick explanation of the Blueprint settings:
The settings are broken into 3 categories:
Settings
This section contains the Random Seed, which if 0 is random each time, or when set to an integer value, will populate with exactly the same locations/scale/rotation each time.
It also contains the Scale Settings – the overall settings for each of the scalability levels. If you only add one, it will be used for all scalability levels, otherwise you must add 5, one for each level: Low,Medium,High,Epic,Cinematic.
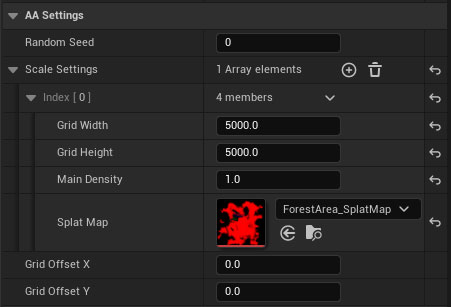
The Grid Width and Height specify how much space is between objects – the smaller the number the denser the objects will be.
The SplatMap is a Texture where the pixel values of each channel represent the density of objects within the level. It can be configured to be either on/off or a linear gradient.
The GridOffsetX and GridOffsetY are offsets into the grid for placement. This can be handy if you want multiple Procedural Populators in your level.
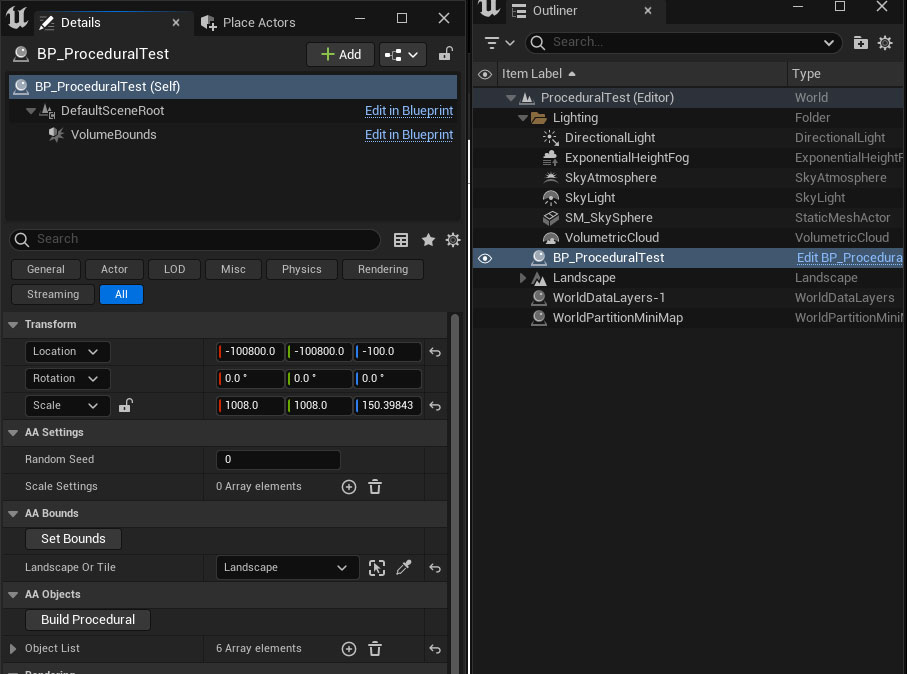
Bounds Section
This section allows you to easily set the transform of the Population volume to fit either your level, or a Tile within that. Just select the landscape/tile by using the picker, or the landscape from the dropdown. Then click “Set Bounds”.
Objects Section
This is where you add the objects you want to populate with.
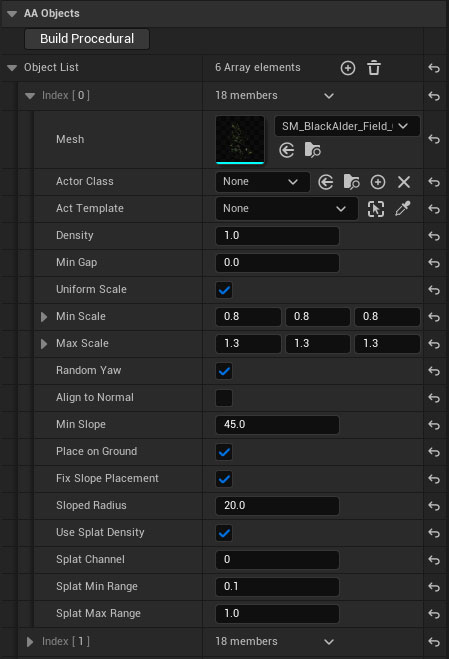
You can a Mesh and/or an Actor, just specify the Mesh in the mesh value, and an ActorClass with optional Actor Template just below. These are created with the Fast Instancing so give the best speeds possible.
The Density value is self explanatory – max is 1.0, less decreases the amount of this object.
Min Gap is the minimum amount of space between objects allowed.
You can set the scale range next with Min Scale and Max Scale– ticking “Uniform Scale” scales all dimensions the same.
Random Yaw gives a random rotation around the Z axis.
Place on Ground line-traces to the landscape and positions the z value on that. If you have “Fix Slope Placement” ticked, it calculates the correct Z value that covers all the bottom of the object. The “Sloped Radius” is the area to check under (think the size of the tree trunk). A Value of 100.0 is a good size for most tree trunks.
Use Splat Density uses the pixel brightness to control the density of the object on top of the previous values.
Splat Channel is the texture channel to assign to this object, Red, Green, Blue or Alpha – use the numbers 0-3.
You can also control when the objects are added by specifying a Splat Min and Splat Max Range for those pixel values – expressed between 0.0 and 1.0.