rdInst Tutorial 28 – Prefab Proxies
Last Updated: 7th February 2024
Project Created with rdInst version 1.35
Download Project File – 84.6MB (UE4.27 up)
Prefab Proxies are similar to the default Instance Proxies, but the whole prefab blueprint (usually built from many instanced meshes) is swapped for the interactive actor on proximity.
In this tutorial we are going to create a House Prefab – up until now the tutorials have used simplistic assets, but this tutorial is going to use a game ready house from the Prophaus Residential Houses collection (volume 2).
This tutorial also uses rdBPtools to create the prefabs.
If you don’t have this pack, you’ll need to create the project as described rather than use the download project, substituting the assets with your own.
If you do have the pack, you can migrate it to your new project or to the downloaded tutorial project and use it from there.
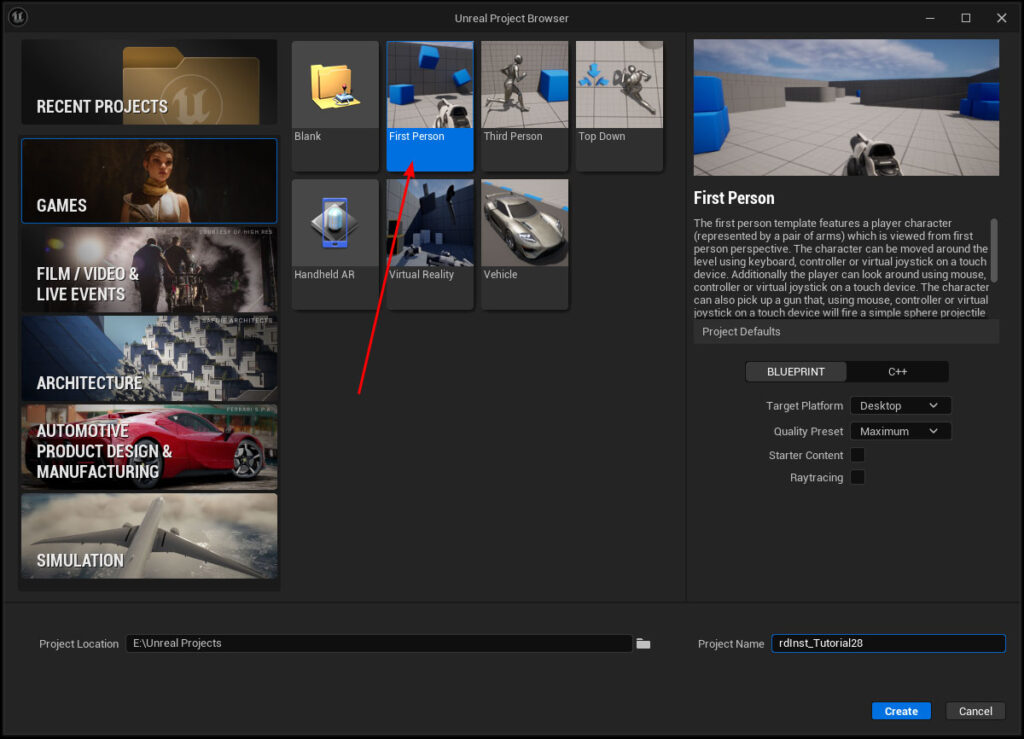
Step 1. Create a new FirstPerson Project
Create a new project based on the FirstPerson Template.
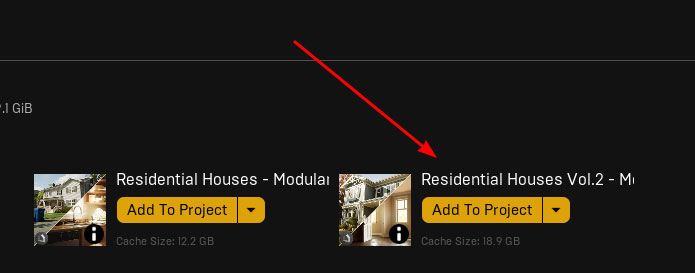
Step 2. Add the Residential Houses Volume 2 to the project
Add the Residential Houses Volume 2 to the project. If you don’t have this pack, you can use any modular house pack.
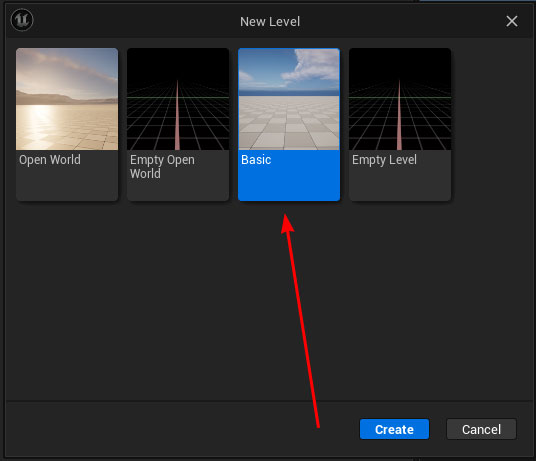
Step 3. Create a new Level and add a default Landscape
Add a new level, then add a Landscape using the default settings to it.
Step 4. Drag the House07 Blueprint into the Level and create a rdPrefab from it
Drag the House07 Blueprint from ResidentialHouses/Houses02 into the level.
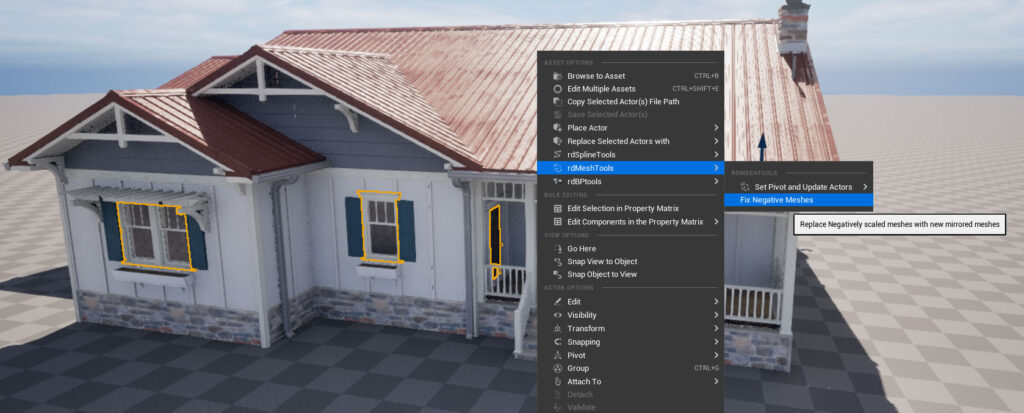
There are a few negatively scaled meshes used in the house – to fix these you can use rdMeshTools, or create new, mirrored meshes in a modelling app, or ignore them and let rdBPtools use StaticMeshComponents instead of instances for them.
Here, we fix them with rdMeshTools, select all meshes of the house and select “Fix Negative Scaled Meshes” in the rdMeshTools section of the context menu. This creates new meshes, mirrored in the appropriate axis’ and swaps the negatively scaled meshes for the new ones in the level.
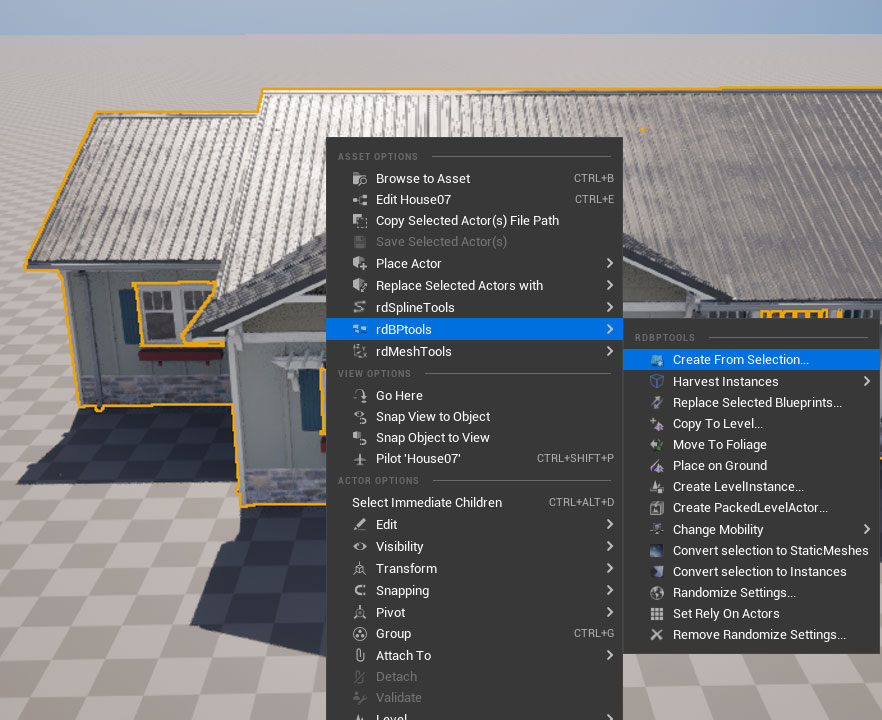
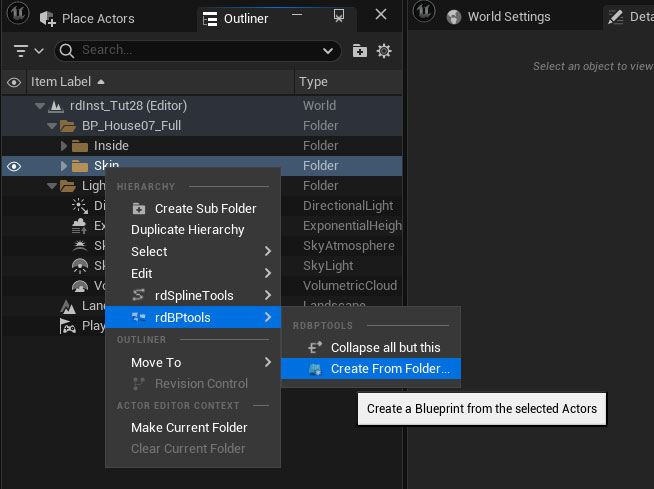
Then right-click on it and in the rdBPtools section, select “Create Blueprint from Selection”.
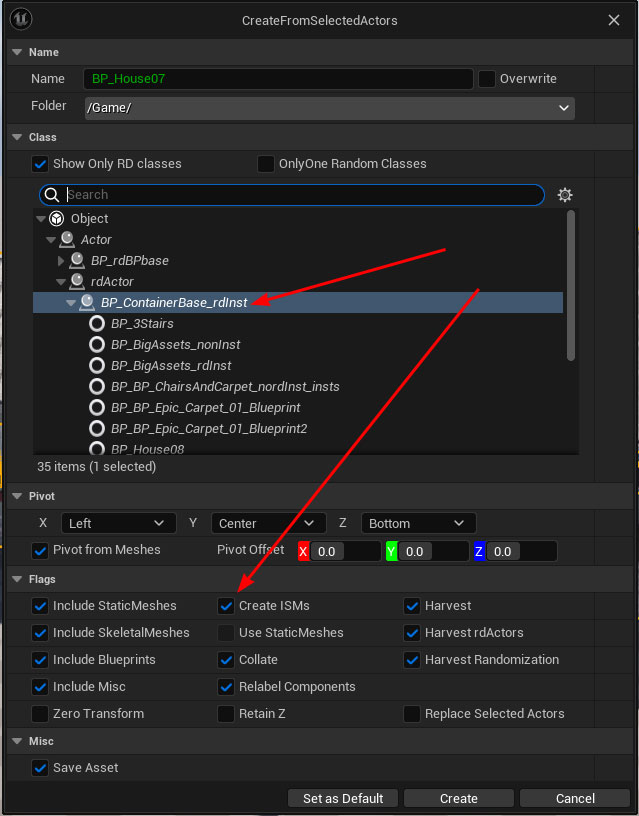
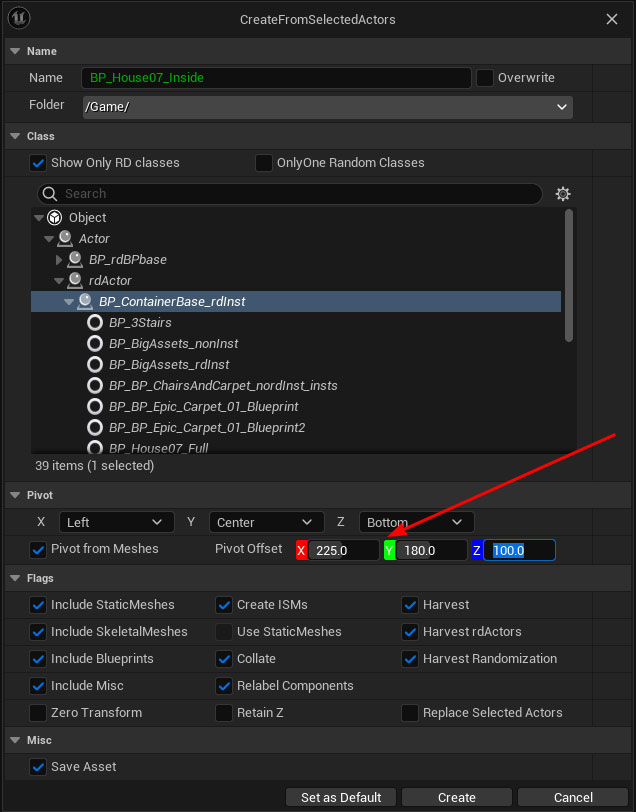
In the options, tick the “Use ISMs” and select the BP_ContainerBase_rdInst class as the parent.
Once you’ve created the prefab you can remove the original House07 Blueprint from the level.
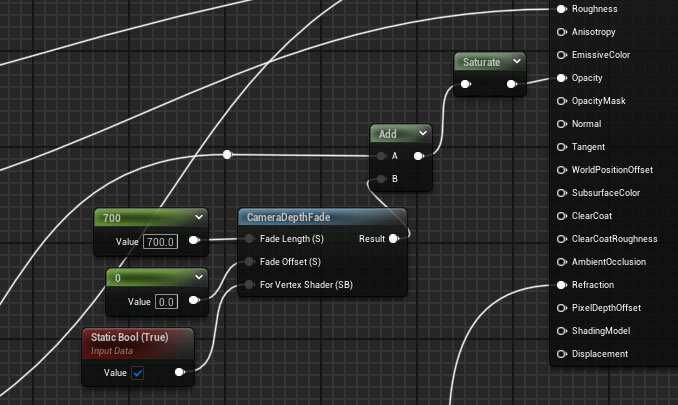
We want to change the window glass a little – by adding a CameraDepthFade we can reduce the opacity depending on the distance from the player – just so the empty inside bits don’t show through. Open MM_Glass in the Material Editor and add these nodes:
Step 5. Drag the rdPrefab onto the level and Replace with StaticMeshes
Now drag the newly created prefab into the level. Right-Click on it (or the item in the outliner) and choose the “Replace Selected Blueprints” option in the rdBPtools section on the context menu.

Just click “Replace” with the default options.
Now you have the actual StaticMeshes all set up in the level.
Step 6. Select all the Outside Meshes (skin)
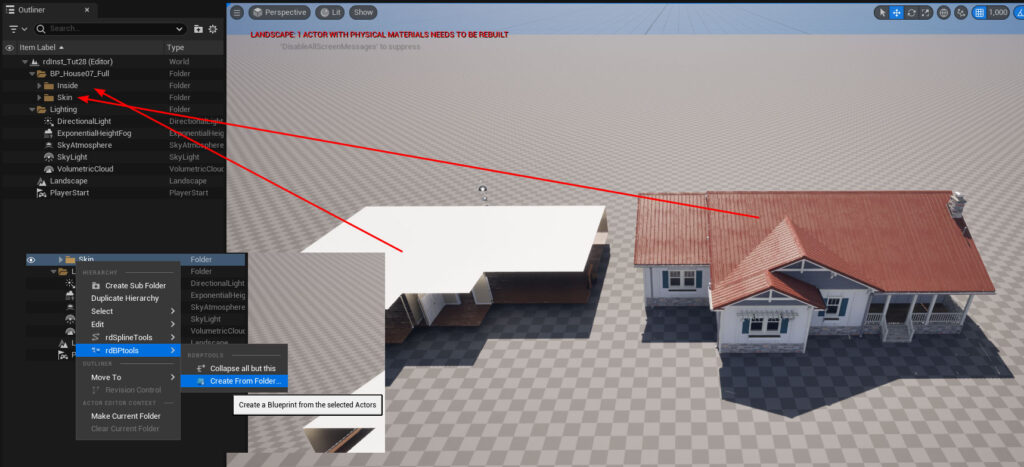
Go through and select all the meshes visible from the outside of the house. These will be our skin proxy.
One way to make sure you select everything you need is to set the translate grid up to 2000 and move your selection away from the main house, looking for missing meshes – those can then be selected and moved over too. I also move the selection into it’s own folder so it can be easily worked on in the future if need be.
If you intend to also build a destroyed version of the prefab for destruction, you can also select just the base parts first, create a prefab for that – then select the rest of the outside for the skin.
Once you have them all selected, go ahead and “Create Blueprint from Selection” for those actors. This prefab is our skin prefab, shown until the player is in close proximity to the house.
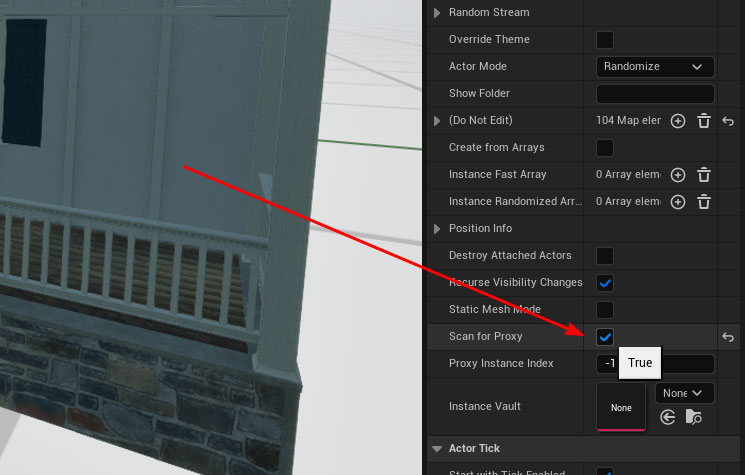
The Skin prefab is what will be scanned for proximity swapping – so we need to enable ProxyScanning for the prefab by ticking the “Scan for Proxy” tickbox in the details panel of the prefab (in the Blueprint Editor).
Create a prefab on the interior meshes too – we’ll use 2 systems of swapping in the proxies, one hiding the skin prefab and showing the proxy prefab, the other doesn’t hide the skin and just shows the interior proxy. For this prefab, to get it to align correct with the skin, set the Pivot Offset to 225,180,100.
Once you’ve created the prefabs you can delete the house parts from the level.
Step 7. Create a new Blueprint for spawning the houses
Now we create a Blueprint to spawn the houses in the level – use rdActor as the parent and call it “BP_SpawnHouses”. Set the ActorMode for the rdActor to “None”.
Add a function called “SpawnHouses” and add the code below:
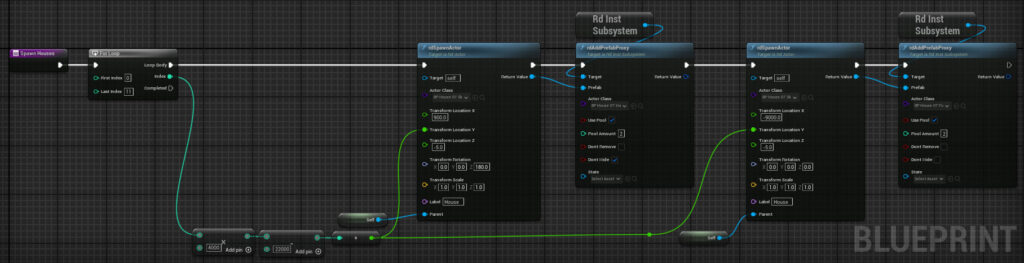
Note that we are hide hiding house skins on the left and just showing the inside proxy – but on the right we’re hiding the prefab and using the full house proxy – when you’ve added Door Blueprints, lights etc – this is the best way to go.
Now call that function from the BeginPlay event:

Step 8. Change the Mesh Collision settings
We want to be able to collide with the houses and walk into them, so we turn on collisions for the meshes.
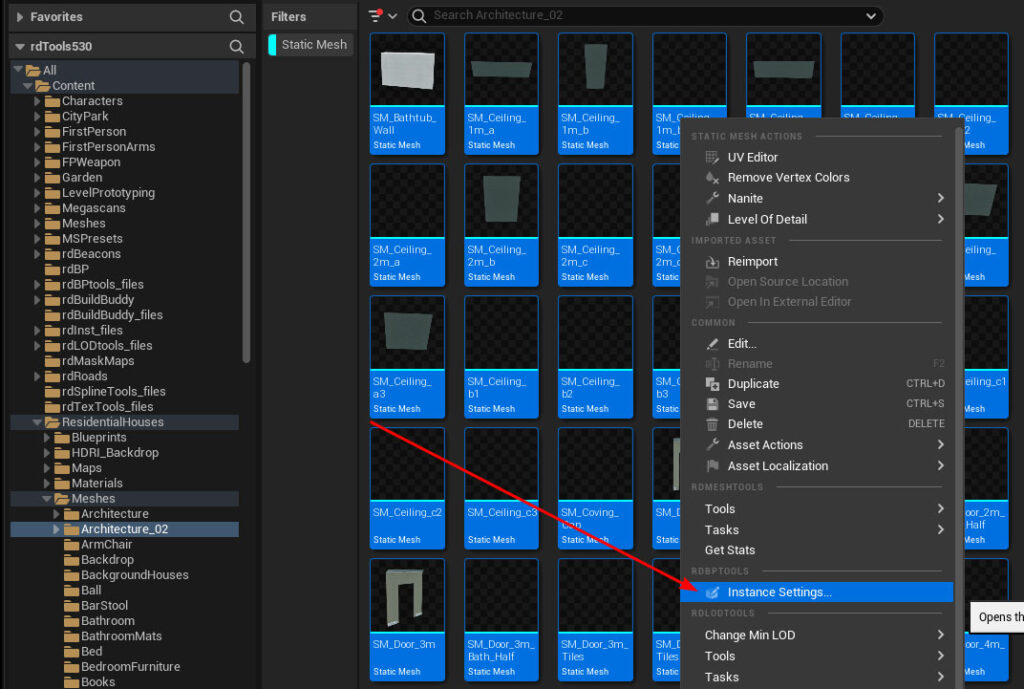
Navigate to the ResidentialHousees/Meshes/Architecture_02 folder and add a filter for static meshes – then select them all, right click and select “Instance Settings” from the menu:
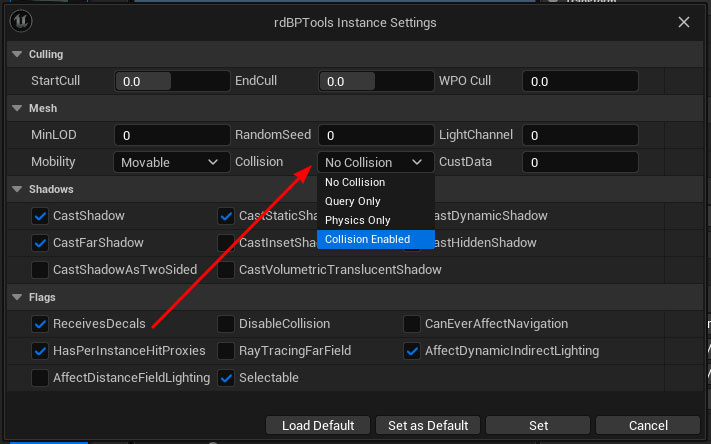
Change the Collision setting to “Collision Enabled”:
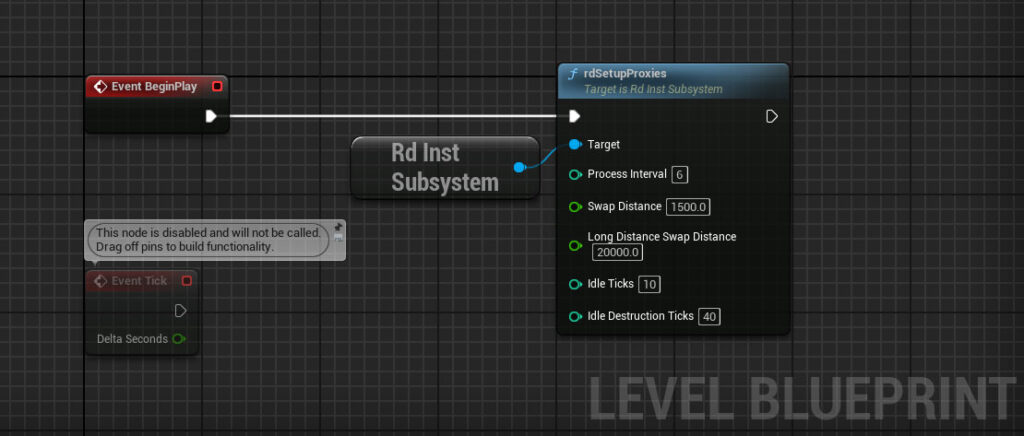
Step 9. Setup the Proxy management from the Level Blueprint
Add the code below to the level blueprints BeginPlay event:
Step 10. Done – Play the level.
That’s it, now Play the level and walk into the houses – see how they seamlessly swap between the prefab and the proxy.